
User guide
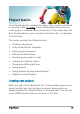


Project basics 51
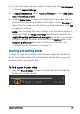
To enable the creation of proxy files
• Click Settings > Smart Proxy Manager > Enable Smart Proxy.
Note: The Smart Proxy feature is enabled by default if the
computer’s hardware can support the feature. However, you can
force the creation of proxies at any time by right-clicking on a file,
or multiple files in the Timeline, and choosing Create Smart Proxy
File.
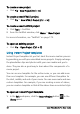
To set the environment when smart proxy files will be
generated
1 Select Settings > Smart Proxy Manager > Settings.
2 In the Performance tab of the Preferences dialog box, you can
customize Smart Proxy settings.
The Smart Proxy File Manager lists the source and proxy files.
You can use this manager to delete proxy files you no longer
need.
The Smart Proxy Queue Manager shows the files for which
proxies will be generated.
In the case of HDV and AVCHD files, Smart Proxy is automatically
activated during capture and use of these files in your project.
Once Smart Proxy is enabled, proxy files will automatically be created
and used in your project whenever you insert video files into the
Timeline.
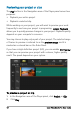
To view the list of video files to be generated as proxy files
1 Go to Settings > Smart Proxy Manager > Smart Proxy Queue
Manager.
2 Select the files you want to include in your queue.
3 Click OK.