
User guide

40 Corel VideoStudio Pro User Guide
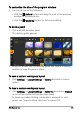
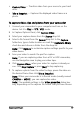
5 Click Capture Video to start capturing and Stop Capture to end
your capturing session. Your media clip will be stored as MPEG-2
format in the folder you specified.
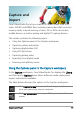
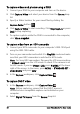
Capturing digital video (DV)
To capture Digital Video (DV) in its native format, select DV from the
Format list in the Options Panel. This saves the captured video as a DV
AVI file (.avi).
You can also use the DV Quick Scan option to capture DV video
DV AVI Type-1 and Type-2.
When capturing DV, click Options in the Options Panel and select Video
properties to open a menu. In the Current Profile, choose whether to
capture DV as DV Type-1 or DV Type-2.
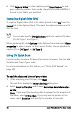
Using DV Quick Scan
Use this option to scan a DV device for scenes to import. You can add
the date and time of your video.
For more information on this feature, see “DV-to-DVD Wizard” on
page 235.
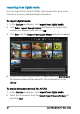
To add the date and time of your video
1 After scanning your DV tape, click Next.
This will then display the Import Settings dialog box.
2 Select Insert to Timeline and choose Add video date information
as title.
Note: If you want the shooting date to appear for the duration of
the video, select Entire video. If you only want a portion of the
video, select Duration and specify the number of seconds.