
User guide

36 Corel VideoStudio Pro User Guide
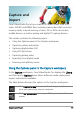
Capturing videos and photos
The steps on how to capture are similar for all types of camcorders
except for the available capture settings in the Capture Video Options
panel that can be selected for each type of source.
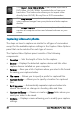
The Capture Video Options panel consists of the following
components:
• Duration — Sets the length of time for the capture.
• Source — Displays the detected capture device and lists other
capture devices installed on your computer.
• Format — Gives you a list of options where you select a file format
for saving your captured video.
• File name — Allows you to specify a prefix for captured files.
• Capture folder — Allows you to specify a location for captured
files.
• Split by scene — Automatically separates captured video into
several files based on changes in shooting date and time.
• Capture to library — Choose or create a Library folder where you
want your video to be saved.
• Options — Displays a menu allowing you to modify your capture
settings.
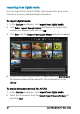
Click Import from Digital Media to add media clips from a
DVD-Video, AVCHD, BDMV formatted disc or from your
hard drive. This feature also allows you to import video
directly from AVCHD, Blu-ray Disc or DVD camcorders.
Click Stop Motion to create instant stop motion animations
using captured images from your photos and video capture
devices.
Click Screen Capture to create screen capture videos that
capture all computer actions and elements shown on your
screen.