
User guide


Save and share 199
clicking File > Save or Save As. This lets you return to your
project at any time and make edits.
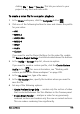
To create a video file for computer playback
1 In the Share workspace, click the Computer button .
2 Click one of the following buttons to view and choose the profile
for your video:
• AVI
• MPEG-2
• AVC/H.264
• MPEG-4
• WMV
• Audio
• Custom
If you want to use the Project Settings for the video file, enable
the Same as Project Settings check box located above the buttons.
3 In the Profile or Format drop-list, choose an option.
If you want to create a custom profile, click the Create Custom
Profile button . For more information, see “Working with
custom profiles in the Share workspace” on page 209.
4 In the File name box, type a file name.
5 In the File location box, specify the location where you want to
save the file.
6 Set any of the following options:
• Create Preview Range Only — renders only the section of video
that is selected between the Trim Markers in the Preview panel.
• Enable Smart Render — analyzes a video for any previously
rendered sections and renders only the new or revised sections.
This can reduce rendering time significantly.