
Operation Manual

Share 141
Creating 3D video files
Corel VideoStudio Pro lets you create 3D movies or convert regular 2D
video into 3D video files. With the help of this feature and compatible 3D
gadgets, you can enjoy 3D video popping out of your screen in just a few
easy steps.
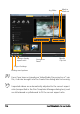
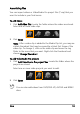
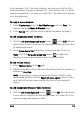
To create 3D video files
1 In the Share Step Options Panel, click the Create Video File button
and select 3D.
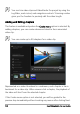
2 Choose the video format from the submenu.
The Create Video File dialog box appears.
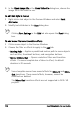
3 Click Options to specify additional video file settings.
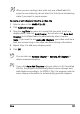
4 Depending on the properties of the media clips used in the 3D
project, enable one of the following options:
• Create 3D File — This option is available when you use tagged 3D
media clips and no 2D filters or effects have been applied.
• 3D Simulator — This option is available when you have 2D media
clips in the Timeline that you can simulate as 3D. Enter a value in
Depth to adjust the depth of the 3D video file.
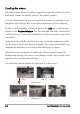
5 Choose a mode of 3D conversion from the following options:
• Anaglyph — Requires only the red and blue generic anaglyph 3D
glasses to view 3D video without the need for special display
monitors.
• Side-by-side — Requires polarized 3D glasses and a compatible
polarized display monitor to view 3D video.
Note: You need a playback software that supports Side-by-side 3D
video playback to view your 3D video files. For 3D TVs, 3D
equipment and glasses are required.
6 Enter a file name and click Save.
The movie file is saved in the current library.