
User Guide


Academic Courseware: Chapter 5
Joyce Ryan
50
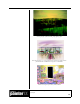
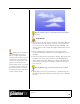
Play the Clouds script to see how the sky and clouds were
created.
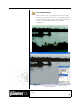
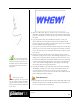
Create the text
1 Open a new file, the same size as your Sky file, and name it Whew.rif.
Click the Text tool in the toolbox, or press “T” on the keyboard to
activate the Text tool. Select a bold font and type “WHEW!.” Use
the Layer Adjuster tool to adjust the height and width of the word to
your liking.
2 On the Layers palette, click the palette menu arrow and select
Convert Text To Shapes. Click the arrow on the Whew! layer to see
the shapes.
3 Click on any shape that needs adjusting or kerning. Experiment with
the shapes of the letters. Customize the font by manipulating the
shapes. Adjust the kerning. When you are happy with the kerning
and overall letter spacing, choose Shapes > Convert To Selection.
Save your work.
Play the Whew script to watch how the text was created.
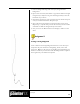
4 With a shape layer selected, click on Layers > Dynamic Plug-ins >
Bevel World. Experiment with the controls until you get a look that
you like.
Kerning refers to adjusting the
space between letters. Kern type for
television carefully. Type that looks
good in print does not always look good
in video. Video is made of interlaced
raster lines. If the type is thin, or has
fine serifs, those details can be lost
between the lines in video. It is usually
a good idea to make the tracking (the
space between the letters) a bit wider
for video than for print to make up for
the lower resolution of video.