
User Guide


Academic Courseware: Chapter 5
Joyce Ryan
49
Chapter 5
The Write-on
Every animator at some point in his or her career is going to have to
create a “write-on.” A write-on is a word or an image being magically
written across the screen. In this chapter, we are going to explore several
techniques in Corel Painter for creating different styles of write-on.
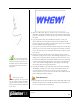
We will create a write-on for the name of a radio station. My radio
station is called WHEW! 98.6 FM. I want to give the WHEW! a shiny
cloud-like 3-D effect that appears over a background of sky and softly
floating clouds.
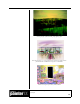
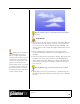
Create the background
1 Open a new file, 720 x 486 at 72 ppi. Create a gradient from dark
blue to light blue for your sky and save it. Fill the canvas with your
gradient.
2 Choose Select > All, and then Select > Float. Name the new layer
Sky.
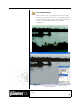
3 On a new layer labeled Clouds1, try using Airbrush variants to create
some clouds. I added some Motion Blur to the background (Effects >
Focus > Motion Blur) to smooth out my clouds and make it look like
there was a little breeze. You will be animating the clouds
independently, so make sure they are not cropped by the edge of the
image. You may want to be able to isolate your clouds as independent
selections for more flexibility.
4 On a new layer, create some smaller foreground clouds. Name this
layer Clouds2. Save your file in the RIFF format to preserve your
layers.
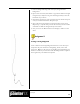
A write-on effect can be used
as an effective signature for a client’s
logo. It is also fascinating to watch a
drawing taking shape one step at a
time. This simple technique can be used
in a multitude of situations.