
User Guide


The Brush Creator186
To save a Brush Look:
1 In the toolbox, click the Look
selector menu arrow, and choose
New Look.
2 In the New Look dialog box, type a
name for the look.
The icon for the Look you’ve
created is saved into the Look
selector in the toolbox. This is a
handy visual reminder of what the
Look does.
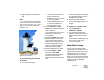
Saved Looks appear in the Look selector in the
toolbox.
In the case of the Image Hose brush,
the Look might have a particular
nozzle file attached. For more
information about working with the
Image Hose and Nozzle files, refer to
“Using the Image Hose” on page 334.
To use a saved Look:
• In the toolbox, choose a look from
the Look selector.
Corel Painter loads the correct
variant and materials for the saved
Look.
Using Brush and Looks
Libraries
Corel Painter comes with several
brush libraries. You can also create
new libraries for brushes and Looks
and add your custom brushes to them.
Create as many brush libraries as
needed.
Library features are identical for all
resource types (Papers, Brushes,
Looks, Patterns, Gradients, Weaves,
Scripts, Layers, and Selections
portfolios). For more information on
Library features, refer to “Libraries
and Movers” on page 23.
It’s a good idea to limit the number of
tools in a library. This makes it easier
to find a particular tool and helps
Corel Painter manage memory.
Corel Painter loads brushes into
memory when you launch it, so
adding variants to the default brush
library increases the program’s need
for RAM. Organize new brushes into
secondary libraries for better
efficiency. When you want a different
brush set, just switch libraries.