
User Manual

88 Corel VideoStudio
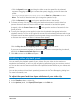
Note: Changes made in the video Duration box only affect the Mark-out point. The
Mark-in point remains unchanged.
Using the Slip tool to adjust trimmed clips
The Slip tool lets you adjust which frames in a trimmed clip will be shown without affecting
the length of the clip in the Timeline. The Slip tool reveals or hides head frames (frames
trimmed from the beginning of a clip) or tail frames (frames trimmed from the end of a clip).
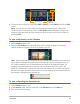
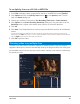
The Player panel lets you see the Mark In/Mark Out points for a trimmed clip and see
if there are head frames and/or tail frames for the clip.
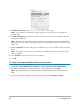
To use the Slip tool to adjust clips in the Timeline
1 In the Timeline, select a trimmed clip.
2 On the Timeline toolbar, click the Slip tool .
3 With your pointer over the clip, drag in the Timeline to change which frames display in
the Timeline.
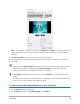
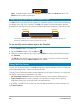
The Player panel displays the clip with the trim markers to help you see how the new
position affects where the Mark In/Out points appear.
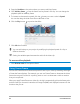
Using Split by Scene
Use the Split by Scene feature in the Edit workspace to detect different scenes in a video file
and automatically break it down into several clip files.
The way Corel VideoStudio detects scenes depends on the type of video file. In a captured
DV AVI file, scenes can be detected in two ways:
• DV Recording Time Scan detects scenes according to their shooting date and time.
• Frame Content detects content changes, such as motion change, camera shifting,
brightness change, etc., and splits them into separate files.
In an MPEG-1 or MPEG-2 file, scenes can only be detected based on content changes (i.e.,
by Frame Content).
head frames tail frames