
User Manual


Project basics 43
When customizing project settings, it is recommended that you make the settings the
same as the attributes of the video footage that will be captured to avoid distorting the
video images and can help prevent jumping frames. However, preview performance
might decrease for projects with high resolution files, depending on the system
specifications.
Creating custom profiles
Profiles contain settings that define how to create the final movie file. By using the preset
profiles provided by Corel VideoStudio or by creating and saving your own profiles in the
Movie Profile Manager, you can have multiple versions of your final movie. For example,
you can create profiles that provide high-quality output for DVD and video recording, and
you can create profiles that output to smaller, lower-quality files ideal for Web streaming and
e-mail distribution.
You can also choose profiles and create custom profiles in the Share workspace before you
output your movie project. For more information, see “Working with custom profiles in the
Share workspace” on page 216.
To create custom profiles
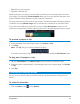
1 Click Settings > Movie Profile Manager. The Movie Profile Manager dialog box opens.
2 Click the Computer or 3D tab.
3 From the Format drop-list, choose a file format.
4 Click New.
5 In the New Profile Options dialog box, click the Corel VideoStudio tab, and type a name
in the Profile name box.
6 Click the General tab, and choose the settings you want.
Note: Additional tabs and settings are available depending on the type of format you
choose.
7 Click OK.
To choose a custom profile for your project
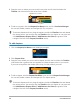
1 Click Settings > Movie Profile Manager. The Movie Profile Manager dialog box opens.
2 Click the Computer or 3D tab.
3 From the Format drop-list, choose a file format.
4 In the Profile area, choose Personal Profiles from the drop-list.
Previously saved custom profiles are listed in the box below the drop-list.
5 Click the profile you want, and click Close.