
User Manual


42 Corel VideoStudio
To create a new FastFlick project
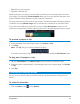
1 Click Tools > FastFlick.
2 From the FastFlick window, click Menu > New Project.
For more information, see “FastFlick” on page 183.
To open an existing project
• Click File > Open Project [Ctrl + O].
To add an existing project to a new project
1 In the Library, click the Media button .
2 Drag a project file (.vsp) from the Library to the Timeline.
If the file isn’t in the Library, click the Import Media Files button, navigate to a project
file (stored in My Projects folder by default), select the file, and click Open.
All tracks, media, and elements of the project appear in the Timeline.
Before you import a project (VSP file) to the Library, ensure that all links in the project
are working. Projects with linking issues cannot be added to existing projects.
If you want to flatten the project to add it to a specific track, press and hold the Shift
key before you release the mouse button.
Setting project properties
Project Properties serve as your template for your movie projects. The project settings in
the Project Properties dialog box determine the appearance and quality of a project when
it is previewed on-screen.
The project properties are based on a profile. You can use an existing profile or create a
custom profile. For more information about custom profiles, see “Creating custom profiles”
on page 43.
To modify project properties
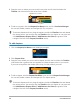
1 Click Settings > Project Properties.
2 Choose the appropriate setting options in the Project Properties dialog box.
3 Click OK.