
User Manual


Capture and import 37
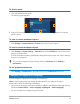
2 Select Insert to Timeline and choose Add video date information as title.
Note: If you want the shooting date to appear for the duration of the video, select
Entire video. If you only want a portion of the video, select Duration and specify the
number of seconds.
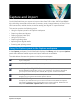
Capturing analog video
When footage is captured from analog sources such as VHS, S-VHS, Video-8, or Hi8
camcorders/VCRs, it is converted to a digital format that can be read and stored by the
computer. Before capturing, choose the desired file format to use for saving the captured
video in the Options Panel’s Format list.
To specify the type of video source you are capturing from
1 In the Capture workspace, click Options and select Video properties.
2 In the dialog box that opens, you can customize the following capture settings:
• In the Input Source tab, choose whether you are capturing NTSC, PAL, or SECAM video
and select the Input source (TV, Composite, or S-Video).
• In the Color Manager tab, you can fine tune the video source to ensure good quality
captures.
• In the Template tab, choose the frame size and compression method to use for saving
the captured video.
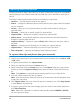
Importing from digital media
You can import DVD, AVCHD, BDMV video and photos from a disc, hard drive, memory card
and digital camcorders.
To import digital media
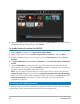
1 In the Capture workspace, click Import from Digital Media.
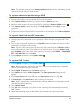
2 Click Select Import Source Folders and browse for folders that contain your digital
media and click OK.
3 Click Start and the Import from Digital Media dialog box appears.