
User Manual


Capture and import 35
Note: The available settings in the Video properties dialog box vary, depending on the
capture file format that you have chosen.
To capture videos and photos using a DSLR
1 Connect your DSLR to your computer and turn on the device.
2 Click Capture Video and select your device from the Source drop-list.
3 Specify a folder location for your saved files by clicking the Capture Folder button .
4 Click Capture Video to start recording. Click Stop Capture or press [Esc] to stop
capturing.
5 To capture a photo while the DSLR is connected to the computer, click Take a snapshot.
To capture video from an HDV camcorder
1 Connect your HDV camcorder to your computer’s IEEE-1394 port using the IEEE-1394
cable.
2 Turn on your camcorder and switch it to Play/Edit mode and make sure that your HDV
camcorder is switched to HDV mode.
Note: For Sony HDV camcorders, flip open the LCD screen and see if HDVout I-Link is
on the LCD screen to check if the camera is set to HDV mode. If you see DVout I-Link,
press P-MENU at the lower right of the screen. In the menu, press MENU > STANDARD
SET > VCR HDV/DV and press HDV.
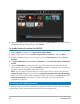
3 In the Capture workspace, click Capture Video .
To capture DVB-T video
1 In the Capture workspace, click Capture Video .
Note: Before capturing, ensure that the DVB-T source is connected via a compatible
capture card installed on your computer.
2 Select Digital TV Source from the Source drop-list.
3 Click Options and select Video Properties. The Video properties dialog box will
appear.
4 In the Input Source tab, select TV from the Input source drop-list. Click OK.
5 In Channel List, click Start Scan to start scanning for channels.
Note: DVB-T channels are not automatically scanned. Make sure to manually scan the
channels first before capturing.
6 Click Capture Video.
7 Click Yes when prompted if you want to start capturing and automatically recovering
DVB-T video.
8 Follow the remaining steps as described in the procedure for capturing videos.