
User Manual


214 Corel VideoStudio
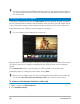
To create 3D video files
1 In the Share workspace, click the 3D Movie button .
2 Click one of the following buttons:
• MPEG-2
• AVC/H.264
• WMV
• MVC
3 In the Profile or Format drop-list, choose an option.
If you want to create a custom profile, click the Create Custom Profile button . For
more information, see “Working with custom profiles in the Share workspace” on
page 216.
4 Choose one of the following 3D conversion options:
• Anaglyph — Requires only the red and blue generic anaglyph 3D glasses to view 3D
video without the need for special display monitors.
• Side-by-side — Requires polarized 3D glasses and a compatible polarized display
monitor to view 3D video.
5 In the File name box, type a file name.
6 In the File location box, specify the location where you want to save the file.
7 Set any of the following options:
• Create Preview Range Only — renders only the section of video that is selected
between the Trim Markers in the Player panel.
• Enable Smart Render — analyzes a video for any previously rendered sections and
renders only the new or revised sections. This can reduce rendering time significantly.
8 Click Start.
Press the [Esc] key to cancel the rendering process.
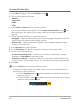
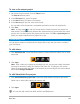
A progress bar appears when you render a video. You can use the buttons on the
progress bar to do the following:
•Click the Pause/Play button on the progress bar to pause and resume the
rendering process.
• Click the playback button to enable the preview while rendering or stop the
preview to reduce rendering time.
The rendering progress bar