
User Manual

162 Corel VideoStudio
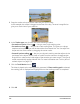
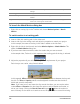
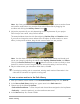
3 Drag the tracker to the part of the video that you want to track.
In the example, the tracker is dragged to the face of the boy. The area is magnified to
give you a closer view of your selection.
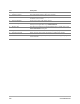
4 In the Tracker type area, choose one of the following trackers:
• Set tracker as point (default) — lets you set a single tracking point.
• Set tracker as area — lets you set a fixed tracking area. This gives you a larger
sample area but also lets you set the boundaries for a Mosaic blur. You can adjust the
shape and size of the tracker by dragging the corner nodes.
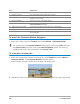
• Set multi-point tracking — lets you set a dynamic tracking area that adjusts in size
and shape as the object moves closer or further from the camera or changes angles.
Drag the four nodes to the inside edges of the area that you want to track. This type of
tracker automatically applies a Mosaic blur. For more information see “To blur parts of
tracked objects” on page 174.
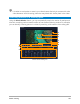
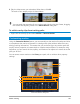
5 Click the Track Motion button .
The video is played as the tracking path is generated. If Show tracking path is selected,
the tracking path is displayed and highlighted once the tracking process is completed.
6 Click OK.