
User Manual


104 Corel VideoStudio
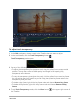
To edit a mask
1 In the Timeline view (Edit workspace), select a clip that has a mask, and click the Mask
Creator button on the Timeline toolbar.
The Mask Creator dialog box opens. Make any adjustments you want and click OK to
return to the Timeline.
To save a mask
1 After you create a mask, in the Save options area of the Mask Creator dialog box, click
Mask (default) or Invert mask.
Note: If you invert the mask, the preview area does not show the inverted mask—it
displays when you return to the Timeline.
2 Set a destination in the Save to box.
3 Click the Save As button at the bottom of the dialog box, and choose a name for the
mask.
If you want to link the mask to the original clip, mark the Link mask to source clip check
box. Note that you can link only one mask per file.
To import a video or still mask as an overlay option
1 In the Timeline, select an overlay clip.
2 In the Options panel, click Effect tab.
3 Enable the Apply Overlay Options check box, then choose Mask Frame (for a still mask)
or Video Mask from the Type drop-list.
4 Click the Add mask item(s) button to the right of the mask preview area, and browse
to a saved mask file (.uisx format for a video mask, .png for a still mask).
The mask is added to the preview area.
You can remove files from the video masks list by clicking the thumbnail for the mask,
and clicking the Remove mask item button .
You can create a folder for masks in the default user content folder: ...Documents/
Corel VideoStudio Pro/22.0/.
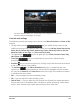
Track transparency
You can use the Track Transparency mode to precisely control the transparency of a track.
Key frames let you vary track transparency to achieve the effect you want. For example, you
can adjust the transparency of a track to create a superimposed effect (where the underlying
track shows through) or to create a custom fade in and fade out effect.