
User Manual


Edit media 103
3 In the tools area, choose one of the following: Mask Brush, Smart Mask Brush,
Rectangle tool, Ellipse tool, Freehand tool or Text Mask.
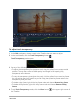
4 In the playback window, drag, draw, or type to select a mask area. A highlight appears
over the selected area.
5 You can fine-tune the mask by using the tools to modify the selected area.
To reset the mask, click the Clear Mask button.
If you want to invert the mask, in the Save options area, click the Invert mask option.
If you want to save the mask as a Mask Frame (Options panel, Effect > Apply Overlay
Options > Mask Frame), click Save As and type a name for your PNG mask.
6 Click OK to exit Mask Creator.
The mask appears on its own track in the Timeline, below the original source clip. You
can adjust the length of the mask as you would other clips and you can apply effects to
the mask by dragging an effect onto the mask in the Timeline. You can also change the
clip for the mask by dragging a new clip from the Library to the masked clip and
pressing CTRL.
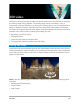
To create a video mask with the Mask Creator
1 In the Timeline view (Edit workspace), select the clip you want to work with, and click the
Mask Creator button on the Timeline toolbar.
2 In the Mask Creator window, click the Video option.
If you are creating a video mask for a specific segment of the video clip, scrub through
the video to figure out when you want the masking to start and stop. Make note of the
timecode for the stop time.
3 In the tools area, choose a masking tool.
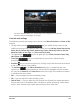
4 In the playback window, drag across the area that you want to select. A highlight appears
over the selected area.
5 In the Detect movement area, choose Next Frame , End of Clip , or type a
timecode in the timecode box and then click Specified Timecode . Note that when
you detect movement to the end of a clip or to a specified timecode, it can take a few
minutes, depending on the length of the clip and the quality.
6 Review the results in the playback window. You can fine-tune by scrubbing through the
video and using the Eraser tool and Brush tool to modify the selected area. In some
cases, you might find the Editing tools helpful when working from frame-to-frame.
If you want to invert the mask, in the Save options area, click the Invert mask option.
7 Click OK to exit Mask Creator.