
User Manual

Edit media 91
Saving trimmed clips
Frequently, when you make changes (i.e., after auto-splitting clips using Split by Scene,
extracting clips using Multi-trim Video, or manually trimming clips), you may wish to make a
permanent change to the clip and save the edited file. Corel VideoStudio gives you a margin
of safety since it saves the trimmed video to a new file and does not alter the original file.
To save a trimmed clip
1 In the Storyboard View, Timeline View, or the Library, select a trimmed clip.
2 Click File > Save Trimmed Video.
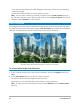
Taking a snapshot from a video clip
You can take a photo snapshot in the Edit workspace by selecting a specific frame on the
Timeline and saving it as an image file.
To capture photos in the Edit workspace
1 Click Settings > Preferences > Capture.
Choose Bitmap or JPEG as the Snapshot format.
Note: If you select JPEG, set the Snapshot quality.
2 Click OK.
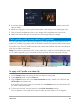
3 In the Timeline, select a video clip in your project.
4 Drag the Scrubber to the frame you want to capture.
5 Click Edit > Take a Snapshot. The photo snapshot is automatically added to the Library
and saved to your working folder.
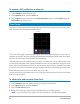
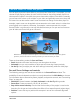
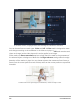
Adjusting the color and tone of clips
Corel VideoStudio lets you improve the appearance of a video or image clip by adjusting its
current properties.
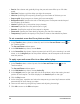
Moves to the start or end frame of a trimmed segment.
Moves to the previous/next frame in the video.
Repeats playback of video