
Quick Start Guide
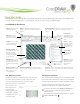
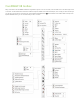
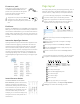
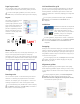
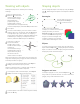
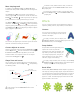

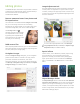
Table Of Contents
- CorelDRAW X8 Workspace
- The Welcome screen
- Workspace selection
- CorelDRAW X8 toolbox
- Templates
- Drawing lines
- Drawing shapes
- Text
- Page layout
- Working with objects
- Shaping objects
- Effects
- Fills and outlines
- Color management
- QR codes
- Importing files
- Pixels view
- Editing photos
- Tracing bitmaps
- Exporting files
- Keyboard shortcuts
- Corel Font Manager™
- Corel® CONNECT™
- Get More docker
Page layout tools
You can display rulers, grids, and guidelines to help you
organize objects and place them exactly where you want.
To view or hide grids, guidelines, and rulers, click the
View menu, and choose the items you want to display.
Layers
All content is placed on a layer.
Content that applies to a
specific page is placed on a local
layer. Content that applies to all
pages in a document can be
placed on a global layer called a
master layer. Master layers are
stored on a virtual page called
the Master Page.
Master layers
With a choice of odd, even, and all-page master layers, it is
easy to create page-specific designs for multi-page
documents, such as 16- or 32-page brochures. For example,
you might want a different header or footer design to appear
on even-numbered pages and on odd-numbered pages.
Drawing scale
You can choose a preset or custom drawing scale so that
distances in a drawing are proportionate to real-world
distances. For example, you can specify that 1 inch in the
drawing corresponds to 1 meter in the physical world.
To set the drawing scale, double-click a ruler to display
the Options dialog box. Click Edit scale, and choose a
preset or a custom drawing scale.
Grid and baseline grid
The grid is a series of intersecting dashed lines or dots that
you can use to precisely align and position objects in the
drawing window. The baseline grid consists of lines that
follow the pattern of a ruled sheet, helping you to align text
baselines.
To set up the grid and the baseline grid, click Tools
Options, and click Grid in the Document list of
categories.
Guidelines
Guidelines are lines that can be placed
anywhere in the drawing window to
aid in object placement. You can
select, move, rotate, lock, or delete a
guideline, and you can change its
color or dashed line pattern.
To add a guideline, drag from the vertical or horizontal
ruler into the drawing window, or click Too l s
Options
and choose Guidelines from the Document list of
categories.
Snapping
When you move or draw an object, you can snap it to another
object in a drawing, to page elements (such as the center of
the page), to the document grid, pixel grid, baseline grid, or
the guidelines. When an object is moved near a snap point, it
is locked to the snap point.
To turn snapping on or off, click Snap To on the standard
toolbar, and enable or disable snapping for the page
elements you want.
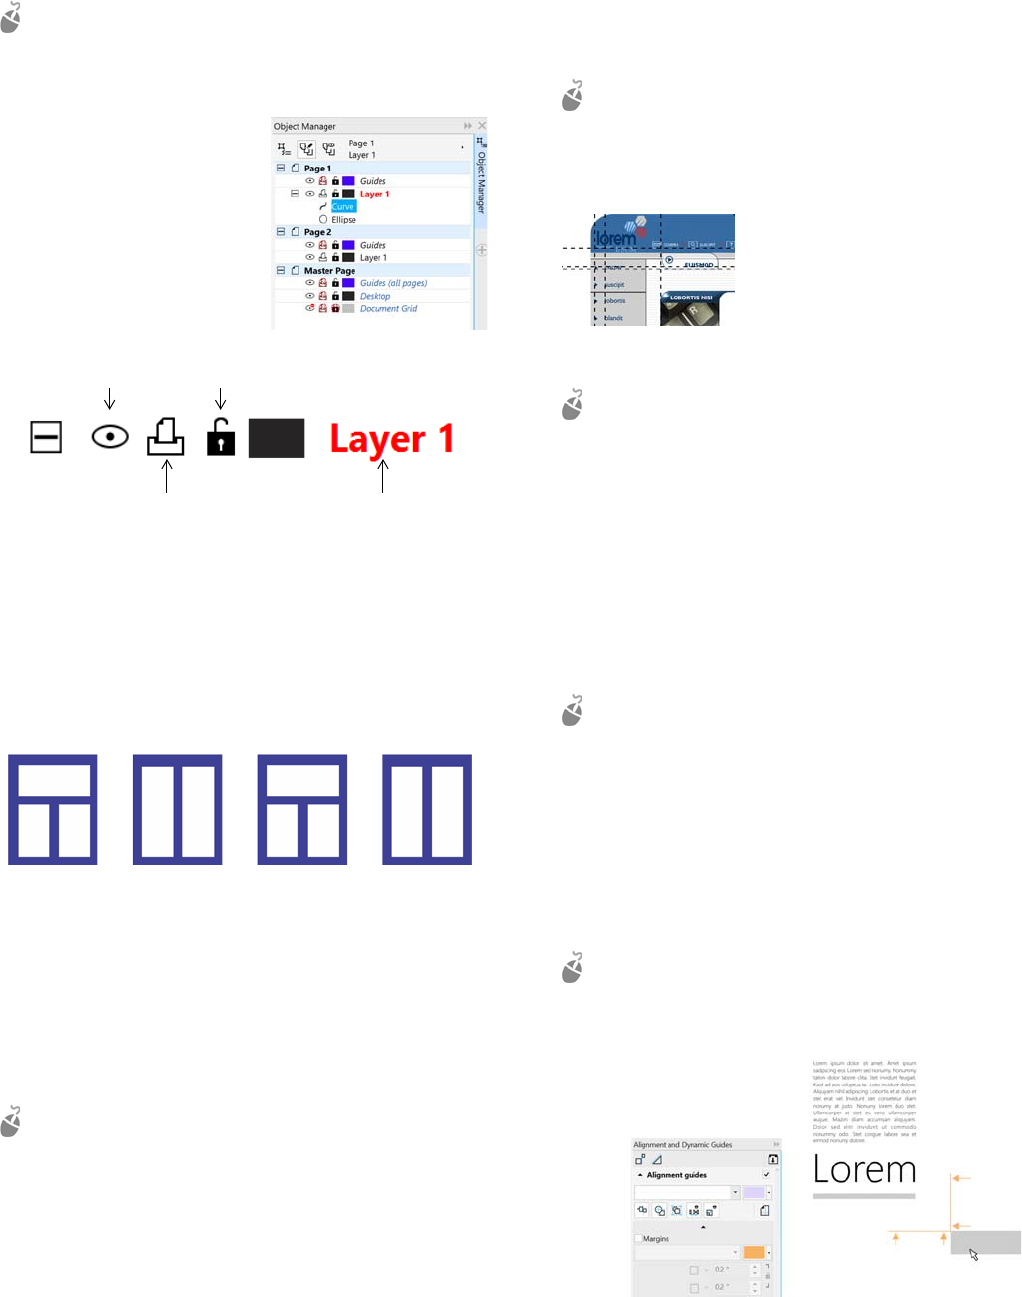
Alignment guides
Alignment guides help you position objects more quickly.
These temporary guidelines appear when you create, resize,
or move objects in relation to the center or edges of nearby
objects.
To display alignment guides, click View
Alignment
Guides. To modify alignment guide settings, click
Window
Dockers Alignment and Dynamic Guides,
and choose the options you want.
Page 1 Page 2 Page 3 Page 4
visible
printable
editable
layer name