
User Manual
9
CARE AND CLEANING
FRONT PANEL AND CASE
- Turn unit off and disconnect power supply.To clean,
use water and a mild detergent.DO NOT use bleach
and abrasivers.Some commercial cleaners may
damage the plastic parts.
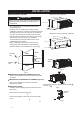
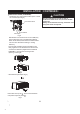
- Removing Air Filter
Fig.9
OUTDOOR COIL
- Coil on outdoor side of unit should be checked
regularly.Unit will need to be removed to inspect
dirt build-up that will occur on the inside of the coil.
If clogged with dirt and soot ,coil should be
professionally cleaned.Clean inside and outside of
outdoor coils regularly.
NOTE: Never use a high-pressure spray on coil.
!
CAUTION
Failure to follow this caution may result in
equipment damge or improper operation.
Airflow restriction may cause damage to the unit.
UNIT DAMAGE HAZARD
AIR FILTERS
IMPORTANT:TURN UNIT OFF BEFORE
CLEANING.
- The most important thing you can do to maintain
unit efficiency is to clean the filters once every
two weeks as required.
Clogged filters reduce cooling,heating and airflow.
!
CAUTION
Failure to follow this caution may result in
equipment damge or improper operation.
Do not operate unit without filters in place.If a filter
becomes torn or damaged,it should be replaced
immediately.
Operating without filters in place or with damaged
filter will allow dirt and dust to reach indoor coil and
reduce cooling,heating,airflow and efficiency of unit.
Airflow restriction may cause damage to unit.
UNIT DAMAGE HAZARD
- Keeping filters clean will:
Decrease cost of operation.
Save energy.
Prevent clogged indoor coil.
Reduce risk of premature component failure.
- To Clean Air Filters:
Vacuum off heavy soil.
Run water through filter.
Dry thoroughly before replacing.
Pull up
2 Air filters
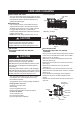
- Replacing Air Filter
Fig.10
Push down
VENT DOOR FILTER
IMPORTANT:TURN UNIT OFF BEFORE
CLEANING.
- If the vent door is open,access requires the removal
of the unit from the wall sleeve.Clean the vent filter
twice a year or as required.
- Make sure to remove the shipping screw from the
vent door.(See.Fig.5)
- Rotate the vent control lever to open the vent door.
(See. Fig.6)
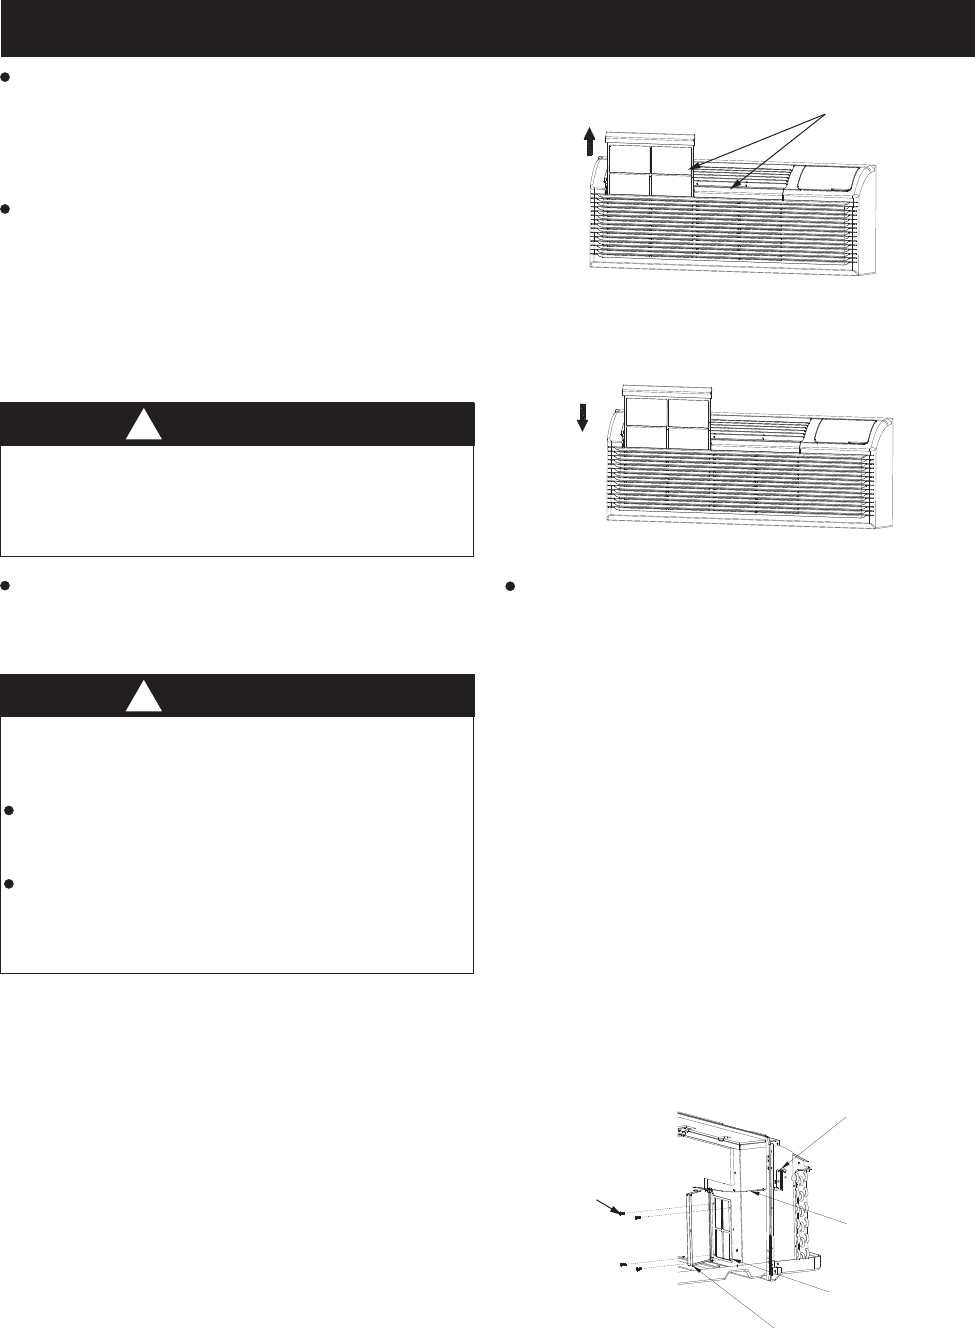
- Remove four screws from the vent door filter.
(See.Fig.11)
- First pull out the vent door steel wire from the hole
of the vent door, then take off the vent door and filter.
(See.Fig.11)
- Clean the filter.Dry thoroughly before replacing.
- Replac the vent door and filter,reinstall the four
screws.
- Reinsert the vent door steel wire into the hole of the
vent door.
.
Vent door
control lever
Vent door
steel wire
Vent door
filter
Screws
Fig.11
Vent door