
user manual
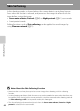
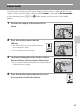


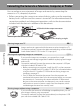
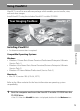
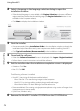
Table Of Contents
- Introduction
- Parts of the Camera and Basic Operation
- Basic Steps for Shooting and Playback
- Shooting Features
- Auto Mode
- Scene Mode (Shooting Suited to Scenes)
- Special Effects Mode (Applying Effects When Shooting)
- Smart Portrait Mode (Capturing Images of Smiling Faces)
- Features That Can Be Set Using the Multi Selector
- Changing the Image Size (Image Mode)
- Functions That Cannot Be Applied Simultaneously
- Face Detection
- Skin Softening
- Focus Lock
- Playback Features
- Recording and Playing Back Movies
- General Camera Setup
- Reference Section
- Using Panorama Assist
- Favorite Pictures Mode
- Auto Sort Mode
- List by Date Mode
- Editing Images (Still Images)
- Editing Functions
- Quick Retouch: Enhancing Contrast and Saturation
- D-Lighting: Enhancing Brightness and Contrast
- Glamour Retouch: Softening Skin and Making Faces Looking Smaller with Larger Eyes
- Filter Effects: Applying Digital Filter Effects
- Small Picture: Reducing Image Size
- Crop: Creating a Cropped Copy
- Connecting the Camera to a TV (Playback on a TV)
- Connecting the Camera to a Printer (Direct Print)
- The Shooting Menu (for Auto Mode)
- Smart Portrait Menu
- The Playback Menu
- The Movie Menu
- The Setup Menu
- Image/Sound File and Folder Names
- Optional Accessories
- Error Messages
- Technical Notes and Index
72
Playback Features
Connecting the Camera to a Television, Computer, or Printer
You can enhance your enjoyment of images and movies by connecting the
camera to a TV, computer, or printer.
• Before connecting the camera to an external device, make sure the remaining
battery level is sufficient and the camera is turned off. For information about the
connection methods and subsequent operations, refer to the documentation
included with the device in addition to this document.
Viewing images on a TV E17
Images and movies captured with the camera can be viewed on a TV.
Connection method: Connect the video and audio plugs of the included
Audio Video Cable EG-CP14 to the TV’s input jacks.
Viewing and organizing images on a computer A73
If you transfer images to a computer, you can perform simple
retouching and manage image data in addition to playing back images
and movies.
Connection method: Connect the camera to the computer’s USB port
with the included USB Cable UC-E6.
• Before connecting to a computer, install ViewNX 2 on the computer
using the included ViewNX 2 Installer CD-ROM. For information about
using the ViewNX 2 Installer CD-ROM and transferring images to a
computer, see page 75.
• If any USB devices that draw the power from the computer are
connected, disconnect them from the computer before you connect
the camera to it. Connecting the camera and other USB-powered
devices to the same computer simultaneously may cause a camera
malfunction or excessive power supply from the computer, which
could damage the camera or memory card.
Printing images without using a computer E18
If you connect the camera to a PictBridge-compatible printer, you can
print images without using a computer.
Connection method: Connect the camera directly to the printer’s USB
port with the included USB Cable UC-E6.
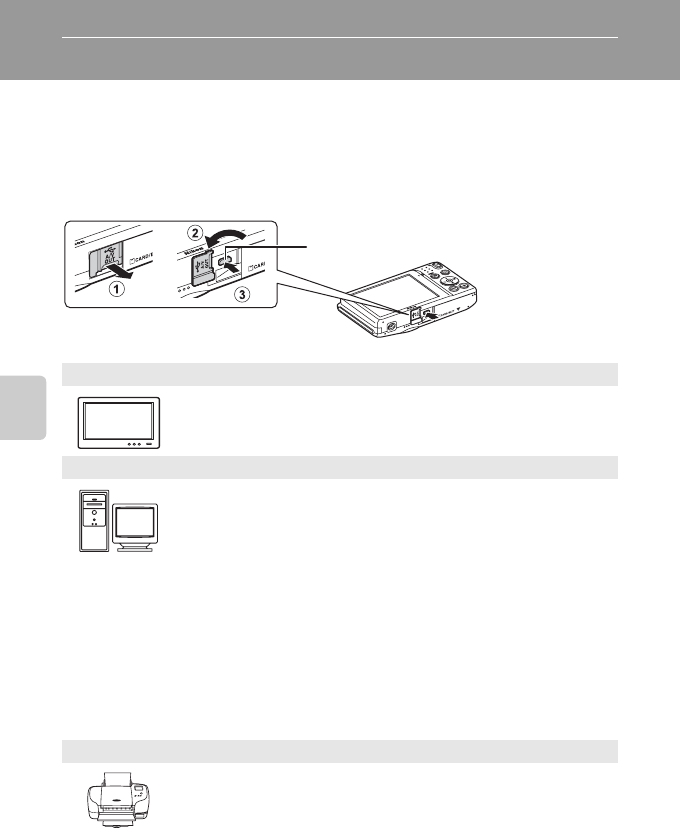
How to open the connector cover
USB/audio/video output connector
Insert the plug straight.