
user manual
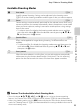
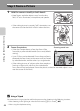
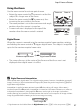
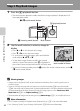
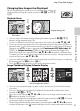
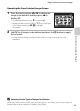
Table Of Contents
- Introduction
- Parts of the Camera and Basic Operation
- Basic Steps for Shooting and Playback
- Shooting Features
- Auto Mode
- Scene Mode (Shooting Suited to Scenes)
- Special Effects Mode (Applying Effects When Shooting)
- Smart Portrait Mode (Capturing Images of Smiling Faces)
- Features That Can Be Set Using the Multi Selector
- Changing the Image Size (Image Mode)
- Functions That Cannot Be Applied Simultaneously
- Face Detection
- Skin Softening
- Focus Lock
- Playback Features
- Recording and Playing Back Movies
- General Camera Setup
- Reference Section
- Using Panorama Assist
- Favorite Pictures Mode
- Auto Sort Mode
- List by Date Mode
- Editing Images (Still Images)
- Editing Functions
- Quick Retouch: Enhancing Contrast and Saturation
- D-Lighting: Enhancing Brightness and Contrast
- Glamour Retouch: Softening Skin and Making Faces Looking Smaller with Larger Eyes
- Filter Effects: Applying Digital Filter Effects
- Small Picture: Reducing Image Size
- Crop: Creating a Cropped Copy
- Connecting the Camera to a TV (Playback on a TV)
- Connecting the Camera to a Printer (Direct Print)
- The Shooting Menu (for Auto Mode)
- Smart Portrait Menu
- The Playback Menu
- The Movie Menu
- The Setup Menu
- Image/Sound File and Folder Names
- Optional Accessories
- Error Messages
- Technical Notes and Index
27
Step 3 Frame a Picture
Basic Steps for Shooting and Playback
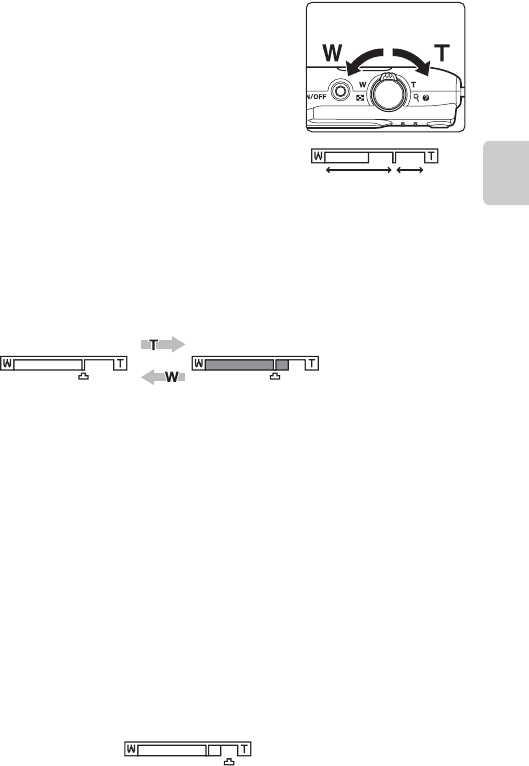
Using the Zoom
Use the zoom control to activate optical zoom.
• Rotate the zoom control to g to zoom in so that the
subject fills a larger area of the frame.
• Rotate the zoom control to f to zoom out, thus
increasing the area visible in the frame.
• The zoom position is set at the maximum wide-angle
position when the camera is turned on.
• A zoom indicator is displayed at the top of the
monitor when the zoom control is rotated.
Digital Zoom
When the camera is zoomed in to the maximum optical zoom position, rotating
and holding the zoom control at g triggers digital zoom. The subject is magnified
up to 4× the maximum optical zoom ratio.
• The camera focuses at the center of the frame and the focus area is not
displayed when digital zoom is in effect.
C Digital Zoom and Interpolation
Unlike optical zoom, digital zoom uses a digital imaging process known as interpolation to magnify
images, resulting in slight deterioration of image quality according to the image mode (A60) and
digital zoom magnification.
Interpolation is applied at zoom positions beyond V when taking still images. When zoom is
increased beyond the V position, interpolation is initiated and the zoom indicator turns yellow to
indicate that interpolation is being applied. V moves to the right as the image size becomes
smaller, allowing you to confirm the zoom position that can be used to capture still images without
image degradation before shooting at the current image size setting.
• Digital zoom can be disabled from the Digital zoom option (A87) in the setup menu (A86).
Zoom out
Zoom in
Optical
zoom
Digital
zoom
Maximum optical zoom Digital zoom enabled
Small image size