
user manual
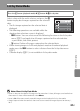
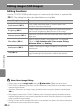
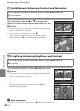
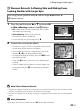
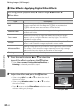
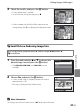
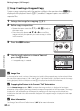
Table Of Contents
- Introduction
- Parts of the Camera and Basic Operation
- Basic Steps for Shooting and Playback
- Shooting Features
- Auto Mode
- Scene Mode (Shooting Suited to Scenes)
- Special Effects Mode (Applying Effects When Shooting)
- Smart Portrait Mode (Capturing Images of Smiling Faces)
- Features That Can Be Set Using the Multi Selector
- Changing the Image Size (Image Mode)
- Functions That Cannot Be Applied Simultaneously
- Face Detection
- Skin Softening
- Focus Lock
- Playback Features
- Recording and Playing Back Movies
- General Camera Setup
- Reference Section
- Using Panorama Assist
- Favorite Pictures Mode
- Auto Sort Mode
- List by Date Mode
- Editing Images (Still Images)
- Editing Functions
- Quick Retouch: Enhancing Contrast and Saturation
- D-Lighting: Enhancing Brightness and Contrast
- Glamour Retouch: Softening Skin and Making Faces Looking Smaller with Larger Eyes
- Filter Effects: Applying Digital Filter Effects
- Small Picture: Reducing Image Size
- Crop: Creating a Cropped Copy
- Connecting the Camera to a TV (Playback on a TV)
- Connecting the Camera to a Printer (Direct Print)
- The Shooting Menu (for Auto Mode)
- Smart Portrait Menu
- The Playback Menu
- The Movie Menu
- The Setup Menu
- Image/Sound File and Folder Names
- Optional Accessories
- Error Messages
- Technical Notes and Index
E13
Editing Images (Still Images)
Reference Section
s Glamour Retouch: Softening Skin and Making Faces
Looking Smaller with Larger Eyes
1 Press the multi selector H or I to choose All
or Skin softening and press the k button.
• All: Soften facial skin tones, make faces look smaller,
and make eyes look larger.
• Skin softening: Soften facial skin tones.
• The preview screen is displayed.
• To exit without saving the copy, press J.
2 Preview the result of the effects.
• Skin tones in up to 12 faces, in the order of that closest
to the center of the frame, are softened.
• If more than one face was softened, press the multi
selector J or K to display a different face.
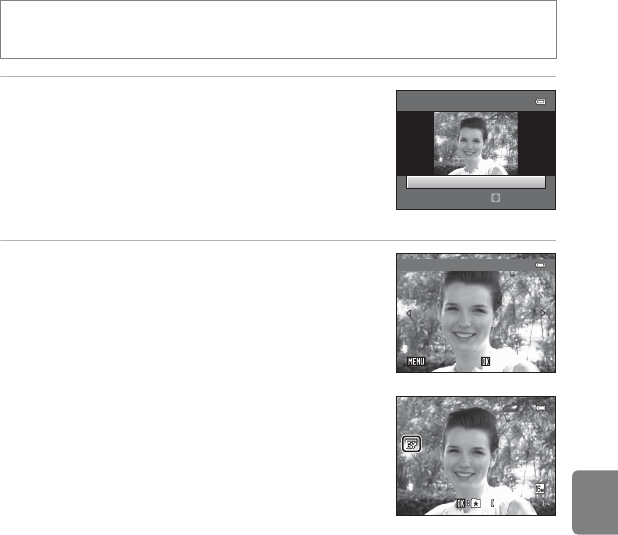
• To change the degree of effect, press the d button
and return to step 1.
• When the k button is pressed, a new, edited copy is
created.
• Copies created with the glamour retouch option can
be recognized by the u icon displayed in playback
mode.
B Notes About Glamour Retouch
• The glamour retouch function may not perform as expected depending on the direction in which
the faces are looking or the brightness of the faces in the image.
• If no faces are detected in the image, a warning is displayed and the screen returns to the playback
menu.
C More Information
See “Image/Sound File and Folder Names” (E70) for more information.
Press the c button (playback mode) M select an image M d button M
s Glamour retouch
Glamour retouch
All
Select
Preview
Save
Save
SaveBack
Back
Back
0 0 0 4 .J P G
0004.JP G
4 / 4
4/ 4
1 5 / 0 5/ 2 0 12 1 5 : 3 0
15/05/2012 15:30