
user manual
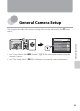
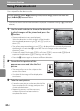
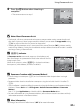
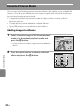
Table Of Contents
- Introduction
- Parts of the Camera and Basic Operation
- Basic Steps for Shooting and Playback
- Shooting Features
- Auto Mode
- Scene Mode (Shooting Suited to Scenes)
- Special Effects Mode (Applying Effects When Shooting)
- Smart Portrait Mode (Capturing Images of Smiling Faces)
- Features That Can Be Set Using the Multi Selector
- Changing the Image Size (Image Mode)
- Functions That Cannot Be Applied Simultaneously
- Face Detection
- Skin Softening
- Focus Lock
- Playback Features
- Recording and Playing Back Movies
- General Camera Setup
- Reference Section
- Using Panorama Assist
- Favorite Pictures Mode
- Auto Sort Mode
- List by Date Mode
- Editing Images (Still Images)
- Editing Functions
- Quick Retouch: Enhancing Contrast and Saturation
- D-Lighting: Enhancing Brightness and Contrast
- Glamour Retouch: Softening Skin and Making Faces Looking Smaller with Larger Eyes
- Filter Effects: Applying Digital Filter Effects
- Small Picture: Reducing Image Size
- Crop: Creating a Cropped Copy
- Connecting the Camera to a TV (Playback on a TV)
- Connecting the Camera to a Printer (Direct Print)
- The Shooting Menu (for Auto Mode)
- Smart Portrait Menu
- The Playback Menu
- The Movie Menu
- The Setup Menu
- Image/Sound File and Folder Names
- Optional Accessories
- Error Messages
- Technical Notes and Index
E2
Reference Section
Reference Section
Using Panorama Assist
Use a tripod for the best results.
* The icon for the last scene mode selected is displayed. The default setting is x (Scene auto
selector).
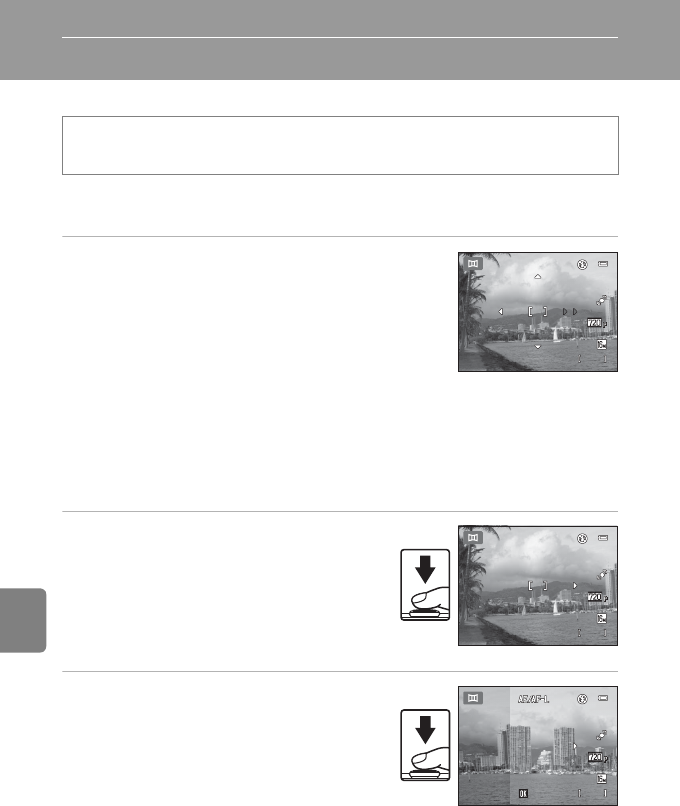
1 Use the multi selector to choose the direction
in which images will be joined and press the
k button.
• Panorama direction icons are displayed.
Select the direction in which images will be joined in
the completed panorama: right (I), left (J), up (K) or
down (L).
• The yellow panorama direction icon (I I) is displayed for the current direction and
the direction is fixed when k is pressed. The icon changes to the white fixed
direction I icon.
• If necessary, apply flash mode (A53), self-timer (A55), macro mode (A56) and
exposure compensation (A57) settings with this step.
• Press the k button again to choose a different direction.
2 Frame the first portion of the
panorama scene and take the first
picture.
• The camera focuses on the subject at the
center of the frame.
• One third of the image will be displayed as
translucent.
3 Take the next picture.
• Frame the next picture so that one third of the
frame overlaps the first image, and press the
shutter-release button.
• Repeat this process until the necessary
number of picture has been taken to
complete the scene.
On the shooting screen M A (shooting mode) button M x (second icon from the
top*) M K M U Panorama assist
9 5 0
950
8 m 0 s
8 m 0s
9 5 0
950
8 m 0 s
8 m 0s
9 4 9
949
End
End
End
8 m 0 s
8 m 0s