
User's Manual
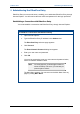
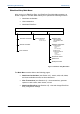
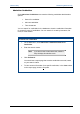
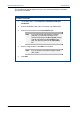
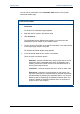
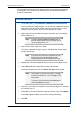
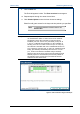
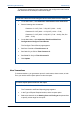
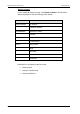
Table Of Contents
- Important Safety Information
- Introduction
- EtherProx Entry Installation
- Configuring the EtherProx Entry
- Administering the EtherProx Entry
- Diagnostics
- Glossary

Administering EtherProx Entry EtherProx Entry
You can specify a time period for clearance during which access is granted to
a cardholder. You can set up time clearances for an individual cardholder or
groups of cardholders.
To set time clearances
1. On the Main Menu, click Administer Cardholders>Time Clearances.
The Time Clearance page appears. You should see a table with columns
representing the days of the weeks, start time, and end time. In rows1
through 4, you can specify up to four time periods for a group.
2. Select a group from the Clearance Name drop-down list. For example,
select Clearance A.
Note You cannot adjust the Always and Never groups, as
these are system defaults, but you can define up to six
of your own groups from A – F.
3. Click a cell to select a day of the week.
The cell you selected changes to green, indicating that access will be
granted for that day.
Note If you want to turn off access for a particular day, click
that cell. The cell you selected changes to white,
indicating that access will not be granted for that day.
4. Repeat step 3 to select additional days for which you will allow access.
5. Click a Start cell that corresponds to a day you selected.
The Start cell appears in blue. The Enter new time boxes appear.
Note Time is based on a 24-hour clock format. For example,
for 5:00 PM set the time as 17:00. For midnight, se the
time as 00:00.
To specify a 24-hour time period, set the Start time as
00:00 and the End time as 23:59.
6. Click in the hour time box and type the hour with two digits. For example,
for 5:00 PM, type 17.
7. Press Tab. In the minute time box, type the minutes. Then click Update.
A message appears asking if you want to change the setting.
8. Click OK.
Page 30 Software House