
User's Manual

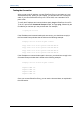
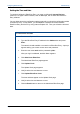
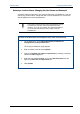
Table Of Contents
- Important Safety Information
- Introduction
- EtherProx Entry Installation
- Configuring the EtherProx Entry
- Administering the EtherProx Entry
- Diagnostics
- Glossary

Configuring EtherProx Entry EtherProx Entry
Setting the Time and Date
To continue configuring EtherProx Entry, you must run Microsoft Internet Explorer
version 5.5 or higher. Other browsers, such as Netscape, will not work with EtherProx
Entry software.
You can either enter the configuration settings manually or upload the configuration tables
to EtherProx Entry. In this section, you will establish a network connection between
EtherProx Entry and the PC by using Internet Explorer 5.5. Then you will set the time and
date.
To set the time and date
1. Run Internet Explorer 5.5.
2. Type the EtherProx Entry IP address in the Address box and press
Enter.
The network should establish a connection to EtherProx Entry. A prompt
appears asking you to enter a user name and password.
3. Enter the user name web and the password spider.
After your login is validated, the Main Menu appears.
4. Click Administer EtherProx.
The Administer EtherProx page appears.
5. Click Update Clock.
The Update Clock page appears.
6. Verify that the time and date are correct.
7. Click Update EtherProx clock.
The time and date appear on the Update Clock page.
8. Verify that the time and date are correct.
9. Click the Back button to return to the Administer EtherProx page.
Page 22 Software House