
User's Manual
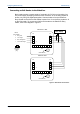

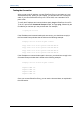
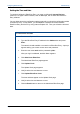
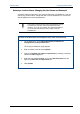
Table Of Contents
- Important Safety Information
- Introduction
- EtherProx Entry Installation
- Configuring the EtherProx Entry
- Administering the EtherProx Entry
- Diagnostics
- Glossary

EtherProx Entry Configuring EtherProx Entry
Testing the Connection
After you set up the IP address, connect EtherProx Entry to your laptop or Local
Area Network (LAN). When you use a laptop, you will need a a CAT 5 crossover
cable. If you connect EtherProx Entry to a LAN or HUB, use a standard CAT 5
patch cable.
To verify the IP address and communications path, ping the EtherProx from a PC.
To do so, open a DOS Command Prompt window, and type ping, followed by the
IP address you had set up in the previous task. For example,
C:\>ping 172.31.10.10
If the IP address and communication path are correct, you should see a reply in
the Command Prompt window that is similar to the following example:
Pinging 172.31.10.10 with 32 bytes of data:
Reply from 172.31.10.10: bytes=32 time=2ms TTL=32
Reply from 172.31.10.10: bytes=32 time=2ms TTL=32
Reply from 172.31.10.10: bytes=32 time=4ms TTL=32
Reply from 172.31.10.10: bytes=32 time=3ms TTL=32
If the IP address or communication path is incorrect, you should see a reply in the
Command Prompt window that is similar to the following example:
Pinging 172.31.10.10 with 32 bytes of data:
Request timed out.
Request timed out.
Request timed out.
Request timed out.
Once you connect EtherProx Entry, you can set the time and date, as explained in
the next section.
Software House Page 21