Disclaimer Control4® makes no representations or warranties with respect to this publication, and specifically disclaims any express or implied warranties of merchantability or fitness for any particular purpose. Control4 reserves the right to make changes to any and all parts of this publication at any time, without any obligation to notify any person or entity of such changes. Trademarks Control4, EZ ID, and the Control4 logo are trademarks or registered trademarks of Control4 Corporation.
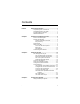
Contents Preface Important Information ......................................... 1 Graphical Symbols on the Device........................... 1 Graphical Symbols in this Guide............................. 1 Important Safety Instructions .................................. 2 Additional Resources.............................................. 4 Chapter 1 Introduction to Media Controller ........................ 5 Role in a Control4 System ...................................... 5 Features and Benefits........
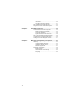
Interviewer ..................................................... 30 The Main Composer Interface ....................... 31 Set Up Media and Create Playlists ....................... 32 Program the Home Automation System ............... 33 Chapter 4 Use Media Controller......................................... 35 Control Devices and Use the System ................... 35 Media Controller Front Display ...................... 35 On-Screen Navigator .....................................
PREFACE Important Information This preface provides the following information: ` Graphical Symbols on the Device ` Graphical Symbols in this Guide ` Important Safety Instructions ` Additional Resources Graphical Symbols on the Device The following information has been placed on the device: Graphical Symbols in this Guide The following symbols and their descriptions draw your attention to important safe practices and additional information that can help you avoid injury, death, or loss of materia
WARNING! This indicates a potentially hazardous situation that, if not avoided, may result in death or serious injury. DO NOT IGNORE A WARNING! CAUTION! This indicates a potentially hazardous situation that, if not avoided, may result in minor or moderate injury. DO NOT IGNORE A CAUTION! IMPORTANT! This indicates information that will help you avoid damage to your equipment, loss of materials, or loss of time.
8. Do not install near any heat sources such as radiators, heat registers, stoves, or other apparatus (including amplifiers) that produce heat. 9. Do not defeat the safety purpose of the polarized or grounding-type plug. A polarized plug has two blades with one wider than the other. A grounding type plug has two blades and a third grounding prong. The wide blade or the third prong are provided for your safety.
WARNING! This CLASS I apparatus must be connected to an AC mains socket outlet that has a protective earthing connection (i.e., third-prong ground conductor). DO NOT DEFEAT THE PROTECTIVE EARTHING CONNECTION! Additional Resources The following resources are available to provide you with additional support. 4 ` Your authorized Control4 reseller ` Control4 Web Site: http://www.control4.
CHAPTER 1 Introduction to Media Controller This chapter introduces a Control4 home automation system and explains the important role a Control4 Media Controller plays in that system. It contains the following information: ` ` ` ` ` Role in a Control4 System Features and Benefits Requirements What’s in the Box Control4 Supported Devices Role in a Control4 System An essential component in every Control4 system is a controller that acts as the central processor of the system.
your media collections, play music, or access other stored media. Features and Benefits The Media Controller makes it easy to enjoy your favorite music wherever you are. The Media Controller digitally stores music collections and delivers simultaneous audio streams over a wired or a wireless home network. The Media Controller utilizes online music and movie recognition. You can select music by artist, song, genre, or even album cover art.
Powerful Automation Controller ` Complete theater control – Provides multiple IR outputs and intelligent video sensing, making control of the entire home theater easy. ` Complete home control – Allows complete control of the whole home using devices controlled by IR contacts, relays, serial, IR, or other protocols. ` Standards-based control – Devices throughout the home are controlled via wired or wireless communication (Ethernet or ZigBee 802.15.4 mesh networking).
What’s in the Box The following are included in your Media Controller box: ` Media Controller and On-screen Navigator software ` Pluggable terminal block connectors (11) ` Control4 System Remote Control with LCD Navigator display and 4 AAA batteries ` S-VIDEO cable ` Composite video cable ` IEC power cord ` IR emitters (8) ` Stereo RCA cable ` Media Controller Installation and User Guide (this manual) ` On-Screen Navigator User Guide ` System Remote Control User Guide This following sections include: `
Front View with Door Opened 1. Front display area — For viewing settings, network addresses, playlist and title sections, media information, receiver status, and system menus. 2. Buttons — For choosing options on the front display. 3. CD drive — For importing CDs into the system. 4. IR window — For capturing IR codes from third party devices from hand-held devices, such as remote controls using the Driver Wizard within Composer. The IR filter is designed to capture codes at or close to 40 kHz. 5.
10 7 1 8 9 10 2 11 12 13 14 3 15 4 16 5 6 17 Back View
1. Serial 1- 2—Standard RS-232 serial ports with hardware flow control available for controlling serial devices such as projectors or DVD changers (DB9 connector type). 2. Contacts 1- 6—6 pin Pluggable Terminal Block connectors for up to six dry contact closure, logic input connections, door contact sensors, or motion sensors. Maximum voltage is 24 volt, AC or DC. 3.
Specifications Model Numbers AVM-MC1-B Media Recognition Connections Audio Input: 3 analog, 1 digital Audio Output: 3 analog, 1 digital On-screen display output: S-VIDEO, Composite, VGA, Component Video sense loop: 4 inputs and 4 outputs AMG online CD/DVD recognition and media information service Audio Recording Formats MP3: 192kbps Audio Playback Formats Uncompressed WAV and PCM: 44.
Control4 Supported Devices For a list of Control4 supported devices and solutions, see “Products” at http:/www.control4.com. Typical devices include: Speaker Point™ Wireless Dimmer Mini Touch Screen Wireless Switch Touch Screen – 10.
14
CHAPTER 2 Install the System This chapter explains how to set up the Control4 home automation system and how to make hardware connections. The essential tasks include: 1. Plan the Equipment Layout 2. Power Up the Media Controller 3. Connect to the Network 4. Connect Devices 5.
Plan Your System Connections When setting up the Media Controller, you need to plan the physical connections. Then, at your preference you can either use Interviewer (within Composer) to guide you through setting up these connections, or you can set up the physical connections first and then run Interviewer to tell the system how things are physically connected. Complete the worksheet that follows to plan the system connections.
Connection Options and Typical Use Reserved for: Relays 1-6 — 6 pin Pluggable Terminal Block connectors for up to six normally closed or normally opened switchable connections such as blinds, fireplaces, or projector screens. 1. Each set contains a connection for Common (COM) Normally Closed (NC) or Normally Opened (NO). See “Connect to the Relay Ports” on page 27 for more information. 5.
Connection Options and Typical Use Reserved for: Ethernet — RJ-45 for a 10/100 BaseT Ethernet connection, using a shielded Ethernet cable. 1. USB — For supported USB memory devices (such as FAT32 formatted devices). One is on the back and one is on the front (behind the door). 1. 2. Modem — RJ-11 port (currently disabled). Disabled Digital Audio In — Optical connection (Toslink) for digital audio input. In: Digital Audio Out — Optical connection (Toslink) for digital audio output.
Determine Best Video Option If you have multiple connection options for a video component, you need to determine the best connection available. Table 2-2 provides a list of video connection options that are ranked according to quality of video performance. NOTE: There are four Video Out format options available on the Media Controller: VGA, Component, Composite, and S-VIDEO. Only the combination of S-Video and Composite can be used simultaneously. Table 2-2.
Power Up the Media Controller Plug the Media Controller power cord (provided) into an electrical outlet. Change Front Panel Information To view or change the system configuration: 1. On the front panel, press the SETUP button. The System Configuration screen plays: SYSTEM CONFIGURATION Host setme DHCP Client IP xx.xx.xx.xxx MSK 255.255.0.0 MAC 00:0F:FF:00:01:30 EDIT LCD CANC The menu options are: EDIT: Press this to change the network setup.
2. To edit the setup: 2a. Press the EDIT button. The Network Setup screen is displayed: NETWORK SETUP 1. Host Setup 2. DHCP Client 3. DHCP Server 4. Static IP CANC 2b. Rotate the dial to select a setup option, press the dial, then edit the settings as follows. Host Setup: Choose this option to enter a name server number for your DHCP Server. Turn and press the dial to set a number, then press OK.
DHCP Server: If the network does not have a device serving as the DHCP Server (such as a network gateway, switch, or router), then you may use the Media Controller as the DHCP server. The following screen with default settings is displayed. These will work for most Control4 system users. DHCP SERVER SETUP IP 10. 4. 4. 1 MSK 255. 255. 0. 0 GWY . . . BEG 10. 4. 4. 10 END 10. 4. 4. 100 OK CANC Static IP: Choose this option if you do not plan to use a DHCP solution.
Connect Devices You can use Interviewer within the Composer software on a PC to walk you through the connection physical process or you can set up the physical connections and then run Interviewer to tell the Control4 system the applicable connections. Connect all applicable devices to the Media Controller using one of the available connection methods, including those described in Table 2-1,See “Media Controller Connection Worksheet” on page 16..
2. Lower the opening’s latch until it locks the wire in place. 3. Repeat Steps 1-2 for all wires required for your device. NOTE: When you connect dry contact closure devices, such as door switches, connect the switch between +12V (Power) and SIG (Signal). See Contacts on Table 2-1. Configure and Connect to the Serial Ports The Media Controller provides four serial ports: Two that use standard male DB9 connector and two that are configurable as RS-232, RS-422, or RS-485 and provide hardware handshake.
Figure 2-1. Configure RS-232 for Configurable Port TX RTS DB9 Pin #2 RX CTS RX+ RX- TX- TX+ DB9 Pin #3 GND DB9 Pin #5 Figure 2-2. Configure RS-422 for Configurable Port TX RTS RX CTS RX+ RX- TX- TX+ GND RX- TX- TX+ GND CAT 3 or CAT 5 Figure 2-3.
TIP: If you are having trouble communicating with your device, make sure you have connected the transmit and receiver wires correctly. Ensure that the transmit line of the Media Controller is hooked to the receiver line of the device, and that the receiver line of the Media Controller is hooked to the transmit line. Also, ensure that ground is hooked to the ground. Connect to the Contact Ports The Media Controller provides six contact input ports.
Figure 2-6. Connect Contact for Self Powered Voltage Source Device 12V SIG Signal Input GND Return Path Connect to the Relay Ports The Media Controller provides one relay port as a subset of the pluggable terminal block provided. For most applications, attach one wire to the common terminal and the other to the normally open terminal. The relay switches close when the relay is activated. The Media Controller can support applications that require a normally closed contact.
Set Up IR Emitters Your system might contain third-party products that are controlled with IR commands (usually through remote controls). To provide a way for the Media Controller to control a device that only recognizes IR commands, complete the following setup. 1. Plug the 3.5 mm connector end of one of the 8 IR stick-on emitters provided into an IR Out port on the Media Controller. 2.
CHAPTER 3 Configure the System The Composer interface and wizards are designed to help you simplify the process to fully design, set up, and program a Control4 system. This chapter provides an introduction for how you can configure a Control4 system using the Composer software. The essential steps include: 1. Design and Setup the System 2. Set Up Media and Create Playlists 3. Program the Home Automation System For more detailed instructions and information, refer to the Composer online help.
Interviewer The Home Automation Interviewer (Interviewer) is a wizard that guides you through project configuration to set up the Control4 system. To launch Interviewer within Composer, from the File menu, click Run Interview. If it is your first time setting up a Control4 system or you want to ensure you think of all the setup options, use the Interviewer. As you answer questions while going through Interviewer, it configures a project.
connect to the controller hardware using a network address. These include devices like Control4 Dimmers, Switches, Keypads, Mini Touch Screens, System Remote Controls, and any other device that communicates ZigBee or TCP/IP. ` Audio/Video helps you define all the audio/video connections on the system. Audio/video connections include any device’s inputs and outputs that carry audio and/or video signals. ` Control helps you define all the control connections on the system.
Setting up with Composer, you have the flexibility to follow any set up path you desire. When you become familiar with the Control4 system, this is the quickest method for setting up a system. When designing, setting up, and making connections for a project, you will use the following Composer views: ` System Design View — Allows you to build the Project Tree and identify the devices on the system. ` Connection View — Allows you to identify all connections (Room, Control, AV, Network).
Program the Home Automation System The programming of the system includes programming interactions between events on the system and actions of other devices. You can program the behavior of devices, such as when the projector is turned on, the motorized screen comes down or when the door is opened, the lights turn on. To do programming on the system using the Composer, drag and drop events and actions for corresponding devices on to a programming script. For more information, see the Composer online help.
34
CHAPTER 4 Use Media Controller This chapter introduces interfaces and the common system tasks you can perform with the Media Controller. It contains the following information: ` ` ` Control Devices and Use the System Set up and Use External Storage Device Copy Music to the Digital Audio Player Control Devices and Use the System Once the Media Controller is set up, any navigation device associated with it (such as a Mini Touch Screen or a System Remote Control) is dynamically maintained.
device. See“Change Front Panel Information” on page 20 Control4 Fri, Apr 15 11:06:30 EJCT CLOSE SETUP for more information. On-Screen Navigator The Media Controller provides an on-screen system called Control4 On-Screen Navigator. Once a Control4 system is configured and the Media Controller is connected to a monitor or TV, you can press the button on the System Remote Control to access the OnScreen Navigator home screen.
The On-Screen Navigator Home screen displays the current location and provides access to other locations and all subsystems. ` Location (upper-left of screen): Displays current room name that provides access to all available rooms in the system when you click on it. ` Radio: Allows you to browse all radio stations available or just favorite stations. Play an AM, FM. XM, Sirius, Satellite or Cable DMX, and radio broadcast.
System Remote Control with LCD The Control4 System Remote Control that ships with this product includes an LCD for system information and feedback, in addition to a variety of buttons for accessing and controlling system components and media. The information that displays on the remote control LCD depends on the action you choose with the remote control buttons and/or with another system navigation device. For detailed information on the remote control, refer to the System Remote Control User Guide.
Copy Music to the Digital Audio Player Control4 audio systems make use of digital music files that have been added to the Media Controller digital audio player storage area and scanned into the system’s music database. NOTE: Control4 Composer software offers installers a variety of methods for adding AND scanning music. Refer to the Composer Professional or Media Edition online help. You can create digital backup versions of all your music CDs using the Media Controller.
NOTE: If the media database cannot identify the music CD, the title “Unknown” is displayed. You can edit the CD information using the Navigator user interfaces, Composer, or Composer Media Edition. For more information, see the Composer online help. 3. If the information in Match 1 is correct, press OK. If not, press NEXT until you find the correct match or the “Unknown” option, then press OK.
NOTE: If the message HARD DISK FULL displays, then click OK and then click CANC to stop the backup process. You will need to free up disk space on the Media Controller before you can continue backing up CDs. 6. If you are finished copying CDs, press the CLOSE button. 7. To free up disk space on the Media Controller, use the Composer software interface: 7a. Start Composer and open this Media Controller’s project. 7b. From the Media view, highlight Digital Audio. 7c.
1. On the Info option bar, choose Themes. The Themes screen is displayed, including a list of theme options. The default theme is Radiant Blue. 2. Choose a theme, then choose Load Theme. The screen will soon refresh with the theme you chose to load.
CHAPTER 5 Warranty and Regulatory Compliance This chapter provides the following information: ` Warranty ` Regulatory Compliance Warranty This section provides the following information: ` Limited Hardware Warranty ` Hardware Warranty Terms ` Software Agreement IMPORTANT! Warranty terms may be different with the country of purchase; contact your Authorized Control4 Sales and Service office for detailed product warranty information.
` Operation or storage outside the environmental specifications for the product ` In-transit damage and improper maintenance ` Physical damage to the unit, such as a cracked or broken screen or defect resulting from use of improper software, accessories, media, supplies, consumables, or such items not designed for use with the product. Hardware Warranty Terms READ THESE WARRANTY TERMS CAREFULLY BEFORE INSTALLING OR USING THE CONTROL4 SYSTEM OR COMPONENTS.
ANY WARRANTY OF MERCHANTABILITY AND ANY WARRANTY OF FITNESS FOR A PARTICULAR PURPOSE, except that for product purchased directly by a consumer, any implied warranties are limited in duration to the term of the express warranties provided above. Some states do not allow limitations on how long an implied warranty lasts, so the above limitation may not apply to you. 3.
4. DISCLAIMER OF INCIDENTAL AND CONSEQUENTIAL DAMAGES IN NO EVENT SHALL CONTROL4 BE LIABLE FOR ANY INCIDENTAL, SPECIAL, INDIRECT OR CONSEQUENTIAL DAMAGES, WHETHER RESULTING FROM NONDELIVERY OR FROM THE USE, MISUSE OR INABILITY TO USE THE PRODUCT OR FROM DEFECTS IN THE PRODUCT OR FROM CONTROL4'S OWN NEGLIGENCE. This exclusion applies even if the remedy provided by Control4 fails of its essential purpose.
Software Agreement The Control4 Media Controller contains pre-installed software. Please read the following Control4 terms before proceeding: NOTE: Carefully read this License Agreement and the Limited Warranty statement before operating the equipment. The rights to the software are licensed, not sold. Control4 or its licensors continue to own all intellectual property rights to the software, and you will be granted certain rights to use the software upon your acceptance of this license.
Regulatory Compliance North America This product complies with standards established by the following regulatory bodies: Federal Communications Commission (FCC) Industry Canada Underwriters Laboratories Inc. (UL) FCC FCC ID: R33AVMMC11 This device complies with Part 15 of the FCC Rules. Operation is subject to the following two conditions: (1) This device may not cause harmful interference, and (2) this device must accept any interference received, including interference that may cause undesired operation.
Industry Canada This Class B digital apparatus complies with Canada ICES-003. Cet appareil numérique de la classe B est conforme à la norme NMB003 du Canada. Underwriters Laboratories Inc. This product has been tested by UL and has been found to be in compliance with: UL 60065:2003: Standard for Audio, Video and Similar Electronic Apparatus — Safety Requirements CAN/CSA-C22.2 No.
CE Declaration of Conformity DeClaration OF CONFORMITY Control4 Corporation, 11734 S.