System User Guide Control4 Disclaimer Control4® makes no representations or warranties with respect to this publication, and specifically disclaims any express or implied warranties of merchantability or fitness for any particular purpose. Control4 reserves the right to make changes to any and all parts of this publication at any time, without any obligation to notify any person or entity of such changes. Trademarks Control4 and the Control4 logo are registered trademarks of Control4 Corporation.
System User Guide Contents 1. Welcome ..................................................................................................................................... 6 1.1 Purpose ............................................................................................................................... 6 1.2 Related Documents and Resources .................................................................................... 6 2. Introduction .....................................................
System User Guide 5.5 6. Add a New Custom Home Page ........................................................................................ 31 5.6 Lock the Navigator ............................................................................................................ 32 Navigation ................................................................................................................................. 35 6.1 Using the System Remote Controls .................................................
System User Guide 7. 8. 6.6.1 Supported Devices and System Requirements ............................................................ 149 6.6.2 MyHome Licensing ...................................................................................................... 150 6.6.3 Downloading and Configuring MyHome Apps .............................................................. 150 Glossary..........................................................................................................................
System User Guide 1. Welcome Welcome to the exciting world of home automation and Control4. The Control4® home-automation system lets you automate the most important tasks and comforts in your home according to your lifestyle, helping to make your living environment enjoyable for you, your family, and friends. As your Control4 dealer or installer adds new devices to your Control4 system, you may discover unlimited ways to automate the controlled devices in your home, and enhance daily living at home.
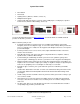
System User Guide Door Station Thermostat Lighting devices (dimmers, switches, and so on) Multiple-button keypads Various audio and video devices (receivers, tuners, DVD players, media players, Speaker Point™ devices, Wireless Music Bridge, and so on). See the Control4 Products pages at www.control4.com to view the full line of available Control4 products to automate your home.
System User Guide After installation, you’ll quickly be using your Control4 Navigators (touch screens, System Remote Control, MyHome apps on your smartphones or PC/Mac tablets, and on-screen Navigators) to automate your home. The Control4 system is room based; the Navigators can control one (1) or all rooms in the home. You can control the devices installed in that room. From a Navigator, select the room to control.
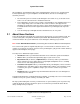
System User Guide 2.2 www.control4.com, my.control4.com, and MyControl4 www.control4.com is the Control4 corporate website everyone can visit to find information about Control4 products, access customer accounts, read or download documentation, access marketing materials, purchase apps from 4Store, access 4Sight, find a dealer, and much more. A my.control4.
System User Guide 3. My.Control4.Com and MyControl4 After your Control4® Dealer or installer has installed your system, dealers will usually use their my.control4.com (dealers) account to set up your free personal MyControl4 account and register your system. After the account is set up, you will need to log in to the account and accept the Terms of Use agreement for the first time.
System User Guide 4. Enter your customer’s system information (Step 2 – Enter Your Control4 System Information). To set up Remote Access so your dealer can view your system configuration, select Allow Remote Support. 5. Create your customer’s account name, email address, and password (Step 3 – Create you’re my.control4.com Consumer Account). Also add a promotional code if you have one. 6. Read and accept the Terms of Use. Check if you’d like to receive communications from Control4.
System User Guide 6. Click Yes. A 10-digit code is returned to you. Write this code down, or copy and paste it into a text editor. You’ll need this code for the next steps. 7. Go to a touch screen and tap More > Settings > Registration. 8. Enter the 10-digit code you received from the my.control4.com or MyControl4 account. 9. Select Activate (Step 3 on your Navigator, not applicable for MyHome iOS or Android devices). 10.
System User Guide See “Create an Account and Register Your System” mentioned earlier to find out how to set up 4Sight. See “Using Anywhere Access: Web” or “Using Anywhere Access: Mobile” to learn how to use Anywhere Access. 3.4 Enable Remote Access on Your Devices Use the Control4 Navigators to enable remote access. Note: Remote access is not supported on MyHome apps for iPad, iPhone, iPod Touch, or Android devices. For information about MyHome, see “Using MyHome Apps” later in this guide.
System User Guide (2) If your primary controller is registered on MyControl4, the system is accessible through remote access (without a 4Sight subscription) after a request by the installer or Control4 Technical Support is made to access the system on the account AND the system user (installer or home/business owner) instructs the controller to 'Check In.' The owner can do this from the Navigator’s Remote Access page. 3.
System User Guide 4. Review the list of links at the top of the page adjacent to Account Administration. Account Profile—Lists your account information, owner's profile (editable), dealer (editable), and the check box 'Allow Remote Access.' Check this box if you want to allow your dealer to access your account remotely. My Profile—Lets you update your profile: user information, passwords, and permissions. Click Save to save your changes.
System User Guide 4Store Home page: 4.1 4Store Prerequisites 1. Ensure that your Control4 dealer has added and configured the supported devices (touch screens, MyHome apps, and on-screen Navigators) to use with 4Store in your Control4 system. 2. Ensure that your touch screens, MyHomePC, and on-screen Navigators are working correctly. 3. Create a 4Store account and set up an account to purchase and download apps. Note: Except for MyHomePC, access to 4Store is not supported on devices that run MyHome apps.
System User Guide Update purchased apps Check your account Add shortcuts to your apps Store a copy of the app in another category (for example, Lighting, Watch, Listen, and so on.) Lock or unlock the ability to purchase apps Note: You can purchase apps directly on your Navigators (touch screens, MyHomePC, or on-screen Navigators). This feature is not supported on Navigators released prior to OS 2.0. At 4Store.com, you can also: Log in and log out of your account.
System User Guide My Apps lets you View the apps on your My Apps page. Configure another app, for example, Facebook, to use on your Navigators. Click Configure, and then add the login and password information for that app (if available). View the app's description in the Description column. Add a Review. Click Review next to the app and enter a rating or review comments. Delete the app. Click Delete next to the app. Contact the developer.
System User Guide 5. When approved, you will receive an acknowledgement via an email message with instructions about logging in, setting up your password, and other information. 6. To request a new password, see “Request a New 4Store Password.” 7. To set up purchasing, see “Set Up Purchasing.” 8. To log in to your new account, view app details, and purchase apps, see “Access 4Store.” 9. Download what you've purchased.
System User Guide 4.5 Set Up 4Store Purchasing Use your Control4 4Store account to purchase apps for your supported Navigators. To set up your billing method: 1. Log in to 4Store.com. 2. At the Featured Apps page, click Setup Purchasing. 3. Click the first here link to set up your credit card billing information. 4. Fill out the billing form, including Name, Address, and credit card information. Note: This feature is not supported in all countries. 5. Read and accept the agreement. 6. Click Save. 7.
System User Guide View—View your personal information or history. Edit —Choose one of the following: Account—Click or select to change your email address, password, or locale. Personal Information—Click or select to change your name, phone, address, city, state, and zip. 4. After you’ve edited your data, click or select Save. To browse and buy 4Store apps: 1. At any page in the Control4 4Store under 4Store click Browse Apps (left navigation list). 2. Click the app's link. 3.
System User Guide 2. Create a Custom Home page for your Navigators. 3. Use Composer Home Edition (HE) to change simple system configurations (sold separately) or add media. For details talk to your dealer, see the “Composer HE Overview” in this guide, or the System Quick Start Guide. 4. Use Composer Media Edition (ME) to add media to your Control4 system. For details, talk to your dealer or see “Composer ME” in the System Quick Start Guide. 5.
System User Guide List Navigator (System Remote Control SR-250 window). This Navigator type displays your options in a 'list' format (see the yellow text in the photo below). Use the four (4) directional arrow buttons (shown in a circle) and the Select button to choose an item in the list. The list appears at the top of the remote in yellow text (shown below). You use this remote with your on-screen Navigator (on your TV).
System User Guide See the list Navigator next. System Remote Control SR-250B Multiple--button keypads. You can program these types of devices (shown below) to perform automated tasks in your system. You can either have your installer program these buttons for you, or you can use Composer HE (sold separately) to program the buttons yourself. The keypads that are available with the Next-Generation Lighting devices (OS 2.5.
System User Guide 5.2 Programmable Buttons Work with your Control4 dealer to program buttons on your Navigators. These programmable buttons are used most widely to control your audio and video devices (TV, DVD, disc changer, tuner, and so on). You can program specific buttons to perform individual or grouped actions; the examples below show the colored buttons you or your installer can program.
System User Guide 3. The colored buttons are device specific. You can have your installer assign two (2) different programs per button if the devices are different. Example: Assign the red button to change the channel on the TV when you're using your TV, and have the same button assigned to Skip Forward when you're using your DVD player. 4. You can assign the */. or #/- buttons to a specific action too. These buttons are at the bottom of the remote. 5.
System User Guide Use the Intercom agent to set up devices that use audio and video intercom. Create your own Wakeup scenes. Create intercom groups (new with OS 2.2.
System User Guide Ensure that your devices and Navigators have been added and identified to the Control4 system. Your dealer or installer can help you. To create a Custom Home page: Use the Custom Home Template wizard to create your customized page. 1. From the Navigator Home page, select More. 2. Select Settings > Custom Home. Notes: (1) The following screen appears on a touch screen or MyHomePC. A slightly different format appears on the on-screen Navigator.
System User Guide Title—The Navigator selects the title based on where you are. To keep this title, don't do anything. To change the title, select it. Use the virtual keyboard (see below) to type the name of the icon to add, and then select Done. Note: The name is limited to eight (8) to 10 characters, depending on the length of the character (for example, an 'M' uses more space). Otherwise, the text does not display correctly.
System User Guide 4. Select Save. 5. Select Save again. Note: You cannot delete a Custom Home page. If you don't want to use it, don't select it to display. You can always select the Control4 Home page, and then select Never for the timeout if you don't want to use your Custom Home page. Tip: To know when you’re in your Custom Home page versus the default Control4 Home page, you‘ll see a red Control4 logo in the left corner.
System User Guide Grid style: With Custom Home pages, you can: customize the elements on your Home page in a Grid or Circle of Power view, add apps to your pages that you've developed (requires the App SDK, sold separately) or you've purchased from the Control4 4Store, or add shortcuts (Favorites) to your pages. See “Add a New Custom Home page” next for details. 5.
System User Guide 3. 4. 5. 6. Under Default View, select the down arrow, and then select Favorite. With Favorites showing in the Default View, select Edit Selection below Favorite. In your Favorites folder, select the buttons that you want to appear on your page. Press Select. See “Custom Home Page Templates” for more information. 5.
System User Guide More (Unlocked or Locked)—Locks someone from using the ‘More’ pages until a PIN code is entered. Examples: The following examples show what the pages look like on a Navigator when the settings have been changed in the Access agent (Composer Pro or Composer HE). Locked Favorites: When you try to tap this icon, it doesn't go to Favorites or anywhere else. To unlock it, enter the PIN code: This PIN code appears. Enter the code that was set up by your dealer. Copyright © 2014 Control4.
System User Guide Unlocked after the PIN code is entered: The Favorites page appears after the PIN code is entered. When Favorites is set to Hidden, the star icon doesn't appear, so you can't choose it: This PIN code is shown with exposed numbers when entered on the keypad (Disabled'Hide Digits'): If your dealer selects Disabled under Hide Digits in Composer, the following PIN code appears as numbers. Copyright © 2014 Control4. All Rights Reserved.
System User Guide Check with your dealer to set up access or you can change your own areas in the Composer HE Agents view. See the Composer HE User Guide for details. 6. Navigation Use the Navigators (touch screens, MyHome apps, on-screen, and so on) to move about in the Control4 system. As you navigate around the system, you can view the status of your devices and control them from your Navigators. 6.
System User Guide To change your settings: 1. Pick up the remote to wake it, and press the LIST button. 2. In the remote's List Navigator window, scroll down to Info and press the right arrow. 3. Scroll down to Config, and then press the right arrow. 4. Select one of the following options for your Navigator: Display Brightness—Indicates how bright the List Navigator display is. Keypad Brightness—Indicates how bright the buttons are. Motion Detect—Wakes up the remote when it's moved.
System User Guide (2) Scroll to Lighting Scenes, press the right and down arrows to select your scene, and then press Select. (3) New with OS 2.3.0 or later, you can create or edit lighting scenes or ramp and fade lighting scenes (OS 2.5.0 or later) yourself using a touch screen or MyHome app. See “Lights” for details. To use the on-screen Navigator from the System Remote Control: 1. On the remote, press 4 to turn on the TV and view the Control4 home page in the on-screen Navigator. 2.
System User Guide 6.1.4 Watch Button Press the Watch button to toggle through the last three (3) video sources you accessed (for example, Satellite, DVD, Wii), or to view the video sources available. This is a quick way to get to your TV channels or movies without using the red 4 button. Note: The TV and Movies pages are located in Watch. Tip: If you prefer, you can use the Watch button on your touch screens, MyHome apps, or on-screen Navigator to get to the same place.
System User Guide http://www.control4.com/products/interfaces/C4-SR250RSK-B or http://www.control4.com/products/interfaces/C4-SR150RSK-B. 6.2 Using the Touch Screens, MyHome Apps, and On-Screen Navigators Use the Control4 touch screens, MyHome apps, and/or on-screen Navigators to view and manage Control4 system devices. The Navigator below shows a touch screen's Home page. For the on-screen Navigator, simply press a button on the System Remote Control.
System User Guide Control motors and sensors. Change the time from a 12-hour format to a 24-hour format on the Home page, Thermostat pages, Motors and Sensors, Wakeups, and Screen Saver. Change other devices. Change other settings. Create Favorites. View and purchase apps from the Control4 4Store (only applies to touch screens, MyHomePC, and on-screen). Use the Intercom system. An intercom icon appears at the top of the page for access on supported Navigators.
System User Guide Control4 Home Page Radio Receiver Edit Favorites Internet Music Custom Home Playlists Screen Saver Now Playing Wallpaper Disc Changer Remote Access Zones Registration TuneIn (OS 2.4.0 or later) Service Connection Wireless Music Bridge (OS 2.5.0 or later) Backlight Intercom 6.2.
System User Guide Control4 Home Page: Notes: (1) If you have Intercom capability, the Intercom icon appears at the top of this screen. (2) The screen above also shows custom buttons (Lights, Blinds, Security, and so on). See the Composer HE User Guide for details). 6.2.2 Secondary and Tertiary Pages The Control4 system Navigator secondary and tertiary screens (screens that appear after the Home page) may or may not contain the basic elements listed in the example below.
System User Guide Typically, this is how the subsequent screens are presented (depending on what you’re doing). Top Row Left side o 4 button o Back button o Intercom button (if supported) o Favorites button (star, if set up) Middle.
System User Guide appears on a touch screen or MyHome app. A slightly different format appears on the on-screen Navigator. To turn one room off (when playing music in more than one zone) or all rooms off, see “Media Zones.” 6.2.4 Change Rooms Use the Control4 system pages on your Navigators to change rooms. You can change rooms when you need to adjust the devices in that room, for example, set a Wakeup scene, add music zones, turn lights off, change lighting scenes, and so on. To change rooms: 1.
System User Guide 6.2.5 Adjusting the Time and Temperature Use the Control4 Home page Thermostat icon or outdoor temperature and time displays to adjust the indoor temperature, view the outdoor temperature, and view the current time. Your dealer can adjust the time format to 12-hour or 24-hour as desired. Indoor temperature—The temperature is based on the Control4 Wireless Thermostat. See your Control4 dealer or installer for details.
System User Guide To use the device controls: 1. From the Navigator's Home page or on the System Remote Control, select Watch or Listen. 2. Select the device to control. 3. View and select the device control buttons on the Navigator as needed. 6.2.7 List View If you have a long list of items displayed on a Navigator screen in a grid view, you can use the Control4 system list view on your touch screens, MyHome apps, or on-screen Navigator (see below) to view the items in a list format instead.
System User Guide To display the list view, select the icon shown below: Tip: The grid view in the on-screen Navigator changes to a list view if you press Guide on the System Remote Control. You can toggle Guide back and forth from the list to grid views. 6.2.
System User Guide To display the grid view, select the Grid icon as shown below: Tip: The grid view in the on-screen Navigator changes to a list view if you press Guide on the System Remote Control. You can toggle Guide back and forth from the list to the grid views. 6.2.9 Sort View If several items appear on your Navigator, you can use the Control4 system Sort icon on your touch screens or MyHome apps to sort your items numerically or alphabetically.
System User Guide Alphanumeric Sort view results: Numeric Sort view results: 6.2.10 Breadcrumbs Use the Control4 touch screens, MyHome apps, or on-screen Navigator to view and use breadcrumbs. Breadcrumbs are an easily-identifiable navigation path so you always know where you're at. Each breadcrumb item is a link; just select the link to go back one or more pages, and the Navigator will get you there quickly. Example: You're at the All Movies screen, and you want to get back to Movies.
System User Guide 6.2.11 Media Dashboard From the touch screen or MyHome app, use the Control4 system media dashboard (a quick and easy way to manage movies/videos or listen to music) to control your audio, video and other devices. The most common buttons that you're accustomed to using on your audio or video devices appear on the dashboard (Play, Pause, Volume, and so on). Note: The media dashboard displays in an on-screen Navigator, but it is used to view what's currently playing only.
System User Guide 6.2.12 Media Zones Use the Control4 system Zones icon on your Navigators to set up and manage media zones (also known as zones). Zones let you add rooms that have audio devices in them, for example, Speaker Point devices located in several rooms or a Multi-Channel Amplifier wired to several rooms. Example: You can add a room to a zone where music is already playing or play separate music in each zone. Note: Videos or movies cannot be used with media zones, only audio.
System User Guide 3. To add a room to a zone, in the Navigator go to the source Example: Listen > My Music > My Artists > "Weird Al" Yankovic > Poodle Hat. 4. Select the Media Zones (touch screens or MyHome apps only) or Listen > Zones icons, and then select Add Rooms. The Add Rooms screen displays the rooms and the audio or video devices attached to those rooms. (The appearance may vary among Navigators. The screen below appears on touch screens.) 5.
System User Guide To remove a room from a zone: From Media Zones or Listen > Zones, select the Power Off icon next to the desired room. To stop playing music in a zone: Select the Off button from the media dashboard or the Power Off icon in the Zones page. This powers off the CD player or stops playing the song; the media dashboard disappears. To turn off all zones: From your Zones page, next to All Zones select the Power Off icon. Tip: You can also have your dealer create a media scene for you.
System User Guide For simple control of devices (for example, lights, contacts/relays, movie screen, and so on) in a room that requires a combination of shortcuts and macros. To execute an IR command that is not part of a device control using the Macros agent (you or your dealer or installer can create it in Composer). To add a shortcut to your Custom Home page. Add customized pages on your touch screens, MyHome app, or on-screen Navigators. To program events.
System User Guide Action——(Optional) Select the action (macro) to use (if one was created as a Macros agent in Composer Pro or Composer HE) with programmed events. Your dealer can create a macro for you. Go To—Verify that the breadcrumb goes to the correct location. If unchecked, just that action runs. If checked, you will go to that favorite and run the action associated with it.
System User Guide To use macros with favorites: Note: Your dealer or installer must add a Macros agent in Composer Pro first. 1. On the touch screen, MyHomePC, or on-screen Navigator home page, create the desired favorite. 2. Select the Star button, or select More > Settings > Edit Favorites. 3. Create the favorite. 4. In the Macros drop-down menu, select the macro to use. 5. Select Save. To delete a favorite or folder: 1. Select More > Settings > Edit Favorites to view the list of favorites. 2.
System User Guide 6.2.16 Watch Use the Control4 system Watch button from the touch screens, MyHome apps, or on-screen Navigator to watch TV, channels, movies or videos from the video devices attached to your Control4 system. Note: Use the Control4 system Watch or Listen icons on your touch screen or on-screen Navigator to change how you listen to music or watch videos and movies through your Sony STR receiver plus access other Sony services. See “Sony STR Receivers” in this guide for details.
System User Guide If you select a device that uses a remote, for example, a media player, VCR, DVD, cable or satellite, a device controls screen appears as a virtual representation of your remote. You can select the movie or video from your device controls screen. If you select a type, for example, Movies or Channels, a list appears from which you can select a movie or station to watch. Tip: This is the most popular way to watch your channels or movies. 2.
System User Guide 4. To stop watching your movie or channel, use these options: System Remote Control—To stop watching anything in the room, press Room Off. Device controls/media dashboard—To stop watching what is currently being viewed, press the Power button (if applicable). 6.2.16.
System User Guide 2. Choose a movie from the following categories. The movies are listed with cover art if available: All Movies—Select to view all movies scanned. Genres—Select to view movies by genre (for example, Romance, Comedy, and so on). Ratings—Select a rating (G, PG, R, PG-13, and so on) to view the list of movies with that rating. Directors—Select a movie to view who directed it. Actors—Select a movie to view its lead and supporting actors. 3.
System User Guide Title—Use the on-screen keyboard to type the name of the movie to change, or select the search icon. Genre—Use the keyboard to change the genre. Rating—Use the keyboard to change the rating. Location—Use the keyboard to change where the movie originated. 5. Select Done when you’re finished. 6. Select Save. To delete a movie: 1. You can delete movies by selecting All Movies. 2. Select the movie to delete. 3. Select Edit Info. 4. Select Remove. 5.
System User Guide To play a video from your VCR: 1. On the Navigator's Home page, select Watch > VCR. 2. You can choose your videos using: Device controls—Use the buttons to change videos, adjust the volume, play, stop, and so on. Select what you want to view, and then select the Play button on the media dashboard. Videos list—Select the video to watch (list or grid).
System User Guide 6.2.16.3 DVDs or Disc Changers Use the Control4 system Watch > DVDs or Watch > Disc Changer icon on your Navigators to watch movies or videos from your DVD players or disc changers. You can edit DVD information also. Tip: Control4 recommends that you use the Movies icon to get to your favorite videos or movies quickly (rather than using a DVD player or disc changer icons). You can add your movies from several devices to the Movies list for easier access.
System User Guide 3. Select each box, and type the information as needed. Title—Use the on-screen keyboard (see below) to type the name of the movie to add, or select to browse by title. Select Done when you’re finished. Genre—Use the on-screen keyboard to add a genre. Rating —Use the on-screen keyboard to add the rating. Location—When you select this box, the Add DVD box appears. Choose the DVD from the list. The DVD slot number appears here. 4. Select Save.
System User Guide Device controls—Use the buttons to select the slot to play, play, stop, pause, change movies, adjust the volume, and so on. Movies list—Select All Movies (list or grid), Genres, Ratings, Directors, or Actors. Note: If you choose this option, your movies must be scanned into the system first, and then you can select Watch > Movies rather than Watch > DVD. Tip: Select AZ (movie name) or 09 (movie list) buttons to display the list in a particular sort order.
System User Guide Device controls/media dashboard—To stop watching what is currently playing, press the Power button (if applicable). 6.2.16.4 Cable TV or Satellite Use the Control4 system Watch > Cable TV or Watch > Satellite icon on your Navigators to watch channels from your cable TV or satellite devices. Tip: Control4 recommends that you use the Channels icon to get to your favorite channels quickly (rather than using the cable TV or satellite icons).
System User Guide You can set up the channels that you want to see in the Navigators using the Media view in Composer. To watch the television: On the Navigator's Home page, select either Watch > Television or Watch > Channels. Television—Use the buttons on the device controls to change channels, adjust the volume, play, stop, pause, and so on. The following figure shows the display on a touch screen.
System User Guide 6.2.16.6 Channels Use the Control4 system Watch > Channels icons on your Navigators to watch your television's local, cable or satellite channels or any channels you or your dealer add to your project (using Composer ME or Composer HE). You can watch all TV stations from one view regardless of the source (Satellite, Cable TV, Plasma Television, and so on). Or you can choose from Channels, Genres, and Guides on your remote, or Favorites (not supported on MyHome apps except for MyHomePC).
System User Guide To add or remove channels: Ask your installer to help you add or remove channels that you want to show in the Navigator, or remove the channels in Composer HE or Composer ME. To stop watching a station, use these options: System Remote Control—To stop watching anything in the room, press Room Off. Device controls/media dashboard—To stop watching what is currently being viewed, press the Power button (if applicable). 6.2.
System User Guide To listen to music or the radio: 1. On your touch screens, MyHome app, or on-screen Navigator Home page, select Listen. Note: The following page may vary between the touch screen, MyHome app, and on-screen Navigator. The following figure shows the display on a touch screen. 2. Select the source to listen to, for example, AM Radio. When you select the station, it appears in the media dashboard. The following figure shows the display on a touch screen. 3.
System User Guide Playlist—Select Stop. System Remote Control—Press and release Room Off to turn off the room, or press and hold Source Off to turn off the source. Media Dashboard—To stop listening to music, select the Power button.
System User Guide To play songs in My Music: First, scan your audio files from a network drive, hard drive, or from CDs. You’ll need Composer ME or Composer HE to do that. Your installer can create a valid audio path for you if desired. After the scan, you can play your songs and albums. To access My Music: 1. From your Navigator, select the Listen > My Music icon. The following figure shows the display on a touch screen. 2.
System User Guide Tip: Use the Media Zones (touch screens or MyHome apps only) or the Listen > Zones icons to add rooms to music zones. See “Media Zones” for details. 6.2.17.3 Digital Audio (My Music) Use the Control4 system Listen > My Music icon on your Navigators to populate your list and listen to your stored audio music collections (digital music, CD, Internet music, USB drive, and so on), music from audio zones, or audio-only devices (iPod, CD player, or CD changer).
System User Guide 3. Select your audio stream using one of these categories to play now or add to your queue: My Artists—From the list, select the artist, and press the > arrow. Select the album, and press the > arrow. My Albums—From the list, select the album, and press the > arrow. Select the song, and press the > arrow. My Genres—From the list, select the genre, and press the > arrow. Select the artist, and press the > arrow. Select the album, and press the > arrow.
System User Guide To view what's currently playing by genre, artist, and so on: When you select a song or album, the following information displays: Song title Album title Artist Next song to play To add music to a zone: 1. Select Zones. See “Media Zones.” 2. Add a room to the music. 6.2.17.
System User Guide Queue—Press Queue to add a song to the queue. Guide—Press Guide on the System Remote Control for (1) queue options - Shuffle (Off), Repeat (On); press OK. (2) View options for grid or list. Shuffle/Repeat—These buttons have three (3) states. Shuffle—Off, Songs (shuffles songs only), Albums (shuffles albums; keeps songs in order within the album). You can shuffle one, all, or no songs.
System User Guide To play iPod movies: 1. From your Navigator's Home page, select Watch > iPod. 2. Locate the movie to watch, and select to play. To stop playing iPod movies: 1. From your Navigator's Home page, select Watch > iPod. 2. Select the Stop button on your iPod touch or iPhone. 6.2.17.5.3 iPort To use iPort: 1. From your Navigator's Home page, select Watch or Listen. 2. Select the songs, albums, movies, etc. to watch or listen to. 3. Select the Play button.
System User Guide To listen to a radio station, use the Stations icon: 1. From your Navigator's Home page, select Listen. 2. Select Stations. Note that the station name, location, call number, source, and station type appear. Note: The following screen may vary on a touch screen, MyHome app, and on-screen Navigator. The following figure shows the display on a touch screen. 3.
System User Guide To listen to an XM radio station, use the TunerXM icon: From your Navigator's Home page, select Listen > TunerXM or Listen > Stations > Source > XM Radio. If you choose Listen > TunerXM, the device controls and media dashboard appear. Use the numbers and the Enter, Scan, or Forward/Back buttons to select your radio station. If you choose Stations > Source > XM Radio, select your station. The current station appears in the media dashboard.
System User Guide Scan (AM, FM only) —Select the left or right arrow to advance quickly through the stations, forward or back (if applicable). Tune (AM, FM, Tuner) —Select the left or right arrow to move through the stations. Programmable buttons—Your installer can program these colored buttons for you. 4. Listen > Stations > Sources > AM Radio or FM Radio. Select the station to listen to, or select the genre and then the station. To add a room to the radio stations: See “Media Zones.
System User Guide To listen to a CD from the CD changer: 1. Select Listen > Browse CDs. 2. Choose a CD from the following categories. The CDs are listed with cover art: Albums—Select an album to view from all albums scanned, and then select Play Now or the Play button. Genres—Select to view CDs by genre (for example, Rock and Roll, Country, and so on). Artists—Select a CD by artist. 3. Select the Play button, or press Play below the cover art. To use the media dashboard: 1. Select Listen. 2.
System User Guide 4. Use the media dashboard to play, pause, skip forward, volume, power off, and so on. To stop listening to a CD, see “Listen.” To edit a CD's properties: 1. You can edit your album’s information by selecting Listen > Browse CDs > Albums. 2. Select the album. 3. Select Details. The Details page lists the album name, genre, record label, artists, year, location, and description. 4. Select the Edit Info link on that page. 5. On the Edit Info page, change the options as needed.
System User Guide Check with your installer to ensure that the correct devices and agents are set up to Control4 system to listen to Internet music, and that the stations you want to listen to appear in the Navigators. To listen to Internet music: 1. From your Navigator’s Home page, select Listen > Stations. The following figure shows the display on a touch screen. 2. Select from one of these categories: All Stations—Select from the list of stations. Use the scrollbar if needed.
System User Guide To stop listening to Internet music, see “Listen.” Tips: 1. Internet radio streams are sometimes unreliable. They can break up songs or cut out completely due to slow Internet traffic and other problems. If this happens to you, choose another station and come back to it later. 2. If the Internet radio station is not working, try the same station outside the Control4 system, for example, a media player, to see if it’s the station or the Control4 system that’s causing the problem. 3.
System User Guide Note: If you’re using the new Sony STR receiver, you can use the receiver’s interface, Listen > Network. See “Sony STR Receiver” below. Check with your dealer for details. To receive output from the receiver: 1. From your Navigator's Home page, select Listen > Receiver. 2. The next screen displays the surround-sound modes. Select the mode you want to use. Note: The receiver screen may vary on a touch screen, MyHome app, and on-screen Navigator.
System User Guide Watch Video Media—Use to stream videos from DLNA on the network, play from a USB, use ISO or BOB formats, and use as a media player. Photo Media—Use to display photos from a USB attached to the receiver, use for photo storage, or display slideshows. Music Media—Sony's 'My Music.' Can display songs from USB. Internet Video—Access video services, for example, Netflix, Hulu, VooDoo, Amazon, and other online content.
System User Guide 2. Select My Queue. Notice that your selections appear there. The following figures show the display on a touch screen. 3. 4. 5. 6. 7. In My Queue, select the songs or albums to add. Select Save Playlist. Select the playlist type: Control4 Playlist or Playlist. When the on-screen keyboard appears, type the playlist name, and select Done. Select My Playlists to verify the songs or albums in your new playlist. To select songs: 1.
System User Guide To add an Internet playlist to My Music: 1. Log in to the Internet music service. 2. Select the song or album to add to your Control4 playlist. 3. Select to play the song. 4. Select My Queue and Save Playlist. 5. Select Playlist. 6. When the on-screen keyboard appears, type the name of the playlist, and select Done. 7. Return to the Control4 Home page, and select My Music. 8. Select My Playlists. 9. Choose the playlist that you just created.
System User Guide 2. Check the current song, album, and artist along with the cover art (if it exists). 3. Select another song or album to play from the list of buttons on the left side (the song can be either from your digital audio collection or from the Internet music service, depending on what's playing). See “Digital Audio (My Music)” for details. 4. To stop what’s currently playing, see “Listen.” 6.2.
System User Guide To view or activate lights: From the Navigator’s Home page, select Lighting. Note: The following screen may vary on different Navigator types. The following figure shows the display on a touch screen. You can view and change lights by Lights (see screen below), Scenes (Lighting Scenes), or All (Lights and Lighting Scenes). 6.2.18.1 Lights (House, Floor, Rooms) 1. Select the left pane (Kitchen in this example) to display All Lights, floors, and rooms.
System User Guide 6.2.18.2 Scenes (Lighting Scenes) Use the Control4 system Navigators and select Scenes to view, create, and edit lighting moods for your home, for example, an indoor or outdoor 'Party' scene for entertaining, an 'All Lights Off' scene to execute at bedtime, or a 'Welcome Home' scene to open your garage and turn the walkway lights on. Your installer can help you figure out the best lighting scenes for your lifestyle.
System User Guide 3. Click the pencil icon in the upper-right corner to open ‘edit’ mode. 4. Select Create New. 5. Select the rooms to add to the scene, and then select Next. 6. Select the lights to add to the scene, and then select Next. 7. Change the light levels, and then select Next or select Add Lights to add more lights or select Learn to learn the current light levels of lights that are already on or off. 8. Select Next. 9. Use the on-screen keyboard to name the new scene, and then select Done.
System User Guide To remove a lighting scene: Your dealer or installer can remove a lighting scene for you, or you can use Composer HE to delete it yourself. When you refresh the Navigator, the lighting scene no longer appears. To ramp or fade a lighting scene (OS 2.5.0 or later): 1. In Lighting, select Scenes or All. 2. Select the scene. 3. Use the up or down arrows to the right of the screen to ramp or fade a lighting scene.
System User Guide Notes: (1) The following screen may vary slightly on the various Navigator types. (2) The Comfort icons display as 120 or 125 degrees until the thermostat is added and configured in the system. 6.2.19.1 Cooling and Heating Use the Control4 system Comfort icon on your Navigators’ home page to change your heating or cooling settings.
System User Guide To adjust the Thermostat settings: 1. If you have several Wireless Thermostats in your home, select the thermostat and its settings. Note: You can adjust several thermostats from the same Navigator without changing rooms. 2. Choose one of the following, as desired: Cool—Select to set the air conditioning. Hold—Select Until Next Event, Permanent, 2 Hours, or Vacation. The selection appears in the Thermostat status screen. Select Remove Hold to stop the hold.
System User Guide °F/°C—Select to change from Fahrenheit to Celsius. Note: When changing thermostat modes, there is an eight (8) minute delay before the next mode starts. 3. (Optional) To set a regular thermostat schedule, see “Thermostat Scheduling.” 6.2.19.2 Cooling and Heating Features Use the Control4 system Comfort icon on your Navigators to change your heating or cooling settings. 6.2.19.2.1 Features Turn Heating or Cooling on or off. Adjust Heating or Cooling temperatures.
System User Guide 3. Adjust the Wireless Thermostat schedule using the options below. Options Day—Select the day of the week to schedule your heating and cooling. If you want to schedule the same time and set points for several days, choose those days. Example: You may want to schedule the same heating or cooling set points for specific times from Monday through Friday, but not the weekends: select Weekdays (Monday, Tuesday, Wednesday, Thursday, and Friday).
System User Guide Day—Select a day or days of the week to adjust. Time and Temperature 1. After you select the day to set the heating or cooling set point, select the scene: Wake, Away, Return, Sleep, Custom 1, Custom 2, and so on. 2. Press Cool or Heat. 3. Select Enable to set this schedule for cooling or heating, or select Disable to disregard it. 4.
System User Guide Custom Settings 1. At the thermostat’s main page, select Program. 2. Select the days, times, and temperatures. Use the scrollbar to select Custom 1 or Custom 2 at the bottom of the list for custom settings. 3. Select Enable. 4. Select Save. Vacation Mode 1. At the thermostat’s main page, select Hold Off. 2. Select Vacation. 3. Use the up and down arrows to adjust the temperature for heat or cool. 4. Select Vacation Hold. 5. To remove Vacation Hold, select Remove Hold.
System User Guide 6.2.20 Security Use the Control4 system Security icon on your Navigators’ Home page to view or change your security settings. Note: A security device compatible with Control4 needs to be installed before this icon appears. Select Security from the Home page. Notes: (1) The following page appears on a touch screen or a MyHome app. A slightly different format appears on the on-screen Navigator. (2) The Door Station does not appear under Security.
System User Guide Note: The following properties appear unless only one (1) camera is installed. Grid View—Select to show the camera views in the grid format. Next—Select to go to the next camera view. Prev—Select to return to the previous camera view. Full Screen—Select to zoom the camera view to full screen. Select Close (X) to close the window. Presets (live feed cameras only)—Select to view the camera's properties and add presets. Use the multi-directional arrow buttons to move the camera view around.
System User Guide 3. Enter your code or use the other security buttons. Note: The device controls are unique to each Security System. Examples of common security system controls: System Status Disarm Day Night Vacation Away Keypad Stay Police Panic Aux/Medical Panic Fire Panic Clear Trouble Text Refer to your manufacturer's documentation for details about how to use the control buttons. 6.2.
System User Guide Various icons display on the next page, depending on what is installed and available in your system. 6.2.21.1 Blinds and Drapes Use the Control4 system More > Blinds icon on the Navigators to adjust Control4-recommended third-party motorized blinds or drapes. Ensure that your installer has added and configured the motorized blinds or drapes in your Control4 system. To control and use blinds and drapes: 1. From the Navigator's Control4 Home page, select More. 2.
System User Guide Change rooms—Use the left or right double arrows (<< or >>) to collapse or expand the floors and rooms tree on the left side of the screen. Select the blinds or drapes—Use the scrollbar to move through your blinds and drapes by All Blinds or by room. Next to the Blinds in item, select the icon to open, stop, or close the blinds or drapes. 6.2.21.2 Intercom Use the Control4 system More > Intercom or Intercom icon on your touch screen to use intercom.
System User Guide The following sections show you how to use Intercom. Refer to the section related to these tasks.
System User Guide To tell if a person’s touch screen is available: 1. On the touch screen, tap the Intercom icon. 2. On the Intercom page, view the buttons for all of the supported touch screens in the intercom system. Red—If a touch screen is busy, ‘Do Not Disturb’ is on at the recipient’s touch screen, and a horizontal red bar appears for that room’s button with a DND symbol on all other touch screens. If you tap the rooms’ button on the caller’s screen, a ‘Do Not Disturb’ message appears. Tap Close.
System User Guide To respond to a one-to-one call (Room 2 to Room 1): From Touch Screen 2 (Room 2 depending on which option you’ve set) you can respond accordingly: 1. If Auto Answer is off, you’ll receive an ‘Accept Call from Room x’ page. Tap Answer to answer the call, or tap Ignore if you don’t want to answer the call. 2. Speak to the person who called you. Tap Start Video to view a video session with the caller unless Send Video is on (see the note below).
System User Guide (4) By default, the Door Station broadcasts to the group All and to all touch screens inside the structure until one of the touch screens answers. At that time, all other touch screens disconnect their communication with the Door Station. To broadcast (caller on Touch Screen 1 to all other touch screens and send a broadcast): 1. On the touch screen, tap the Intercom icon. 2. On the caller’s intercom page (such as John’s Room), tap All. 3.
System User Guide 5. 6. 7. 8. Example: If the recipient turns on ‘Do Not Disturb’ at Touch Screen 2 (Gary's Room), and Touch Screen 1 sends a broadcast to 'Gary's Room,’ the touch screen in Gary’s Room will not get the message or video. Further, Touch Screen 1 receives a ‘Do Not Disturb’ or ‘Station Busy’ message. See “Intercom Settings” for details about ‘Do Not Disturb’ and other settings. Communicate the audio and/or video message to all of the touch screens that have intercom capabilities.
System User Guide 9. Tap the Volume – or + buttons to adjust the volume. Note: Recipients can’t respond to a broadcast. 10. To end the call, tap End Call if the caller doesn’t end the call first. 6.2.21.2.3 Place a Call on Hold The following steps show you how to place a call on hold to communicate with another touch screen or Door Station. In this case, you can have conversations with people at two (2) touch screens or a touch screen and a Door Station.
System User Guide screen that supports video intercom. Talk to your dealer if you want to assign these buttons to specific actions. 6.2.21.2.5 Switch Between Calls See “Place a Call on Hold.” Tip: You can jump to the home page to perform other actions, and then return to the other calls as needed after you place them on hold.
System User Guide To monitor a room: 1. Go to the touch screen that will monitor the other room, for example, Gary’s Room. 2. On that touch screen, tap Intercom. 3. On the Intercom page, tap the room to monitor, for example, John's Room. 4. Monitor the room as needed. 5. To turn on video, tap ON at Send Video. See “Intercom Settings” for details. 6. To stop monitoring a room, tap End Call. 7. To stop monitoring that room, go to the touch screen (John’s Room) and tap OFF at Monitor Mode.
System User Guide To change the settings on a touch screen: 1. On the touch screen, tap the Intercom icon. 2. On the intercom page, tap the Settings icon (see the figure above). 3. Check the options below as needed: If on, an icon appears on that room’s button for all supported touch screens (see the figure above). These changes apply to all supported touch screens locally. For example, you can’t change another touch screen’s settings from your touch screen.
System User Guide This next figure shows some of the settings when they are on. When on, a little icon appears (the same icon as shown below) on the button of the other supported touch screens. Settings (Modes). Do Not Disturb—If ON, when a broadcast or call tries to connect to another touch screen (for example, John’s Room), the message or call is blocked, and the caller’s touch screen displays a ‘Do Not Disturb’ or ‘Station Busy’ message from the ‘John’s Room’ touch screen.
System User Guide video looks like. Example: Local (small frame) shows the person on his or her touch screen; Remote (larger frame) shows the person on the other end. If Send Video is off at everyone’s touch screen (see the figure below) everyone must tap Start Video to start a video session. Send Video is the default. Monitor Mode—If ON, this setting monitors a room through the touch screen in that room.
System User Guide To prevent all calls and broadcast messages: You can change the options on your supported touch screens if you don’t want anyone to disturb you. This means no calls, broadcast messages, or videos. A ‘Do Not Disturb’ message displays on the caller’s touch screen if disabled on the recipient’s touch screen. 1. On the touch screen, tap the Intercom icon. 2. On the Intercom page, tap the Modes icon. 3. Tap ON at ‘Do Not Disturb.’ 6.2.21.2.
System User Guide 3. On the ‘Create Intercom Group’ screen, select the devices (rooms) to add to the new group (see the figure below). 4. When the on-screen keyboard appears, type the name of the group, for example, John’s Group, and then tap Done. 5. Tap Save. 6. To send a call or broadcast to the group, from the Intercom page tap the new group, for example, John’s Group. Copyright © 2014 Control4. All Rights Reserved.
System User Guide To remove an intercom group: Use the Edit icon to remove an intercom group. 1. On the touch screen, tap the Intercom icon. 2. On the intercom page, tap the Edit icon. 3. On the Group button, select the group to delete (see the next figure). 4. Tap the x in the top corner of the group’s button to delete the group, for example, John’s Group. Copyright © 2014 Control4. All Rights Reserved.
System User Guide To rename an intercom Group: Use the Edit icon to rename an intercom group. 1. On the touch screen, tap the Intercom icon. 2. On the intercom page, tap the Edit icon (see the screen in “To remove an Intercom Group” above). 3. On the Group button, select the group to rename. 4. Tap the Edit button on the lower-right side of the group button to rename the group, for example, John’s Group. 5. Using the on-screen keyboard, type the new name of the group, and then tap Done.
System User Guide 1. 2. 3. 4. On the touch screen, tap the Intercom icon. On the intercom page, tap the Edit icon (see the screen in “To remove an Intercom Group”). On the Group button, select the group to change. Select the devices/rooms to add to or remove from the group. Check or uncheck the devices/rooms to remove. 5. Tap Save. 6.2.21.3 Motors & Sensors Use the Control4 system More icon on your Navigators to view or change the status of any motors and sensors you have in your system.
System User Guide To sort by driver type (sprinkler, lock, and so on) select the icon to the right of AZ (see below). To sort the list, select the icon to the left of the List icon. This list indicates which contact or relay was last changed (by time). Example: If you just opened the door, it would appear at the top of the list. To change the status of a motor or sensor: 1. Select More > Motor/Sensor. 2. Select the << to choose the floor you want to view. 3. Select the room you want to view. 4.
System User Guide Ensure that your installer has added and configured the devices to use in your Wakeup scene (lights, music, and so on) and one or more Wakeup agents in the Control4 system. To set the Wakeup scene: 1. From the Navigator's Home page, select the room where you want to execute the Wakeup, and then select More. 2. On the next page, select Wakeups. 3. Select the Wakeup from the list (the Navigator prompts you to select a Wakeup).
System User Guide To view or change your pool or spa's temperature: 1. From the Navigator's Home Page, select More. 2. Select Pool Controls. 3. Select Pentair or Jandy. The following figures show the display on a touch screen. 4. View the current temperature of the Pool and/or Spa. 5. Use the up or down arrows to reset the temperature and turn the heat off or on. Copyright © 2014 Control4. All Rights Reserved.
System User Guide 6. (Optional) Select the following devices which can be configured and custom labeled by your dealer (see right column in the example above): Filter Pump Spa Spa Lights Waterfall Spa Jets 7. Change the on/off settings as indicated in the next figure under the ‘Pool’ example. Note: Jandy settings have three (3) states: Off (Black), Enable (unless pump is running), and Active (heat is activated). Pentair has two (2) settings: Off and On.
System User Guide Registration (not supported on MyHome apps for iPad, iPhone, iPod touch, or Android) Service Connection (not supported on MyHome apps for iPad, iPhone, iPod touch, or Android) Power Management (not supported on MyHome apps) Backlight (not supported on MyHome apps) Note: Some MyHome apps do not support all of the settings mentioned previously. Check with your dealer for details. To view or use the Settings functions: 1. From the Navigator's Home page, select More. 2.
System User Guide 6.2.21.7.1 About Use the Control4 system More icon on your Navigators to view information about the Control4 system: Navigator—View the IP address, version, date, and time. Director—View the IP address, version, date, and time. Dealer—View the dealer's name, phone number, and email address. This information is based on what is entered in the Composer project by your dealer or installer.
System User Guide 6.2.21.7.2 Edit Favorites See “Favorites” for details about this feature. Note: Not supported on MyHome for iPhone, iPod touch, iPad, or Android. 6.2.21.7.3 Add or Change a Screen Saver Use the Control4 system More > Settings > Screen Saver icon on your Navigators to add or change a screen saver. Note: The screen saver functions for MyHome apps vary from those on MyHomePC, touch screens, or on-screen Navigators.
System User Guide View your changes 1. Ensure that your installer has added and configured network-attached storage, a USB drive, or a controller that contains a hard drive to store photos so they appear in the screen saver view below. 2. Ensure that you have a NAS device connected to the Control4 system that contains your screen saver photos. To change a screen saver: Select More > Settings > Screen Saver. Note: The following screen may vary on a touch screen, MyHome app, and on-screen Navigator.
System User Guide If you selected Custom in the Screen Saver Modes, the following list appears: Media—Show the currently-playing media. Time—Show the time. Date—Show the date. Temp—Show the Thermostat's temperature. Photo—Select this option to show the selected photo. Change Photos Every. Use the up or down arrows to set the time, in minutes or seconds, before the photo changes. To change a screen saver: 1. Select More > Settings > Screen Saver. 2. Change the settings listed above as desired.
System User Guide 4. Review the following activities, depending on what you want to do: Change your wallpaper—Select the wallpaper you want to display on all screens in your Navigator. You can choose from a variety of images. The change is effective immediately. Delete your wallpaper—You cannot delete wallpaper, but if you don't want to display any wallpaper, you can select Black for a black background. Set the default—Select Theme Default to return to the default wallpaper. 6.2.21.7.
System User Guide 6.2.21.7.7 View or Change Director Use the Control4 system More > Settings > Director icons on your Navigators to view the current Director or change Directors. This section shows you how to view the current Director, connect to a Director, or cancel Director. To view the current Director: 1. From the Navigator's Home page, select More > Settings > Director. 2. View the Director page. If you have several Directors to choose from, a list may appear. 3. Select the Director to view.
System User Guide To connect to a Director: 1. Select the Director to which you want to connect. 2. Select Connect or select Other. 3. If you selected Other, do the following: a. Select the Name: box. When the on-screen keyboard appears, type the Director name, and then select Done. b. Select the IP Address box. When the on-screen keyboard appears, type the Director IP address, and then select Done. c. (Optional) Select Cancel to cancel the change and return to the previous screen.
System User Guide 6.2.21.7.8 View or Change Network Settings Use the Control4 system More > Settings > Network icons on your Navigators to view or change your IP or wireless network settings. Note: Not supported on MyHome apps. This section shows you how to: View DHCP related addresses. Change IP settings. View DNS settings. View, enable, or disable wireless connections.
System User Guide IP Settings To change IP settings: 1. Select More > Settings > Network. 2. Select DHCP or Static. Dynamic IP (DHCP)—DHCP is used in this case, so you don't need to enter a specific address. The information for the IP Address, Subnet Mask, Default Gateway, and DNS Server is added for you. Assigned IP (Static)—Select the box next to each item in Step 1. When the on-screen keyboard appears, type the address, and then select Done. Click OK when you are finished.
System User Guide a. Network Name—Select to add the SSID or name of the wireless network when the on-screen keyboard appears. b. Security—Select None, WEP 64, WEP 128, or WPA. c. Password—Type the password given to you by the person who set up your home's wireless network (dealer or installer). 4. Select Connect. Notice that the IP Settings change. Note: If you entered a name in Step 3, you can change the Network Name; otherwise, you cannot change it.
System User Guide 6.2.21.7.11 Service Connection Use the Control4 More > Settings > Service Connection icons on your touch screens, MyHomePC app, or on-screen Navigators to establish a connection for remote service with your dealer. Note: Not supported on MyHome for iPad, iPhone, iPod touch, or Android devices. 1. Ensure that your dealer or installer adds and configures the devices for your system, and that the touch screens, MyHome apps, and on-screen Navigators display properly. 2.
System User Guide 6.2.21.7.12 Power Management Use the Control4 More > Settings > Power Management icon on your portable touch screens to change your battery settings and conserve energy. Note: This option is for touch screens that use batteries only, and does not include devices that use MyHome apps. To change your power: 1. From the Navigator's Home page, select More > Settings > Power Management. The following figures show the display on a touch screen. 2.
System User Guide 6.2.21.7.13 Adjusting the Backlight Use the Control4 system More > Settings > Backlight icon on your Navigators to adjust the brightness of your Navigator’s backlight. Note: Backlight settings don't appear in MyHome apps or in Anywhere Access. To set and adjust the brightness of the backlight: 1. From the Navigator's Control4 Home page, select More > Settings > Backlight. 2. Move the horizontal slider bar up or down to adjust the backlight intensity. The change is immediate.
System User Guide personal apps. The Apps icon stores applications you've purchased and downloaded from the Control4 4Store or custom apps you've created. To buy applications and download them to Apps: 1. At the Navigator, select Apps > 4Store. 2. If you've never used Apps before, follow the instructions in “Control4 4Store” or “4Store.com.” To view purchased applications in Apps: 1. At the Navigator, select Apps. 2.
System User Guide Tip: For faster access, you can bookmark your target. See “Favorites” or “Star Button” for details. 6.2.22.2 Weather App Use the Control4 system Apps icon on your touch screens, MyHomePC app (not supported on MyHome for iPad, iPhone, iPod touch, or Android devices), or on-screen Navigators to access the Weather app and view the current weather conditions locally, or browse for other locales. To view the Weather application: 1. From the Navigator's Home page, select Apps. 2.
System User Guide Control4 4Store lets you Create a new account and billing. View and purchase third-party drivers and applications for Control4 devices to run in your Navigator. For example, you can purchase an application for your touch screens, devices that will run MyHome, or on-screen Navigator to play games, manage finances, check movies and stock reports, and so on. View your account status and other information. View the history of your purchases. Manage billing.
System User Guide To purchase applications: 1. At the Navigator, select Apps > 4Store. 2. Select Browse and locate the application you want to purchase. 3. Select the app to purchase. You can view details about the price, information about the app, and check the rating. 4. When you are ready, select Buy. 5. The updated version of your app will download to Apps in the Navigator.
System User Guide To lock or unlock 4Store: You can lock or unlock 4Store to purchase apps. This is useful if children or other users might inadvertently purchase apps without your permission. 1. At the Navigator, select Apps > 4Store. 2. Select the Lock or Unlock permission to purchase or not allow apps to be purchased. 3. When the keyboard appears, type your password, and then select the arrow (>). The status changes. 4. Click Enter. 6.2.22.3.
System User Guide Main Option Music 2nd Option 3rd Option Description/Action Dimmers Dimmer name Lists the Dimmers created in the system. Select to turn on or off. To dim, press Select, use the arrow keys to dim, and press Select again. Switches Switch name Lists the Switches created in the system. Select to turn on or off. Zones Zone name(s) Lists the zones created. Select to enable or disable. Edit playlist Select song. Choose Play Now or Remove from Queue.
System User Guide Main Option 2nd Option 3rd Option Config Display Brightness, Keypad Brightness, Motion Detect, Battery Level About View firmware version, date, and time. Description/Action Select to change configurations. For more information, see the System Remote Control SR-250 User Guide. 6.4 Using Anywhere Access: Web Use MyControl4 to log into, view, and change your Control4 system using Anywhere Access: Web Anywhere Access: Web is supported on OS 2.5.0 or later.
System User Guide Flash view—If you have the Flash version (OS 2.0 or later), refer to the sections in this System User Guide for information about how to use the options in each category (Watch, Listen, Lighting, Security, Comfort, and More). Tip: OS 2.0 and earlier than OS 2.5.0. While in the Flash view, you can jump to the HTML view by clicking the HTML version link (lower-right corner of the Flash screen).
System User Guide HTML view—If you have the HTML version, you can view or change the following: Lighting—Turn lights on or off, and set dimming levels. Security—Changing security codes and toggles is dependent on the type of security device you have in the system. Climate—View or change the following for the HVAC system: o View the current temperature, set points, mode status, or fan status. o Change the Set Heat point by clicking the + or - icons.
System User Guide MyHome lets you control security, lighting, temperature, music and video in the same way you control devices on a Control4 touch screen or on-screen Navigator. The display in MyHome looks similar to the user interface on a 7” In-Wall Touch Screen, but with fewer features. Below are some examples of what the interfaces look like. MyHome – PC app interface on a Mac: Copyright © 2014 Control4. All Rights Reserved.
System User Guide MyHome – Android app interface on an Android: MyHome – iPhone/iPod touch app interface on an iPhone: 6.6.1 Supported Devices and System Requirements OS 2.4.0 or later supports these versions: Control4® MyHome – iPad iOS 5 or later Control4 OS 2.0.1 or later Copyright © 2014 Control4. All Rights Reserved.
System User Guide Control4® MyHome - iPhone/iPod touch iOS 5 or later Control4 OS 2.0.1 or later Control4® MyHome – Android Android 2.2 with screen resolution of 480 x 320 or greater and Control4 OS 2.1 or later Rooted devices are not supported Control4® MyHome – PC/Mac PC or Mac with Adobe Air 2.5.1 or later Control4 OS 2.0.1 or later 6.6.2 MyHome Licensing Beginning in April 2013, Control4 began to include a MyHome site license with new controller purchases.
System User Guide The following table lists the available features on a MyHome app for supported devices: Note: Many settings are not supported for MyHome apps. See “Settings” for details.
System User Guide 7. Glossary 2-Button Keypad: A Control4 Keypad that uses two buttons to control a light. 3-Button Keypad: A Control4 Keypad that uses three buttons to control a light or create a Lighting Scene. 4Sight: An Internet service that provides a connection to the Control4 system any time and from any place worldwide. 4Sight Web Navigator: The navigator used with 4Sight for remote access to a Control4 system.
System User Guide D device: A Control4 component, for example, a piece of hardware (controller, touch screen, and so on) that requires a device driver. Device Control: A virtual view of the actual controls on a device; for example, a Security System's control panel. DHCP: Dynamic Host Configuration Protocol. A protocol used between a network client and a DHCP server (usually a router or access point) that dynamically assigns IP addresses from a pre-defined list of clients on a network.
System User Guide MediaMonkey: An application used for digital music library management. Integrated CD and DVD burning, encoder, and synchronizes with portable audio devices, such as an iPod. MP3 format: A music format that makes streaming audio possible. Control4 supports this format. my.control4.com: The location where a dealer sets up or remotely manages a customer account. MyControl4: The pages where a customer’s Control4 account is managed.
System User Guide T Touch screen: A home-automation system Navigator that controls home lighting, comfort, security, music, videos, Intercom, and other devices on the home network. TuneIn app: Lets users access streaming music, news, sports, podcasts, and more worldwide using the TuneIn app on Navigators. Available on new or legacy systems. HC-250, HC-800, and HC-1000 Controllers that upgrade to OS 2.4.0 or later can benefit from TuneIn. U USB: Universal Serial Bus.
System User Guide 8.
System User Guide Disclaimer, 2 DNS, 135 Dock for iPod, 71 Door Station and Intercom, 106 DVD, 65 DVD, edit information, 67 Edit Favorites, 55 Edit Menu Items, 28 Enable Remote Access, 13 Ethernet, 6 Favorite, add, 56 Favorite, delete, 58 Favorite, edit, 57 Favorites, 29, 55 on System Remote Control, 39 Favorites, and macros, 58 Favorites, create folder, 57 Favorites, sort, 57 Favorites, uses of, 55 Flash view, Web Navigator, 148 FM radio, listen, 81 Functions of Navigators, 41 GNU, 2 Gracenote, 2 Grid ico
System User Guide My Profile, 15 My Queue, 74 my.control4.
System User Guide Wakeup, 124 Wallpaper use or change, 131 Watch button, 59 Watch Button on System Remote Control, 39 Watch movies, 61 Watch TV, 68 Weather, 142 Welcome, 6 WiFi, 6 Wireless, 135 Wireless, connect, 136 XM radio, listen, 81 XM Tuner, 80 ZigBee, 6 Zones, 53, 71 Zones, turn off, 55 Copyright © 2014 Control4. All Rights Reserved.