Disclaimer Control4® makes no representations or warranties with respect to this publication, and specifically disclaims any express or implied warranties of merchantability or fitness for any particular purpose. Control4 reserves the right to make changes to any and all parts of this publication at any time, without any obligation to notify any person or entity of such changes. Trademarks Control4 and the Control4 logo are trademarks or registered trademarks of Control4 Corporation.
Contents Preface Important Information .................................... 1 Safety Instructions ................................. 1 Graphical Symbols on the Device.......... 3 Graphical Symbols in this Guide............ 3 Additional Resources ............................. 4 Chapter 1 Introduction to the Audio Matrix Switch ......... 5 Features and Benefits............................ 5 Network Requirements .......................... 5 What’s in the Box ...................................
Chapter 4 Regulatory Compliance and Warranty......... 25 Regulatory Compliance ....................... 25 FCC ................................................ 25 Industry Canada ............................. 26 Edison Test Lab (ETL).................... 26 CE Declaration of Conformity ......... 27 Warranty .............................................. 28 Index .....................................................................................
PREFACE Important Information Safety Instructions 1. Read these instructions. 2. Keep these instructions. 3. Heed all warnings. 4. Follow all instructions. 5. Do not use this apparatus near water. 6. Clean only with dry cloth. 7. Do not block any ventilation openings. Install in accordance with the manufacturer’s instructions. 8. Do not install near any heat sources such as radiators, heat registers, stoves, or other apparatus (including amplifiers) that produce heat. 9.
moving the cart/apparatus combination to avoid injury from tip-over. 13. Unplug this apparatus during lighting storms or when unused for long periods of time. 14. Refer all servicing to qualified service personnel. Servicing is required when the apparatus has been damaged in any way, such as when a power-supply cord or plug is damaged, liquid has been spilled or objects have fallen into the apparatus, the apparatus has been exposed to rain or moisture, does not operate normally, or has been dropped.
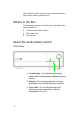
Graphical Symbols on the Device The following information is placed on the device: Graphical Symbols in this Guide Warning, Caution, Note, and Tip paragraphs draw your attention to important safe practices and additional information which may help you avoid injury, death, or loss of material or time. WARNING! This indicates a potentially hazardous situation that, if not avoided, may result in death or serious injury.
IMPORTANT! This indicates information that will help you avoid damage to your equipment, loss of materials, or loss of time. PAY ATTENTION TO THESE IMPORTANT STATEMENTS! NOTE: This indicates a note on related information about the current topic. TIP: This indicates a tip that may save you time or effort. Additional Resources The following resources are available: 4 ` Your Control4-authorized reseller ` Control4 Web Site: http://www.control4.
CHAPTER 1 Introduction to the Audio Matrix Switch Control4 systems are uniquely configured for every customer and every site. A popular component among music lovers is the Control4 Audio Matrix Switch. This chapter introduces the Control4 Audio Matrix Switch and its features. Features and Benefits ` Switches up to 16 input sources to up to 16 simultaneous output zones.
Matrix Switch, ensure that your home network wiring is in place before starting system setup. What’s in the Box The following items are included in your Control4 Audio Matrix Switch box. ` ` ` Control4 Audio Matrix Switch IEC power cord This manual About the Audio Matrix Switch Front View 1 2 3 1. Front Display—For displaying or setting audio switch settings and navigating system menus 2. Buttons—For choosing options or menus displayed in the front panel user interface 3.
Back View 1 3 2 4 1. Power Plug Port—For standard IEC cord (included). Supports universal AC input (100-240 VAC 50/60 Hz). 2. Ethernet—RJ-45 for a 10/100 Mb Ethernet connection 3. Audio In (Left-Right pairs) 1-16—RCA jacks for stereo channel input for up to 16 stereo analog sources 4.
Front Display The best method of initially setting up system routing for the Audio Matrix Switch is using Composer Pro software on a PC (for trained installers only). You can also make adjustments from the front display. The front display allows you to set or change audio source routing and change zone settings for volume, bass, treble, and mute. The display also shows the current source and zone activity.
Technical Specifications Table 1-1.
10
CHAPTER 2 Set Up the Audio Matrix Switch This device operates as part of the Control4 home system, which requires physical and logical connections to function as designed. Essential setup tasks include: 1.Plan Your Physical Layout 2.Connect Input and Output Devices 3.Connect to the Network and Power 4.Set Up Logical Connections 5.Static IP Modifications This chapter describes, in general terms, how to set up physical connections required for the Audio Matrix Switch and all associated devices.
Table 1: Audio Matrix Switch Routing Worksheet 12
RCA Pair # Audio In Sources—RCA (Left-Right) pairs for stereo channel input for up to 16 stereo analog sources Audio Out Zones— RCA (Left-Right) pairs for stereo channel output for up to 16 output zones 1. 2. 3. 4. 5. 6. 7. 8. 9. 10. 11. 12. 13. 14. 15. 16.
Connect Input and Output Devices 1. Connect audio source devices (such as CD changers or players, tuners, iPods, or tape players) you want included in the system to the audio in jacks. 2. Connect amplifiers or amplified speakers as needed to the audio out jacks. NOTE: If you are not sure which jacks to use, try using the worksheet provided in Table 1 to plan your routes. Connect to the Network and Power 1.
Network Configuration To set the network configuration: 1. At the In to Out Assignments screen, press the Network button. 2. On the Network Configuration screen, choose an Ethernet or ZigBee network by rotating and pressing the Select Dial. IMPORTANT! When making logical connections in Composer, identify the device as the network type (Ethernet or Zigbee) that you choose on the device network configuration. To avoid unexpected behavior, do not identify the device as both network types. 3.
The Audio Matrix Switch, by default, uses DHCP to obtain a network IP address. If the local area network does not support DHCP, you can configure the switch to use a Static IP address instead: 4a. Press the Select Dial to enter Edit mode. 4b. Press the Down or Up button (or rotate the Select Dial) to choose Static IP. 4c. Press OK (or press the Select Dial). 4d. Press Save (or press the Select Dial).
4e. Edit the IP, Mask, and GWay fields for the Static IP network: Use the Select Dial to select a line, then press the dial. Use the Select Dial to scroll the number up or down and edit as needed, then press the Select Dial to move to the next field within the number. 4f. When finished editing, press Save.
18
CHAPTER 3 Use Audio Matrix Switch This chapter introduces the user interface available to Audio Matrix Switch users and common system tasks you can perform with the Audio Matrix Switch from the front display. NOTE: Following initial setup, you may never need to manually change settings on the Audio Matrix Switch. This device is managed by the Control4 system. The use of this chapter is completely optional. This device assists in fulfilling a room-specific music request.
Once you make an assignment, the screen displays the assignment. For example, Output 1 is mapped to Input 1. Manage Outputs View Output Assignments To view output assignments: 1. Ensure your Audio Matrix Switch is powered up and that the In to Out Assignments screen displays in the front display. 2. On the In to Out Assignments screen, view the current input-to-output assignments. The screen consists of 16 output zones and any assigned input source.
To explore these menu options, press the buttons on the front panel: ` Setup: Displays an output-specific screen. The most recent screen accessed is displayed by default, but you can choose to view a different output’s setting by changing the Output number. ` Network: Displays the Network Configuration screen. From this screen, you can select Ethernet or Zigbee. ` Display: Displays the Display Configuration Screen. Configure an Output To change output source or settings: 1.
` Gain: Supported range: Mute and -44 to +4 dB (default: 0 dB) ` Treble: Supported range: -12 to +12 dB (default: 0 dB) ` Bass: Supported range: -12 to +12 dB (default: 0 dB) ` Balance: Supported range: -50 to +50dB (default: 0 dB) 1c. To toggle to view input signal sensing information, press the Inputs button. 1d. To exit the screen, press the Exit button. 2. Rotate the Select Dial to highlight a setting. 3. Press the Select Dial to enter edit mode. 4.
View Network Settings To view network settings: 1. Press Network. 2. From the Network Configuration screen, select Ethernet or Zigbee. 3. To return to the Network Configuration screen, press Back. Set Front Display Preferences To set your viewing preferences for the front display: 1. On the Output to Input screen, press the Display button. The Display Configuration screen displays.
24
CHAPTER 4 Regulatory Compliance and Warranty Regulatory Compliance This product complies with standards established by the following regulatory bodies: Federal Communications Commission (FCC) Industry Canada Underwriters Laboratories Inc. (UL) CE FCC FCC ID: R33C416S2EB This device complies with Part 15 of the FCC Rules.
equipment does cause harmful interference to radio or television reception, which can be determined by turning the equipment off and on, the user is encouraged to try to correct the interference by one of the following measures: ` Reorient or relocate the receiving antenna. ` Increase the separation between the equipment and receiver. ` Connect the equipment into an outlet on a circuit different from that to which the receiver is connected.
CE Declaration of Conformity European Contact Information United States Contact Information Control4 UK Limited Unit 3, Green Park Business Centre Control4 Corporation Sutton-on-the-Forest, York 11734 S. Election Road, Suite 200 YO61 IET, United Kingdom Salt Lake City, UT 84020-6432, USA +44 (0) 134781 2300, c4@control4-UK.
Warranty This device has a limited two (2) year warranty on parts from the date of purchase. Control4 will replace or repair any defective unit. Return unit to the place of purchase for replacement. For any damages incurred, the warranty will never exceed the purchase price of the device. This warranty does not cover installation, removal, or reinstallation cost. The warranty is not valid in cases where damage was incurred due to misuse, abuse, incorrect repair, or improper wiring or installation.
Index A About the Audio Matrix Switch 6 Additional Resources 4 Audio Inputs 7 Outputs 7 Audio In 7 Audio Matrix Switch Back View 7 Audio In 7 Audio Out 7 Ethernet 7 Power Plug Port 7 Front View 6 Buttons 6 Front Display 6 Select Dial 6 Audio Matrix Switch Routing Worksheet 12 Audio Out 7 B Back View 7 Backlighting 5 Buttons 6 C Cautions 3 Check Signal Status 22 Configure an Output 21 Connect Input and Output Devices 14 29
Connect to the Network and Power 14 D Display 21 E Ethernet 7, 15 DHCP 15 Static IP 16 F Features and Benefits 5 Front Display 6, 8 Front View 6 I Input Connect Input and Output Devices 14 M Manage Outputs 20 View Output Assignments 20 Display 21 Network 21 Setup 21 N Network 21 Ethernet 15, 16 Requirements 5 Settings 15 Zigbee 15 Network Configuration 15 Notes 3 30
O Output Configure 21 Connect Input and Output Devices 14 Manage Outputs 20 View Assignments 19 P Plan Your Physical Layout 11 Power Plug Port 7 R Regulatory Compliance 25 S Safety Instructions 1 Select Dial 6 Set Front Display Preferences 23 Set Up Logical Connections 14 Set Up the Audio Matrix Switch 11 Setup 21 Source 7 Source Inputs 7 Static IP 16 T Technical Specifications 9 Tips 3 U Use Audio Matrix Switch 19 V View 19 View Network Setting 23 31
View Output Assignments 19, 20 W Warnings 3 Warranty 25 What’s in the Box 6 Z Zigbee 15 32