
User guide


Composer Pro User Guide
Copyright © 2012 Control4. All Rights Reserved.
Saved: 1/20/2012 1:31:00 PM
200-00005 Composer Pro
User Guide Part 1
Page 75 of 199
b. Push and hold the button on the top panel of the Wireless Outlet Switch until the two (2)
LEDs toggle orange On/Off, alternating back and forth.
c. Choose an outlet to configure (Outlet 1 or 2) by releasing the button when the LED that
corresponds to that outlet number lights up.
Example: If a device is plugged into Outlet 1, release the button when LED 1 lights up. The LED
you chose flashes orange, indicating that the Wireless Outlet Switch is learning a steady state of
the device (such as On or Off). When the LED turns solid orange, the Wireless Outlet Switch has
learned the steady state, but has not yet determined whether the state is On or Off.
d. With the LED now solid orange, turn the device plugged into the Wireless Outlet Switch On.
The LED again flashes orange while the Wireless Outlet Switch is learning the On state.
When the learning completes, the LED glows solid orange again to indicate the Wireless
Outlet Switch has learned the steady state.
e. With the LED now solid orange again, turn the device Off. The LED flashes orange to indicate
the Wireless Outlet Switch is waiting for a steady state. When the device reaches a steady
state, the LED glows red to indicate that the Wireless Outlet Switch has learned the Off state.
f. With the LED now solid red, turn the device On again. The LED flashes orange to indicate it is
waiting for a steady state. When the device reaches a steady state, the LED glows green to
indicate the Wireless Outlet Switch has learned the On state.
g. With the LED now solid green, press the button on the Wireless Outlet Switch one time to
save and exit the Power Learning mode.
Tip: Use a quick-button press during any step prior to the LEDs turning solid red or green to exit
the Power Learning mode without saving.
11. Repeat the steps to configure the other outlet (Outlet 1or 2) as needed for any additional plugged-
in device.
12. To unlearn a device, press the button nine (9) times, but use with care; as this will reset both
outlets.
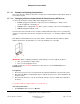
2.5.8 Configuring Navigators
Use the Control4
®
Composer Pro System Design and Connections views to configure Navigators for
the Control4 system.
Note: You may have noticed a "Commissioning Remote Control SR-250" driver in the Online
Database; this driver is not used for residential customers.
These subsections provide information about configuring System Remote Controls and Touch
Screens:
“Configure System Remote Control SR-150B”
“Configure System Remote Control Version 3, SR-250”
“Configure a 7-inch Portable Touch Screen”
“Configure a 7-inch Tabletop or Wall-Mounted Touch Screen”
“Configure a 5” or 7” In-Wall Touch Screen”