
Instructions / Assembly


#500 - I0500 - 0703
4
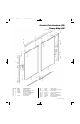
C . Lay the Bottom Track/Curb (#2) on the shower
sill with the sloping face of the Track towards the
inside of the shower. Center the Bottom
Track/Curb (#2) on the shower sill, and secure it in
position with strips of Masking Tape. Mark the
p o s i t i o n on the sill with a Pencil. See Figure 2.
NOTE: The Bottom Track/Curb (#2) must lie flat. If the
enclosure has curved corners you may have to
shape the Bottom Track/Curb (#2) with the File so
that it will lie flat on the sill.
STEP 4 Drilling and Aligning the
Wall Jambs
A. Locate the Wall Jambs (#3). Looking at a Wall
Jamb (#3) you will notice that the Jamb (#3) has
two side legs, one which is narrower than the
o t h e r. This narrow leg will face into the shower. I f
you look on the back of the Jamb (#3), you will
also see a groove which runs the length of the
back surface of the Jamb ( # 3 ) .
B. Drill three 3/16″ diameter holes along the groove
as illustrated in Figure 3. Drill a hole 3″ from each
end and one in the center.
C. Holding the Wall Jamb (#3) with the narrow leg
towards the inside of
the shower, lower the
Wall Jamb (#3) onto
the Bottom Tr a c k /
Curb (#2). The Wall
Jamb (#3) must lie
flat against the wall
and both legs of the
Wall Jamb (#3) m u s t
fully connect with
the Bottom Track/Curb (#2).
NOTE: If your shower has curved corners, you may have
to shape the Wall Jambs to fit snugly with the
Bottom Track/Curb (#2).
D. With the Wall Jamb (#3) in place, use a Level to
ensure that the Wall Jamb (#3) aligns straight up
and down. Use your Pencil to mark the hole loca-
tions.
E . Using either a 1/8″ Drill Bit
(for a fiberglass enclosure) or
a 3/16″ Masonry Drill Bit (for
tile/marble), drill holes where
you made the marks. If
installing in a tile/marble
enclosure, gently tap a
Screw Anchor (#12) into
each hole. DO NOT use the
Screw Anchors (#12) for
a fiberglass enclosure.
F. Repeat this for the other Wa l l
Jamb (#3). Remove the two Wall Jambs (#3) for
n o w.
G. Remove the Bottom Track/ Curb (#2). Gently
Center Punch the three holes along each Wall
Jamb (#3). On ceramic tile be very careful and only
tap the punch l i g h t l y enough to nick the tile s u r f a c e
but not crack the tile.
H. Use the 3/16″ Drill Bit and drill holes into the wall
for both Wall Jambs (#3). When finished, be sure
to clean the shower sill of any debris from drilling.
I. Insert a Screw Anchor (#12) into each of the six
h o l e s .
STEP 5 Caulking and Installing the
Bottom Track/Curb
NOTE: Before siliconing the Bottom Track/Curb (#2), make
sure the surface is completely free of dirt or any
other contaminants to ensure proper adhesion.
A. Apply Silicone Caulking along the caulking
grooves on the underside of the Bottom
Track/Curb (#2) as shown in Figure 4. Only apply
enough silicone to just barely overfill the grooves.
B. Using the location marks install the Bottom
Track/Curb (#2) and seal both ends at the wall
with Silicone.
3/16″ diameter holes
Figure 3
Figure 4
3″
Drill center hole
Shorter leg
of Wall
Jamb
faces into
inside of
shower
Bottom
Track/
Curb
Pencil
Mark
Wall
Jamb
Inside of
shower
Caulk
Bottom Track/Curb
Turn Bottom
Track/Curb over before
installing on the sill
Level
3″
A
Centerline
Center Bottom Track/Curb on sill
and mark position with pencil
Figure 2
500 Install. Instruc. 7/1/03 8:24 PM Page 4