LINK WIRELESS BLOOD GLUCOSE MONITORING SYSTEM 93 USER GUIDE USES BAYER’S CONTOUR® BLOOD GLUCOSE TEST STRIPS 1M 84378888_CntrLINK_UG_EN_FpBp_v3.indd ofc1 3/30/12 11:43 AM FC: 23 mm BC: 9 mm Footer: N/A 1/3rd of the Cross clear 7mm min. space has been applied. 18211 NE 68th Street, E120 Redmond, WA 98052 T: 425-881-5454 BAN#:84378888 DATE: March 30, 2012 CLIENT: Bayer HealthCare DESCRIPTION: Contour LINK UG - English SCHAWK JOB#: SKU#: DIMENSIONS: PRINTER SPEC: FONTS: COLORS: Rev.
Important Safety Instructions The CONTOUR LINK Wireless Blood Glucose Monitoring System is an over the counter (OTC) device utilized by persons with diabetes in home settings for the measurement of glucose in whole blood, and is for single-patient use only and should not be shared. The CONTOUR LINK Wireless Blood Glucose Monitoring System is indicated for use with fresh capillary whole blood samples drawn from the fingertip only.
Extras Help Getting Ready to Test ........................................................................8 Getting the Blood Drop...................................................................10 Fingertip Testing .....................................................................10 Testing Your Blood ..........................................................................11 Turning off the Send option for a Single Test Result .........................13 Cleaning and Disinfection .................
Your CONTOUR ® L INK Meter: Additional Materials • C ONTOUR ® Test Strips — Use for blood glucose or control solution testing. Supplied in a handy bottle with an easy-toopen flip-top lid. • M ICROLET ®2 Lancing Device — Use for fingertip puncture with Bayer's MICROLET lancet. • BATTERIES—Use two 3-volt (DL2032 or CR2032) lithium batteries. Replace when necessary.
Programmed: Your CONTOUR® LINK meter has been preset at the factory with the standard date and time. To change these settings or to use advanced meter features, such as meal markers, read through the Options section of your User Guide. Your CONTOUR® LINK blood glucose meter is specific for glucose and has been referenced to plasma/serum values. Methods calibrated to plasma/serum can be 9% to 15% higher than the results of whole blood glucose assay methods.
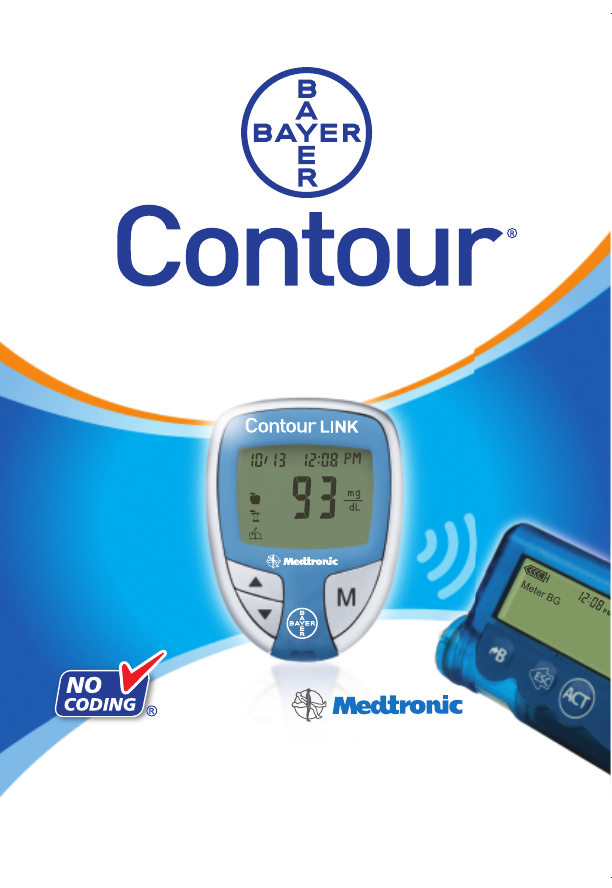
Talking to Your Compatible Medtronic Device 1. Program your meter ID number into your compatible Medtronic device. The ID number is the serial number found on the left side of the back label of your meter. It is a 6-digit numeric or alphanumeric number (0–9, A–F); for example, 120462 or B12B3C. See the User Guide for your Medtronic device for complete information on this step. 2. Set your meter to the same time and date as your Medtronic device (see page 25 in this User Guide).
Getting Ready to Test: Testing Remove the endcap from the M ICROLET 2 lancing device. Getting Ready to Test 8 Rotate (do not remove) the protective cap on a lancet ¼ turn. Remove a test strip from the bottle. Tightly close the bottle lid immediately after you have removed the test strip. NOTE: Check the expiration date. Make sure the test strip does not appear torn or damaged. Tightly close the bottle lid immediately after you have removed the test strip. Excess moisture could damage the test strip.
Fingertip Testing — The depth of the puncture depends upon the adjustable endcap setting you choose and the amount of pressure applied to the puncture site. You should determine which combination works best. Immediately touch the Getting the Blood Drop Press the endcap firmly against the puncture site and press the blue release button. Wait a few seconds. Stroke your hand and finger towards the puncture site to form a drop of blood. Do not squeeze around the puncture site.
Stopping a Result While it is Being Sent Testing Your Blood The test result will also be automatically stored in the meter memory. If you have set your meter to use the special marker options (see page 28), the markers must be selected while the result is still being displayed, before removing the strip or turning the meter off. NOTES: 1. A result of “LO” or “HI” will not be sent to the Medtronic device, even when the Send option is on.
Removing the used lancet: Testing WARNING: Testing Your Blood • Test your blood again if your test result is below 50 mg/dL, above 250 mg/dL, or if you see “LO” or “HI” on the meter display. If your glucose level is still below 50 mg/dL, above 250 mg/dL, or shows as “LO” or “HI”, call your physician or health care professional immediately. • Do not change your medication based on CONTOUR® LINK blood glucose results without the advice of your physician or health care professional.
WARNING: Cleaning and Disinfection 16 • Always wash your hands well with soap and water before and after testing and handling the meter, lancing device, or test strips. NOTE: If your meter is being operated by a second person who is providing testing assistance to you, the meter and lancing device should be disinfected prior to use by the second person. The cleaning and disinfecting directions provided will not cause any damage or degradation to the external case, buttons or display.
Cleaning Your Lancing Device Testing Using a new Clorox® Germicidal Wipe, carefully wipe all outer surfaces of your meter until wet. Do not allow cleaning solution to run into the meter through areas such as around the buttons or the meter’s test strip or data ports. Data Port Disinfecting Your Meter Buttons Test Strip Port Supplies Needed for Cleaning: • Clorox® Germicidal Wipes containing 0.55% sodium hypochlorite (bleach) • Paper towels 1.
Disinfecting Your Lancing Device (cont’d) FOR PROPER DISINFECTION, YOU MUST KEEP ALL ENDCAP SURFACES WET FOR 60 SECONDS. 3. Using a new Clorox® Germicidal Wipe, carefully wipe all external and internal surfaces of the endcap until wet. Control Solution Testing: Use only Bayer’s CONTOUR® control solutions (Normal, Low, or High) with your CONTOUR meter. Using anything other than CONTOUR control solution could present incorrect results.
Control Solution Testing Immediately touch the tip of the test strip to t h e d ro p o f c o n t ro l solution. The solution is pulled into the test strip through the tip. Hold the test strip in the drop until the meter beeps. After the beep, you will see the meter count down five s e c o n d s until the test is complete and your control test result is displayed. NOTE: The does not indicate the control test result is within the specified range.
Setting Your Options: Setting the Time: You can set your meter to display different options. The time will now appear on the display. The number in the hour position will be flashing. Press or until you reach the correct time. Options Setting the Send Option: The number in the minute position will now flash. Press or until you reach the correct minute. Press M to set. The AM or PM will now flash. Press or to choose AM or PM.
This option controls whether you want to hear the “beeps” during testing. Your CONTOUR® LINK meter can give you the option of marking your test results by turning this option on. Press or to choose whether to turn the buzzer on or off. (You will hear a beep when you switch screen.) to the (See pages 28–33 to learn how to use these options!) Press or to turn the marker option on or off. Options Press M to set. Press M to set.
Options Be sure to leave the used test strip in the meter until you have finished marking the results. Using the Markers and Test Reminder Alarm Pre-meal = Marks a test result that was taken before a meal. Post-meal = Marks a test result that was taken after a meal. Logbook = Marks any result as being unique or different in some way and for which you may want to make notes in your Clinilog® logbook.
Test Reminder Alarm: You can now run another test by placing a test strip in the test strip port and following the testing instructions (page 8). Options When you have completed this test and the result is shown on the display, you may want to symbol mark this test with the to identify this test result as your post-meal result. For example: An alarm has been set. You decide to retest before that alarm goes off.
Pre-Meal Press or TO SET Press M Press M Alarm is set to go off after a set amount of time to remind you to run a post-meal test. Press M Result is marked as a post-meal test. Press M Result is marked in memory as unique. You should note this in your Logbook. Options (ON) Post-Meal Press or Using the Markers and Test Reminder Alarm 32 WHAT IT MEANS Result is marked as a pre-meal test. You can now set an alarm.
The 14 day average will appear on the display with the average for test results taken over the last 14 days. If you have set an alarm that has not sounded yet, you will also symbol. see a Options Viewing Stored Results 34 Number of results: The number of results included in the average is shown at the top of the display. Your control results are not included in this 14 day average. Press to view the 7 day total.
Error Codes and Symbols: Diabetes Care Customer Service at 1-800-348-8100 WHAT IT MEANS (will remain on the display) Replace the batteries as soon as possible to avoid the risk of a test result not being stored in your meter. Call Bayer Diabetes Care Customer Service at 1-800-348-8100 for free replacement batteries. E 10 Invalid date or time. See Setup instructions (page 25) to set the date and time on your meter.
• Be sure the Medtronic device is located within 4 feet of the CONTOUR® LINK meter. • Check that the Medtronic device is set to accept meter results and the meter ID has been programmed into the device. • Check the Medtronic device display to determine if the glucose result has been received by the device. If it has not, you can enter the test result manually. If you continue to have problems, contact Bayer Diabetes Care Customer Service. Control test result is out-ofrange (too high or too low).
Changing the Batteries: WARNING: When a low battery warning displays on the meter, replace the battery as soon as possible to avoid a test result not being stored in the meter memory. Slide the battery cover back into place, lining up with the open slots, and close firmly. Batteries should be replaced when the meter continually displays or the meter briefly flashes and then turns off (See Error Codes and Symbols, page 36). WARNING: Keep batteries away from children. Lithium batteries are poisonous.
Transferring Results to a Computer: Transferring Results to a Computer You can easily transfer test results from the CONTOUR® LINK meter to a computer that includes the Bayer's GLUCOFACTS® DELUXE Diabetes Management Software or Medtronic CareLink® Therapy Management Software. The results can then be summarized into easy-to-read reports that you can share with your physician. A Bayer data cable is required to use this feature.
Specifications: To assess intermediate measurement precision, the performance of ten CONTOUR® LINK meters was evaluated with three lots of sensors. The evaluation was performed by three operators who utilized three liquid control glucose levels under normal conditions of use over the course of 10 days. In total, three hundred sensors were used for each glucose level. The Grand Mean, pooled standard deviation and pooled %CV for each glucose level were calculated and are presented here.
Warranty: Limitations of Warranty: This warranty is subject to the following exceptions and limitations: 1. A 90-day warranty only will be extended for consumable parts and/or accessories. 3. Bayer HealthCare reserves the right to make changes in design of this instrument without obligation to incorporate such changes into previously manufactured instruments. 5.
Service Information: Supplies: If you have a problem and none of the problem-solving steps in the User Guide help, call Bayer Diabetes Care Customer Service. We have trained specialists to help you. When calling or writing for supplies, be sure to include the number with the name of the replacement part or accessory item. Important: Speak with Bayer Diabetes Care Customer Service before returning your meter for any reason.
Bayer HealthCare LLC Mishawaka, IN 46544 USA www.bayerdiabetes.com/us Bayer, the Bayer Cross, CONTOUR, MICROLET, Clinilog, GLUCOFACTS and the No Coding logo are registered trademarks of Bayer. No Coding is a trademark of Bayer. Paradigm, CareLink and Bolus Wizard are registered trademarks of Medtronic MiniMed, Inc. Revel is a trademark of Medtronic MiniMed, Inc. 84378888 4378888_CntrLINK_UG_EN_FpBp_v3.indd obc52 © 2012 Bayer. All rights reserved. Rev.