
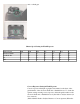
Technical data
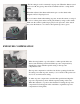
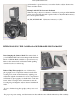
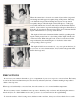

To lock the mirror, turn the mirror lock lever to the right until the white line
is set horizontal to the camera base. Then, push in the depth-of field preview
button. The button will be locked in pushed-in state and the diaphragm will
close down to the preselected aperture.
Before locking the mirror in flip-up position, compose, focus and make
exposure adjustment.
After making the exposure, reset the mirror to its original viewing position.
As soon as the mirror resets to its viewing position, the depth-of-field
preview button will return to its original position. The mirror lock lever can
be operated before or after film wind. The automatic exposure control will
not work when the mirror is locked in flip-up position.
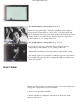
FLASH EXPOSURE
When making exposure with the aid of an electronic flash unit, turn the
shutter control dial off the 'AUTO' setting and adjust it to 1/60sec. or slower
speed setting.
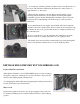
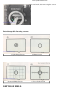
Your CONTAX RTS features an X sync terminal.
1. Mount the electronic flash unit on the accessory shoe.
2. Connect the PC cord of the unit to the camera's sync terminal. With a unit
featuring direct contact shoe, this step is unnecessary.
· The camera's direct contact shoe has anti-shock provision. Circuit contact is
made only when the flash unit is properly mounted on the accessory shoe.
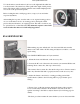
3. Adjust the shutter control dial to a setting providing perfect flash
synchronization. (Refer to the following table for proper shutter speed
setting.)
4. Secure focus, set the lens aperture and trip the shutter. After securing
focus, read the subject distance off the distance scale and set the lens
aperture according to the flash-to-subject distance (See following page for
details).
· The basic procedure remains the same whether you use an electronic flash
www.orphancameras.com