
User manual


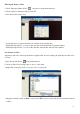
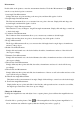

4. Click ‘OK’, the mouse will become a crossing on the screen. Click on the beginning and ending points
across a known value (The default magnification rate and value will show up automatically). Now a
dialog will popup as below and you need to enter the exact value of the measurement sample into the
‘Actual dimension’. Then the software will automatically calibrate the magnification rate. Click ‘OK’ and
the adjusted magnification rate will show in the upper right corner..
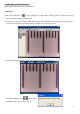
* Remark: The broken line should be parallel to the dial during measurement.
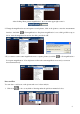
5. Now you can trough ‘Calibration > Straight angle line’ to measure the value again. If the value
you measure by software is nearly the same as the exact value of the dial means the calibration finish.
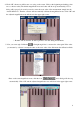
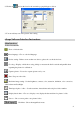
* Base on the same magnification rate, click the icon and a dialog will show up
automatically. Click ‘OK’ and the adjusted magnification rate will show in the upper right corner.
6