
User manual


5
1. Day
1st Da
y
In the Advent calendar toda
y
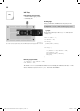
•
1x IoT Bluething board
2
Today, you will get to know the board with which you will implement the projects o
f
the next 24 days. To
prepare
f
or the next days, you will install the driver
f
or the USB connection, install the
A
rduino IDE and
fi
nally create your
fi
rst program
f
or the board
.
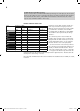
Chipset on the IoT-board
The IoT-board comes with two chipsets. For program execution, the board has an ATmega328P. This
micro controller communicates with an HC-05 via a serial interface. The HC-05 is responsible for the
wireless connection (Bluetooth). The module supports Bluetooth V2.0+EDR. You will need a Smart
-
p
hone with Android for A
pp
communication.
Confi guring the IoT-board
In order to take the IoT-board into operation, you need a computer with Linux, MacOSX or Windows
a
nd a Micro-USB-cable. This connection cable serves power supply and connection o
f
the IoT-board to
the PC in order to program it. You do not need to buy such a cable. You probably have one already –
a
lmost all modern Smartphones use this plug type
.
Select the
p
ro
p
er USB-
p
ort at the PC
Connect the cable to a USB 2.0 connection of your PC if you can. USB-3.0 connections may have con-
nection problems. You can often recognise a USB-3.0-connection by the blue socket.
Be
f
ore connecting the board to a PC, complete the
f
ollowing steps:
•
Step 1: Installation o
f
the driver
f
or the IoT-boar
d
•
Step 2: Installation of the Arduino ID
E
Step 1: Installation o
f
the driver
f
or the IoT-boar
d
T
h
e USB
p
ort on t
h
e IoT-
b
oar
d
is connecte
d
to a CH340G-c
h
i
p
set. In or
d
er to use
this chipset
f
or a USB connection, you need to install the matching driver
f
or your
o
perating system. Per
f
orm the
f
ollowing
f
our steps
f
or this
:
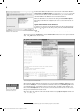
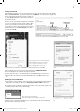
1 Download the example programs and the drive drivers
f
rom
h
tt
p
://www.
b
uc
h.
c
d
. Enter t
h
e co
d
e
1
5
00
7-
3
there and
f
ollow the instructions on the screen.
2 Unpack the ZIP archive into any
f
older under your user
f
older
.
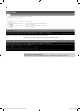
3
Connect the IoT-board via the USB-cable and start the driver installation with the
fi
le
C
H341
S
ER.EX
E
.
You may need to con
fi
rm a query
f
rom the Windows user account control
f
or installation
.
4
In t
h
e insta
ll
ation
d
ia
l
ogue, c
l
ic
k
Insta
ll
and wait until driver installation is con
fi
rmed.
Step 2: Installation o
f
the Arduino ID
E
T
h
e IoT-
b
oar
d
is compati
bl
e wit
h
t
h
e Ar
d
uino Nano an
d
can
b
e programme
d
wit
h
t
h
e Ar
d
uino IDE3. In
the Arduino IDE, you can write the programs in the programming language C and trans
f
er them directly
to the IoT-board. A
f
ter trans
f
er, the program will run without any connection to the PC, which means that
you may
d
isconnect t
h
e
b
oar
d
.
Switchin
g
off the IoT-board
The IoT-board has no off-switch. You
j
ust need to disconnect the USB-cable from the computer PC or
the mains unit, and the IoT-board will switch off. The last saved pro
g
ram will start automaticall
y
when
the board is switched on a
g
ain. The same happens if
y
ou push the reset button
.
2Ca
ll
e
d
t
h
e IoT-
b
oar
d
b
e
l
ow.
3 The Arduino IDE in version 1.8.2 has been used for the projects. If a newer version is available by the time the Advent calendar is
sold,
y
ou can use it instead. If there are an
y
distinctive chan
g
es,
y
ou will fi nd a correspondin
g
note in the download area
.
Installation o
f
the device drive
r
15007-3 Conrad Adventskalender Internet of Things 2017_en.indd 515007-3 Conrad Adventskalender Internet of Things 2017_en.indd 5 13.08.2017 17:02:5713.08.2017 17:02:57