
User manual


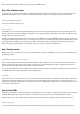


The website in the browser
If you now want to connect your PC to the NanoESP's own WLAN, you have to call up the access point IP address in the browser. The pages are
the same, with the exception that no pictures are displayed. The reason is that the PC has no connection to the Internet through this network and
thus the images, as external resources, can't be loaded. The advantage of this network mode, however, is that you don't need a router as a way
station but can access the board directly. Both methods thus have their advantages and disadvantages.
The IP addresses and browser requests on the serial monitor
Day 16: A web server piano
Behind today's door is a piezo sound transducer. It's possible to generate sounds with it, which will become clear in today's test. Today you're
building a type of piano that can be used via a website. See the following picture for the layout.
The correct connection of the piezo sound transducer
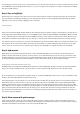
When you've uploaded the programme, you can open the board's website using the IP address in the browser. Today it doesn't matter whether
you connect to the board through your home network or the access point, since no external data is loaded. On the website you find a few
buttons with which you can trigger a tone when you press them. The transfer is really fast. However, you should give the board a quarter of a
second to play the tone before you send another tone. Otherwise, the note sounds very strange. But try to play one of the classics of the beginner
songs: All My Ducklings. The notes are:
C D E F G G A A A A G A A A A G F F F F E E G G G G C
The piano website
Day 17: Wake Up Light
Today's project deals with a well-known lamp from Phillips, the Wake Up Light. This is an alarm clock that, instead of making a loud noise,
slowly increases the brightness. This creates a type of sunrise, and one wakes up in a natural manner.
Behind today's door is another potentiometer, which is important for tomorrow's test. The following layout is required today:
The RGB LED with series resistors
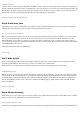
After the set-up, you can download the programme and upload it to the board. After the installation, open the browser and enter the IP address
of the board. On the page that now appears, you can select a time at which the wake-up process should start. You can also set the duration. In
the standard setting, it's 30 minutes. When the time is reached, the LED begins to light up red weakly at first. It slowly becomes brighter, and
then the green LED mixes in, which creates a yellow tone. Finally, the blue LED also lights up, which results in a white with which the entire
bedroom is brightened.
Set the timer on this website.
Day 18: Weather monitoring
Behind today's door is a very special component, namely a humidity sensor. Together with the phototransistor and the NTC, it creates a weather
station for at-home use. The following layout is necessary for this purpose:
The layout with all sensors (resistors 1 kohm)
Today's layout is a bit fiddly. Especially at the point where the potentiometer on the right of the image sits, it touches the NanoESP. But that's not