
User manual


The programme
If one presses a number key on the keyboard, the 7-segment indicator shows the corresponding digit. The Delete key deletes the display.
No number pad
Snap4Arduino supports only the digit keys in the top row of the QWERTY keyboard. The number keys of the number pad cannot be used.
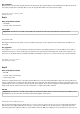
The programme consists of multiple script blocks, each of which reacts to each of the keystrokes. On the platform at the top right, you will find a
schematic diagram of the 7 segment display with the labels of the individual segments (a-g). This graphic has no function for the programme; it
serves only as an overview.
When you click on the green flag, two list variables are initialised:
• s contains the pins an which the seven segments from a to g are connected.
• z contains ten other lists, each of which contains a series of true and false operators, that determine which segments of the 7-segment
indicator should be switched on for the respective digits. The list begins with the digit 1; the digit 0 is
represented by the tenth list element. This method is used because objects in Snap lists are always counted
beginning with 1 – not with 0 as in many other programming languages.
Ten script blocks expect that one of the ten digit keys will be pressed. Depending on the key pressed, the variable n is set to the corresponding
number, for the 0 key to 10. After that, the message display is sent.
When the message display has been received, the most important script block starts; this block presents the digit stored in the variable n on the
7-segment display.
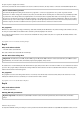
Script block for display of a number
The loop in this script block runs 7 times through and thereby indicates the seven LED segments stored in the list element n of the list z. The
associated pins are read from the list s.
To clear the 7-segment display, a separate script block is used that starts when the Delete key is pressed. Here a similar loop runs through 7
times and sets all segments to false.
The Delete key clears the 7-segment indicator.
Day 17
Today on the Advent calendar
• Clay
With the second piece of clay, you can now make different-coloured clay contacts, in order to clearly differentiate them.
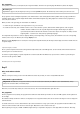
Counter with 7-segment indicator
Components: 1xbreadboard, 1x7-segment indicator, 7x220-ohm resistor (red-red-brown), 1x 20-Mohm resistor (red-black-blue), 2x clay
contact, 10xconnection cable, 1xinsulated jumper
Each time you touch the clay contact, the counter increases by 1. The 0 automatically follows again after the 9.
The programme
Like the programme from yesterday, the programme first defines two lists with the pin numbers for the seven LED segments and the patterns for
the ten digits.
The variable n always contains the number to be displayed on the 7-segment indicator, where the 10 stands for the digit 0 in order to display the
tenth list element.
So that the counter does not race ahead when the clay contact is touched for a longer period of time, the programme waits first until the clay
contact is touched and then until it has been released again. Only then does the counter increase by 1.
At the beginning of every pass, a send ... to all block again calls up a script block to display one of the digits defined in the list z. This script