
Installation Instructions


26
1-877-742-3071
www.connectadock.com
1501OwnerAvenue,Atlantic,IA50022USA
1-877-742-3071
www.connectadock.com
1501OwnerAvenue,Atlantic,IA50022USA
Self Wicking Planter
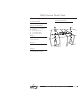
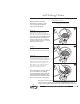
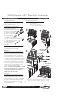
Step 6
While filling the Planter with
potting soil, coil the rope wick up
thru the soil along the sides of the pot.
Note: The rope wick should never be
exposed above the soil as this will
cause it to dry out. We recommend
the last coil to be at least 1” (2.5 cm)
below the soil’s surface.
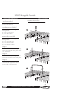
Step 7
Add plants to Planter following the
recommended planting instructions.
Step 8
Jump start the wicking system by
flooding the Planter with water. The
excess water will drain out thru the
bottom of the Planter and the rope
wick. After the excess water has
drained, the rope wick will always
provide the correct amount of
moisture for plants to thrive.
Note: Although the soil may appear
dry on the surface, the wicking
system will always supply plants the
moisture needed at the roots. Also,
the wicking system will drain off the
excessive water after a rain shower.
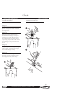
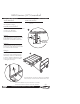
With your Planter assembly
attached to your dock, you are
now ready to fill your Planter
with your favorite plants.
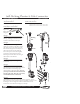
Instructions for:
Self Wicking Planter (SWP1020)
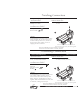
Adding plants to installed Planter
6a
6b
6c
Note: Please exercise caution when using the planter in salt water environments.
Check to make sure that the plants are salt water compatible before planting. If
using in salt water, please check the wick for salt deposits and replace, if necessary.