
User Manual

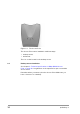
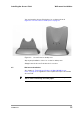
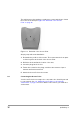
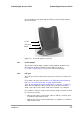
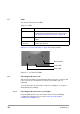
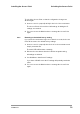

Table Of Contents
- Contents
- 1 Getting started
- 2 Installing the Access Point
- 3 Configuring the Access Point
- 3.1 Introduction
- 3.2 When to configure the Access Point
- 3.3 Starting the Web Interface
- 3.4 Launching Web Interface manually
- 3.5 Contents of Web Interface
- 3.5.1 Settings Summary
- 3.5.2 Wireless Settings
- 3.5.3 Security against unauthorized network access
- 3.5.4 To add a a client to the exception list
- 3.5.5 To delete a client from the exception list
- 3.5.6 Security against eavesdropping
- 3.5.7 Change WEP password
- 3.5.8 Security against unauthorized configuration
- 3.5.9 Identity
- 3.5.10 IP Settings
- 4 Troubleshooting
- 5 Technical specifications 11 Mbps WLAN Access Point
- 6 Regulatory notes and statements
- 6.1 Wireless LAN, Health and Authorization for use
- 6.2 Regulatory Information/disclaimers
- 6.3 USA-FCC (Federal Communications Commission) statement
- 6.4 FCC Radio Frequency Exposure statement
- 6.5 FCC Interference Statement
- 6.6 Export restrictions
- 6.7 Europe - EU R&TTE Declaration of Conformity
- 6.8 Restricted Wireless LAN device use in EU
- A TCP and IP settings
- B Wireless LAN
- Index

555004.doc
15
Installing the Access Point Wall mount installation
You can insert the Access Point in the foot socket as shown in
Figure 2-2: ‘Access Point for desktop use’ on page 15.
Step by step installation of the foot socket for desktop use:
Simply insert the Access Point into the foot socket.
2.5 Wall mount installation
See chapter 5: ‘Technical specifications 11 Mbps WLAN Access
Point’ on page 41 for regulations on the required free space around the
Access Point.
w
ww
w
Before you start drilling holes into a wall, make sure that part of the
wall is clear of electricity and water pipes.
Figure 2-2 Access Point for desktop use