WR17x59E-MA-ENG-0503.qxd 09.03.2005 15:39 Seite 1 Should there be any technical questions, please contact our hotline at +49 6897 81 06 154 or send a fax to +49 6897 81 06 156. www.conergy.
Dear Reader Introduction Thank you for placing confidence in us - and congratulations on your new, technically high-grade product! This instruction manual will help you get to know your new machine. Read the manual carefully and you will soon be familiar with all the many great features of your new product. This really is the best way to get the most out of all the advantages that your machine has to offer.
Safety rules Danger! Warning! Caution! “Danger!” indicates an imminently hazardous situation which, if not avoided, will result in death or serious injury. This signal word must be limited to the most extreme situations. This signal word is not used for hazards relating to property damage unless there is also a risk of personal injury appropriate to this level. “Warning!” indicates a potentially hazardous situation which, if not avoided, could result in death or serious injury.
General Remarks (continued) All the safety instructions and warning signs on the machine itself: - must be kept in a legible condition - must not be damaged - must not be removed - must not be covered, pasted or painted over For information about where the safety instructions and warning signs are located on the machine, please refer to the section of your machine’s instruction manual headed “General Remarks”.
Qualified Staff (continued) Maintenance and repair may only be carried out by an authorised specialist company. There is no guarantee in the case of parts sourced from other suppliers that these parts have been designed and manufactured to cope with the stresses and safety requirements that will be placed on them. Use only original spare parts (this also applies to standard parts).
Safety markings Equipment with the CE mark fulfils the basic requirements of the Guideline Governing Low-Voltage and Electromagnetic Compatibility. (More detailed information about this may be found in the Annex or in the section of your documentation headed “Technical Data”.) Data security The user is responsible for backing up data relating to changes made to factory settings. The manufacturer will not accept liability if personal settings are deleted.
Table of Contents Safety of persons ................................................................................................................... Safety ............................................................................................................................ Housing unit .................................................................................................................. Galvanic insulation ................................................................................
Display Modes ................................................................................................................. Scheme of display modes ........................................................................................... Scheme of display readings ........................................................................................ Display mode „Now“ ....................................................................................................
Service-Codes Displayed ................................................................................................ Service display ............................................................................................................ General service codes ................................................................................................ Complete failure ..........................................................................................................
Safety of persons Safety Housing unit Warning! Incorrect operation and work performed incorrectly can cause serious injury & damage! Only qualified staff are authorized to put your Conergy WR unit into operation and only within the scope of the respective technical regulations. Do not start operation or carry out maintenance works before you have read the chapter „Safety Conditions“! Only qualified installers are authorized to open the connection area.
Monitoring the electric mains network (continued) The permanent ENS mains monitoring scheme is an additional link in its safety chain. One of the signs by which ENS identifies abnormal situations in the mains is a sudden increase of the impedance in the mains network.
The Safety Concept Standards and Regulations Your Conergy WR unit complies with all applicable standards and regulations.
General Introduction How a photovoltaic system works General information The energy from worldwide insolation amounts to a total of about 1,540,000,000,000,000,000 kWh/year (1,540 Peta kWh/year). This is 15.000 times as much as the electricity consumption worldwide. We congratulate you on your decision to actively use world’s biggest energy pool. By the way, it was a scientist in the field of of physics, AlexandreEdmond Bequerel, who first discovered the photo-voltaic effect in 1839.
Spannung Modul 2 Modul 3 Mod. n Spannung Strang Mod. 1 Mod. 2 Power output and voltage are increased by combining a number of solar cells. If solar modules are connected in series like on a string, both the output potential as well as the voltage will increase. Strang-Spannung insgesamt Spannung + Modul 1 Your roof is your power generator (continued) - string 3 mod. n - Electricity is converted under the roof tension module 1, 2, ... n mod. 2 total string tension = mod.
The Conergy WR unit in the Photovoltaic System General information Your Conergy WR unit is the latest generation of solar inverters. It is the highly complex link between solar modules and the public electricity mains network. As such it is in charge of a number of highly qualified tasks. Transforming DC into AC electricity The Conergy WR unit transforms the direct current generated by the solar modules into alternating current.
Voltage transformation and galvanic insulation (continued) The Conergy WR is equipped with an HF-transformer (HF = high frequency) which assures a galvanic insulation between the DC side and the mains. In addition, the HF principle results in a drastic reduction of the transformer’s size, which means that it requires less space and has considerably less weight. In spite of its full galvanic insulation, the Conergy WR unit achieves a high degree of efficiency, due to its innovative circuit schemes.
Your advantage With each additional task, as described above and controlled directly by the inverter, installation becomes easier and less costly because no additional peripheral equipment will be required. Based on our experience and the use of the most innovative technologies, the Conergy WR unit is able to manage all these tasks simultaneously.
Product description The Conergy WR Unit How it functions The Conergy WR unit is designed for fully automatic operation. Basically no personal control is necessary for feeding the power it generates into the mains network. The Conergy WR unit starts operating automatically as soon as the solar modules produce sufficient power output after sunrise. From this point onwards, you will also receive system information from the Conergy WR graphic display.
Startup phase (continued) (3) Synchronisation with mains - The screen displays „SYNCAC“ - „WAITPS“ is displayed: The Conergy WR is waiting for all power supplies in the network to be on stand-by. This procedure takes place dependent on the DC-voltage. - „SYNCAC“ is displayed subsequently. (4) Startup test - Before the Conergy WR unit starts supplying power into the mains, the conditions of the mains network are tested in detail in accordance with the regulations of your country.
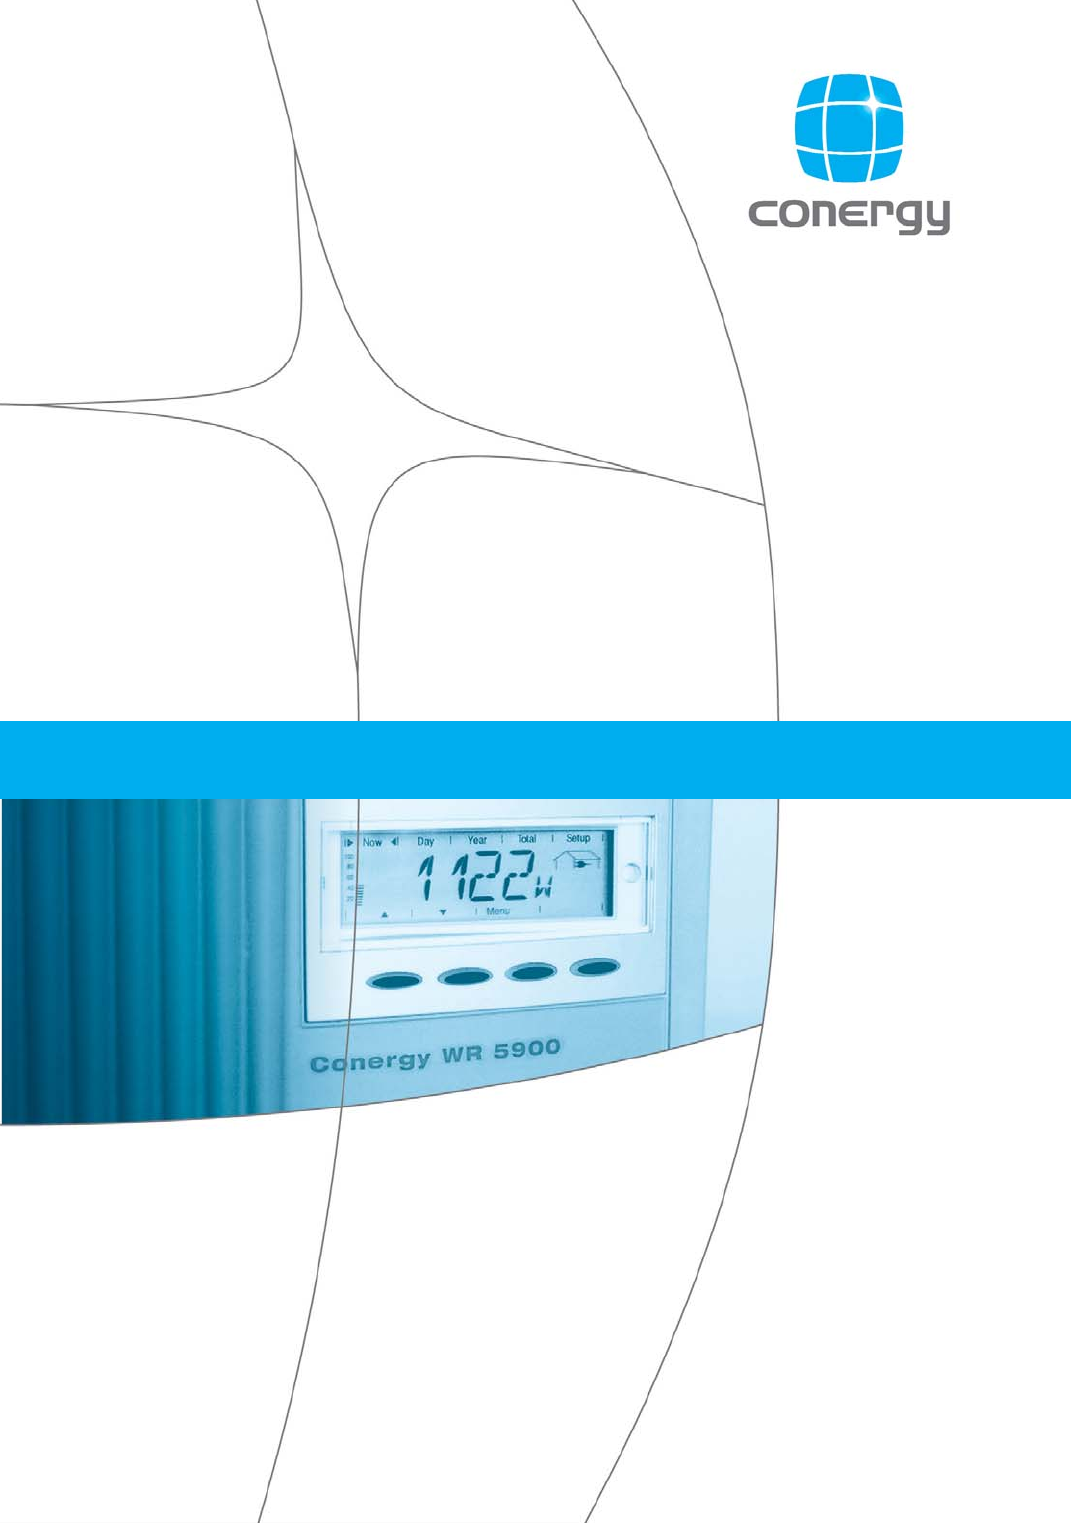
Overview for Conergy WR (1) storage area for operation and installation manual (2) ventilation grill (3) LED for operation status (4) display (5) keyboard (6) slot -in board area (7) various versions of connection plate (8) connection area - to be opened only by licensed electricity installers (9) power stage, separately insulation encased - to be opened only by trained service staff (1) (9) (8) (2) (3) (4) (5) (7) (6) 14
LED for operating status LED Depending on the operating status, the LED assumes different colours (1) LED lights up green: - a green light starts as soon as the Conergy WR unit has completed the startup phase, it stays green as long as the operation of feeding power into the network continues - it indicates faultless operation of the photovoltaic equipment (2) LED flashes green: - as long as the photovoltaic equipment is operating without fault - and an additional message is displayed on the screen Note!
LED for operating status (continued) (4) LED flashes orange: - when a warning is being displayed on the screen - or the Conergy WR unit has been set to standby operation in the setup menu = manual shutoff of power supply operation - after the next day sunrise, power supply operation will be resumed automatically - during the time while the orange LED keeps flashing, the power supply operation can be resumed manually at any time (see chapter „Setup Menu“) (5) LED lights up red: - general status: the respect
Operating scheme The Display General information The Conergy WR unit is pre-configured to be ready for operation, therefore it is not necessary to make any adjustments in order to be able to get it to operate fully automatic and feed power into the mains. The display is powered by the solar module and is therefore available throughout the day. Important! The display of the Conergy WR is not a calibrated measuring device. A slight deviation by a few percent is inherent in the system.
Symbols (continued) (3) area for data display ... for displaying the data value measured (4) area for unit display ... for displaying the measuring unit applicable (5) segment bar ... indicates at any time the power output fed into the mains at a given time - independent from the display mode chosen. The screen displays % of the maximum possible power supply out put of your solar inverter (6) ... appears with data readings which are directly related to the public mains network (7) ...
Menu level From the menu level you enter the display mode or the setup menu. Move into the menu surface by pressing key (C) (C) (C) - the screen displays „Menu“ - the display is operating in the menu level Select display mode - move into the menu level - select the desired display mode (1) to (4) by pressing keys (A) or (B) - enter the display mode selected: press key „Enter“ (D) (1) (2) (3) (4) (A) (A) (B) (D) (B) (D) 19 Note! for the menu item „Year“ a real time clock is required.
Scrolling between display functions (A) (B) (A) (A) (B) (B) - select the desired display mode (see above) - scroll between the display functions available with keys (A) or (B) Display Modes Scheme of display modes The following display modes are available: display mode „Now“ ...shows present data display mode „Day“ ... shows data for supply into the mains for the current day display mode „Year“ ...
Scheme of display readings The following scheme contains a brief list of the display readings available. Display readings without footnote are shown when the setting „standard“ is chosen (factory setting). * optional - if the required option card is not available, the message „N.A.“ (nicht angeschlossen = not connected) is displayed.
Display mode „Now“ Displays present readings - select display mode „Now“ (chapter „The Display“) - the first display function of the display mode „Now“ appears * optional - in case the card for the required option is not available, the message „N.A.“ is displayed power supplied .. power supplied to mains at this moment (Watt) (A) - (B) for the next item press key (B) to scroll back press key (A) mains voltage (Volt) power supplied ...
Display mode „Now“ (continued) module voltage... voltage in the solar modules at the moment of data display The voltage indicated during power supply into mains is equal to the socalled MPP voltage (MPP = maximum power point). The Conergy WR unit keeps the module voltage always within the maximum possible power output withdrawal from the solar modules. This always guarantees an optimum efficiency performance of your photovoltaic generator.. module power ...
Display mode „Now“ (continued) Display example for negative potential (sign „-“) Short circuit between DC- line and earth Display example for positive potential (sign „+“) Short circuit between DC+ line and earth 24 * power output drawn from mains supply... present consumption (Watt; sensor card optional) * ambient temperature (°C;°C; can also be set for °F in setup menu; temperature sensor Nr.2; sensor card optional) * insolation ...
Display mode „Day / Year / Total“ Display mode „Day“ ... shows readings for mains supply feed-in of current day - only in combination with bus-master option Important! For the Conergy WR unit, the day begins with the moment it switches on.
Energy supplied ... energy supplied during period monitored (kWh / MWh) Display mode „Day / Year / Total“ (continued) (A) (B) Due to different monitoring systems there can be deviations in comparison with readings of other metering instruments. For invoicing of the energy supplied only the readings of the calibrated meter supplied by the electric utility company are relevant. - press key (B) for next item to scroll back press key (A) Yield ...
Display mode „Day / Year / Total“ (continued) Minimum mains voltage... lowest reading of mains voltage (V) during observation period Maximum module voltage... highest reading of module voltage (V) during observation period * Energy consumption meter reading energy consumed during observation period (kWh / MWh; applicable for consumption sensor) * maximum temperature at module...
Display mode „Day / Year / Total“ (continued) * maximum insolation... highest insolation during observation period (W/m²; sensor card optional) operating hours ... duration of operation of Conergy WR unit (HH:MM) Duration of operation is shown in hours and minutes upto 999 h and 59 min (display: „999:59“). From then on only full hours are displayed. Although the Conergy WR unit is not operating during the night, all data required for the sensor card option are monitored and saved around the clock.
Display mode „Setup“ The setup menu allows easy readjustment of the preset parameters of the Conergy WR unit in order to adapt to your needs and requirements in the best possible way.
- „Standby“ ...activate/deactivate the standby operation by pressing the „Enter“ key Setting the menu items (D) The menu item „Standby“ allows manual activation of the standby operation of the Conergy WR unit. During standby operation the electronic system of the power stage is switched off. No power is fed into the mains. There is an orange flash on the LED. The following message is flashed intermittently on the screen: „STANDBY“ „ENTER“ - The orange flashing LED stops with dusk arriving.
- „Contrast“ ... set contrast on LCD display (C) (D) (D) - select from settings „0“ to „7“ - press key (A) or (B): - enter „Contrast“: press key „Enter“ (D) As contrast depends on temperature, it may be necessary to adjust the menu item „Contrast“ when ambient conditions change. Settings for minimum possible contrast (0) upto maximum possible contrast (7): (C) (D) ... (A) - maintain previous setting: press key „Esc“ (C) (B) (C) - accept: press key „Enter (D)“ (D) - „Menu Mode“ ...
- „Light Mode“ ... pre-setting of display illumination (C) - to enter „Light Mode“: press key „Enter“ (D) (D) (D) - To switch between settings Auto 1., On 2. and Off 3. - press keys (A) or (B): (C) 1.The display illumination will stop 30 seconds after the last time a key has been pressed - accept: press key „Enter“ (D) - maintain previous setting: press key „Esc“ (C) (D) (A) (B) (A) (C) 2.
2 1 (D) (A) (B) (C) (D) ... ... (A) (B) (C) (D) 1. Enter currency (factory pre-set for EUR) - first digit starts flashing - select a character for the first digit by pressing key (A) or (B) - confirm by pressing key „Enter“(D) - next digit starts flashing - follow same procedure as described above for subsequent digits - accept the currency selected by pressing key „Enter“ (D) - to maintain previous setting, press key „Esc“ (C) (D) 2.
(C) (D) - „IG-NR“ ...Setting the number (=address) of the Conergy WR unit in a setup comprising more than one photovoltaic inverter linked with each other - enter „IG-NR“ by pressing the key „Enter“ (D) (D) enter address (01 ...
(C) (D) (A) (D) (B) (A) (B) If a successful data link has been set up then „OKCOM“ is displayed. (B) „Error“ is displayed if DatCom is not installed or the data link is not functioning correctly. - Press key (B) to call up the Signal Card test (D) (D) - Start the Signal Card test by pressing the „Enter“ key (D) (C) Signal Card not installed (C) Signal Card active - The Signal Card‘s acoustic signal sounds for confirmation. Important! Check the signal lines if the signal fails to sound.
Important! The menu item „Year“ is only supported when the option data recorder is connected. (C) (D) (D) - „Time“ ... setting of date and time - enter „Time“ by pressing key „Enter“ (D) 1.Enter date (e.g.: 03.10.
- „STATE_PS“ ... Status display of power stage sets - Press „Enter“ key (D) (D) (D) - In this case for example the first power stage set (PS00) is on „Standby“ - „Standby“ means no electricity is being fed into the public mains - Press „Enter“ key (D) (D) (D) - Display of the most recently stored service code (e.g. „State 406“) Alternately Important! The most recently stored service code and the display „State Load“ appear alternately.
- „Version“ displays version number and serial number of the IG control unit and the power stage - enter „Version“by pressing key „Enter“(D) (D) - To switch between displays MAINCTRL1., PS01 2. and ENS 3. - press key (A) or (B) (C) (A) (B) (D) display version number (A) 1.
Additional information Upgrading the system The Conergy WR unit is prepared for a whole series of system upgrades.
Upgrading the system (continued) Please take further details from the chapter „LocalNet“ of the installation and service manual.
Installation manual 41
Open the housing Warning! Hazard due to supply voltage and DC-voltage from the solar modules. Only licenced electricity installers are authorized to open the connection area. Only trained service staff are authorized to open the separately insulation-enclosed power stage on condition that it is not under voltage. Conergy WR Opening connection area 2. 1.
Conergy WR (continued) (3) connection section is open (4) power stage (5) (3) (4) Warning! Hazard due to supply voltage and DC-voltage from the solar modules.
(2x) -> Conergy WR 5900 (1) 373 mm Hazard due to supply voltage and DC-voltage from the solar modules. Only licensed electricity installers are authorized to open the connection area. -> Conergy WR 3300 Fixing the wall mounting frame - the Conergy WR unit is to be installed at a height which keeps the display slightly below the position of your eyes in order to secure best possible readability of the display. - The distance between the top edge of the Conergy WR and the ceiling should be approx.
Fixing the wall mounting frame (continued) The housing is designed for a cable channel of up to 50 mm height which can be located directly below the connection area, without - cables visible below the Conergy WR unit - impairing access to the connection area and the slot- in board area Important! Should a cable channel be located below the Conergy WR unit, the following must be observed: - lower edge of Conergy WR unit will be located exactly 26 mm beneath the wall mounting frame 26 mm 45
Connection Connection to the Solar Modules and to the Public Mains Solar modules The following points are important for the most economic use of the Conergy WR unit when choosing suitable solar modules: - the no-load voltage increases when temperature decreases with insolation remaining unchanged. Therefore the no-load voltage must not exceed 500 V - or 530 V for the WR 5900E.
Connection alternatives Depending on the options installed in your Conergy WR unit, you have the following alternatives to connect the solar inverter at the DC solar modules and to the public AC mains: Note! Only cables up to a cross section of 4 mm² are permitted for the AC-plug-type connector. Only use cables with a cross-section of 4 sq.mm for the Conergy WR 5900.
1. Terminal block (continued) AC DC DC PE N L1 + - terminal rail for the leads of the (AC) connection cable 2.
2. DC plug (continued) - install the multicontact plugs at plus and minus poles of solar module strings - connect the strings to the Conergy WR unit Note! Never disconnect the DC plugs from the respective sockets during power feed operation of the Conergy WR unit. Before disconnecting the strings always first disconnect the mains supply or switch the Conergy WR to standby operation. Not complying with this instruction may damage the connection plugs.
3. DC plug and AC connection (continued) (1) (2) (3) white: for main cable with 5 to 11 mm diameter black: for main cable with 9,5 to 15 mm diameter - assemble AC plug - connect AC plug to Conergy WR unit and latch Note! Always shut off voltage before unplugging the AC connection by disconnecting fuse in the house distribution cabinet.
Start up Operation Configuring your Inverter Factory preset configuration Your Conergy WR unit has been pre-configured in the factory and is ready for operation. After connecting the Conergy WR unit to the solar modules (DC) and to the public utility mains (AC), all you have to do is close the AC and DC isolating switch.
Your personal configuration For your personal configuration please consult the chapter „Operating Scheme“, section „Setup Menu“ of your operating instructions. For settings to connect more than one inverter at the LocalNet (such as numbering of the bus partners connected/system upgrading) please consult the chapter LocalNet LocalNet System upgrading / slot-in board system Your Conergy WR is pre-set for quite a number of system upgrades.
Insert slot-in boards, Conergy WR For inserting the system upgrade slot-in boards proceed as follows: Warning! Hazard due to supply voltage and DC-voltage from the solar modules. Only licensed electricity installers are authorized to open the connection area and only on condition that is not under voltage.
Configuration LocalNet automatically identifies different system upgrades (data recorder, sensor card, ...) To differentiate between several identical system upgradings, the respective units must have an individual number. To define each Conergy WR clearly in the LocalNet, an individual number must also be allocated to each Conergy WR. For the respective procedure, please consult the chapter „Setup Menu“ in your operating instructions.
Example (continued) Note! Basically the order of sequence for placing the cards does not matter. Important however is: - One Conergy WR can have only one COM card - One network can contain only one data recorder. More information on the various system upgrade possbilities you will find in the respective operating manuals.
General service codes (continued) As long as the power output at the solar modules is insufficient, the display shows the message „POWERLOW“. After a short time of waiting the Conergy WR resumes network synchronization (message: „SYNCAC“). Complete failure Should the display remain dark for a longer period of time after sunrise you must check the no-load voltage of the solar modules.
Conergy WR with several power stage sets (continued) 1 - The status display of the power stage sets „State_ PS“ appears - Press the „Enter“ key (D) Important! Please see the Section entitled „The Set-Up Menu“, „STATE_PS“ for how to proceed. Class 1 Service codes of service class 1 appear mostly only temporarily, their cause lies in the public mains network. The first reaction of your Conergy WR unit is to disconnect from the mains.
Class 2 Service class 2 codes can only arise in connection with the ENS option. Class 2 service codes are also related to the parameters of the mains network. Some of the checking procedures therefore overlap with those of service class 1. Your Conergy WR unwill react in the same way as in the case of service codes in service class 1.
Class 3 Service class 3 comprises service codes which may appear during operation of feeding power supply, which however basically do not cause a permanent interruption of the operation of feeding power into the mains. After automatic disconnection from the mains and monitoring of the mains as stipulated, your Conergy WR unit will try to resume the feeding operation.
Class 4 Class 4 service codes require in some cases the intervention of a trained Conergy service technician.
Class 4 (continued) Code Designation Description Repair 410 Service plug was not inserted in its original position 2-pole plug inserted in the wrong socket. If Service-Code is displayed permanently, you should contact a trained service technician 412 The setting voltage has been selected instead of the MPP-voltage operation and the setting voltage is set to too low a value.
Class 5 Class 5 service codes generally do not impair the operation of feeding power into the mains network. They will be displayed so long until the service code displayed is cancelled by pressing a key (the Conergy WR unit, however, continues working normally in the background).
Class 5 (continued) Code Designation Description Repair 514 No communication with one of the power stage sets Warning message from one of the power stage sets, second power stage set working normally Contact Conergy-trained service technician if service code is displayed permanently 515 Faulty plug-in connections Temperature sensor DC/AC or DC/DC faulty, Service jumper located on „service“ plug-in station or „+15 V secondary“ not connected Check plug-in connections 516 Status message present f
Annex Technical Data Conergy WR 1700 / 2300 / 3300 Input data Recommended PV power WR 1700 WR 2300 WR 3300 1300-2000 Wp 1800-2700 Wp 2500-3600 Wp MPP-voltage range 150 - 400 V Max. input voltage (at 1000 W/m² / - 10°C in no-load operation) Max. input current 500 V 10,75 A 14,34 A 19 A WR 1700 WR 2300 WR 3300 Nominal output power (Pnom) 1,3 kW 1,8 kW 2,5 kW Max.
Conergy WR 4600 / 5900 / 5900 E Input data Recommended PV power WR 4600 WR 5900 WR 5900E 3500-5500 Wp 4600-6700 Wp 4600-6700 Wp MPP-voltage range 150 - 400 V Max. input voltage (at 1000 W/m² / - 10°C in no-load) 500 V 500 V 530 V Max. Eingangsstrom 29,4 A 35,84 A 35,84 A WR 4600 WR 5900 WR 5900E Nominal output power (Pnom) 3,5 kW 4,6 kW 4,6 kW Max.
Our product complies with the following standards and regulations The Conergy WR unit complies with the „Regulation for supply and parallel operation of low voltage network power generation systems for owner’s own use“ (Richtlinie für Anschluß und Parallelbetrieb von Eigenerzeugungsanlagen am Niederspannungsnetz) of VDEW, the German Association of Producers of Electric Energy (Verband der Elektrizitätswirtschaft).
Warranty and Liability Warranty terms and liability The warranty of the general terms of business is applicable for the Conergy WR unit. For the duration of this period Conergy guarantees the proper function of your solar inverter. Should there be any defect for which Conergy is responsible, Conergy undertakes within the warranty period to carry out the factory repair free of charge. If the machine shuts down no loss of yield can be ascertained for the network power supply that has been lost.
Warranty period 60 months from date of installation. Exception: Options contained in the product delivered (system upgrades). Warranty for this components is 24 months from installation date on. A prolongation of the warranty is possible up to 10 years from date of production. Warranty evidence Purchase date of the invoice, date of taking over the equipment / date of commissioning and report of the energy utility supply company.
69
70
71
72
73
74
75
76
WR17x59E-MA-ENG-0503.qxd 09.03.2005 15:39 Seite 1 Should there be any technical questions, please contact our hotline at +49 6897 81 06 154 or send a fax to +49 6897 81 06 156. www.conergy.