
Instruction manual


79
Printing still images
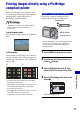
Printing images directly using a PictBridge compliant printer
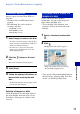
2 Select print settings with v/V/b/B.
[Index]
Select [On] to print as an index image.
[Size]
Select the size of the printing sheet.
[Date]
Select [Day&Time] or [Date] to insert
the date and time on images.
• When you choose [Date], the date will be
inserted in the order you select (page 54).
This function may not be provided
depending on the printer.
[Quantity]
When [Index] is set to [Off]:
Select the number of sheets of an image
that you want to print. The image will
be printed as a single image.
When [Index] is set to [On]:
Select the number of sets of images that
you want to print as an index image. If
you selected [This image] in step 1,
select the number of the same image
you want to print side by side on a sheet
as an index image.
• The designated number of images may not
all fit onto a single sheet depending on the
quantity of images.
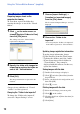
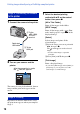
3 Select [OK] with V/B, then press
z.
The image is printed.
• Do not disconnect the dedicated USB cable
while the (PictBridge Connecting)
indicator appears on the screen.
To print other images
After step 3, select [Select] and the desired
image with v/V, then perform from step 1.
To print images on the index screen
Perform “Stage 1: Preparing the camera”
(page 77) and “Stage 2: Connecting the
camera to the printer” (page 78), then
proceed with the following.
When you connect the camera to a printer,
the print menu appears. Select [Cancel] to
turn off the print menu, then proceed as
follows.
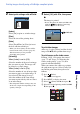
1 Press (Index).
The index screen appears.
2 Press MENU to display the menu.
3 Select [ ] (Print) with B, then press z.
4 Select the desired printing method with v/
V, then press z.
indicator