RocketPort® Serial Hub Si Driver Installation for Windows 95/98® How to Use this Document You can use the interactive Table of Contents to locate the information you need. Driver Requirements This document discusses installing and configuring the RocketPort Serial Hub Si device driver for the Windows 95/98 operating system.
Interactive Table of Contents RocketPort® Serial Hub Si Driver Installation for Windows 95/98® How to Use this Document 1 Driver Requirements 1 Connectivity Requirements 1 Initial Installation - Quick Reference 1 Driver Installation and Configuration Removing an Existing Device and Driver 4 Installing the Device and Driver 6 Verifying the Installation 14 Using the Port Sharing Feature 15 Changing Configuration Parameters 16 Adding RocketPort Serial Hub Si Units After the Initial Installati
Report Configuration Port Monitor Files Port Monitor Variables 38 39 39 Using the Device Advisor 42 Device Advisor Driver Messages 44 Technical Support Comtrol Corporate Headquarters 46 Comtrol Europe 46 Disclaimer and Copyrights 47 3
Driver Installation and Configuration This subsection discusses the following installation and configuration issues: • Removing an existing device and driver (discussed below) • Installing the software • Verifying the installation • Using port sharing • Changing configuration parameters • Adding new RocketPort Serial Hub Si devices to an existing configuration • “Hot-swapping” devices See Initial Installation - Quick Reference, if you want to install the product using a quick reference.
. Click the Remove button. This warning displays: 6. Click the OK button. Wait while the operating system deletes the device record. When it is finished, an updated Device Manager window displays. 7. Repeat Steps 4 through 6 for each RocketPort Serial Hub Si in the system. 8. When finished removing devices, click the Close button. 9. Click the Start button to begin removing the software. 10. From the Start menu, select Settings, then Control Panel. 11. Double-click on the Add/Remove Programs icon.
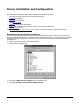
Installing the Device and Driver Use the following procedures to install the device and driver for the Windows 95/98 operating systems. Note: If updating the driver, first remove the existing version of the driver. Do not use the Update option. The following procedures assume that you have already: • Installed the hardware • Determined that the hardware is working properly using the power-on diagnostics See the Hardware Installation documentation for all hardware and diagnostics information.
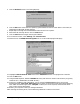
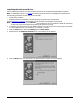
5. Click the No button, then Next. The list of hardware types displays: 6. Highlight Multi-function adapters and click Next. The list of manufacturers and models displays: 7. Click the Have Disk button. This window displays: 8. Enter the drive and directory path to the installation files and click the OK button. For example, if you extracted the driver to a subdirectory named comtrol, enter: c:\comtrol. If using the Browse option to locate the installation files, select the ctmrphsi.inf file.
A list of RocketPort Serial Hub Si devices displays: 9. Select your hub type (4- or 8-port) and click Next. The following window displays: 10. Click Finish.
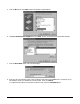
11. Click Yes when asked if you want to restart your computer: 12. After the computer restarts, it automatically recognizes the new COM ports and installs the software for each port. When the process is complete, this message displays: 13. Click Yes. The Comtrol Main Setup window displays: 14. Make sure the RocketPort Serial Hub Si device is selected, then click the Properties button.
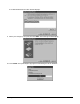
The Device Setup window displays: 15. Optionally, rename the RocketPort Serial Hub Si default device name. 16. Verify the Number of Ports you want to configure for this computer. 17. Select the type of network addressing that you plan to implement. Note: See Hardware Installation for information regarding the advantages of MAC or IP addressing. a. If you select MAC, enter the MAC Address of the device that you are installing.
18. Click the OK button. The Main Setup window appears: 19. If you want to change the Send Window or Scan Rate, click the Options tab. The Options screen appears: a. Select the options you want to implement. Small Send Window causes the driver to send small data packets immediately, rather than waiting until the send buffer fills. b. Scan Rate is used to adjust latency for time-critical applications. Typically, you should leave it set to the default value of 10 milliseconds. 20. Click the Main Setup tab.
21. Highlight any COM port that you want to configure and click Properties. The Port Properties window displays: 22. Select the appropriate mode to match the peripheral that you are connecting to the selected COM port. 23. Optionally, make any necessary changes to fit your environment: a. Lock the baud rate to access higher or lower rates than are normally permitted by your Windows applications. b. Set a time delay on the transmit data before a port closes.
h. If you need to configure RTS options, click on the RS Toggle tab. i. Configure the port. The Override and lock to RTS toggle mode option allows you to lock the port in RTS toggle mode, then set the mode (low or high) as desired. The RTS Toggle RTS Low option allows you to toggle the RTS output signal low during data transmission. If the option box is not checked, RTS is toggled high (asserted) during data transmission 24. After configuring your port (COM) properties, click the OK button.
Verifying the Installation After rebooting the system, the driver downloads to the RocketPort Serial Hub Si. The port LEDs should be cycling their lights approximately every 30 seconds (instead of the Port 1 LED flashing, which indicates that the RocketPort Serial Hub Si is waiting for the driver). Use the following procedure to verify the installation. 1. Open the Device Manager. 2. Expand the Multi-function adapters entry. 3. Select the RocketPort Serial Hub Si. 4. Click the Properties button. 5.
Using the Port Sharing Feature The RocketPort Serial Hub Si can be shared with multiple computers on a network. To do so, follow the Installing the Device and Driver discussion for each server that you want to permit access to the serial ports. You can implement the port sharing feature in several ways. You share the same port with multiple servers or you can set up multiple servers to share specific ports on the RocketPort Serial Hub Si.
Changing Configuration Parameters Use the following procedure to change the: • RocketPort Serial Hub Si properties, such as: - Name of the RocketPort Serial Hub Si - Number of ports - Network address Note: You can change the network address type by clicking on the current checkbox type, followed by placing a check in the other network type and entering the appropriate address. You also have to change the MAC address if hot-swapping the hardware. - Device options such as scan rate.
6. Select the Device Setup tab. 7. Click the Configure button.
8. To change basic driver-level options (scan rate, send window size), click the Options tab. 9. Make your changes, then click on the Main Setup tab to return to the Main Setup page. 10. To change the RocketPort Serial Hu Si properties (device name, number of ports, or network address), highlight the device name and click the Properties button.
11. Make the desired changes and click OK to return to the Main Setup page. 12. To change port configuration, highlight the COM port that you want to change and click the Properties button. The Port Setup window displays: 13. Make the port configuration changes that you want and click the OK button. Before changing the communications mode in the Setup program for an existing port, make sure that you disconnect the peripheral device from the port.
14. Click OK to save your configuration changes and return to the Main Setup window. 15. Click OK to close the setup program and return to the Windows Device Manager.
16. Click OK to exit to the Windows System Properties window. 17. Click OK to exit to the Windows desktop. Note: Depending upon the type of configuration changes you made, you may or may not need to reboot your system. The driver will prompt you to reboot the system, if necessary. Adding RocketPort Serial Hub Si Units After the Initial Installation Each RocketPort Serial Hub Si must be installed as a separate Multi-function adapter.
“Hot-Swapping” RocketPort Serial Hub Si Devices On occasion, it may be necessary to replace an existing and configured RocketPort Serial Hub Si with an identical hub, without downing the server or reconfiguring ports. To do so, follow these steps: 1. Shut off the old RocketPort Serial Hub Si, connect all cables to the corresponding ports on the spare RocketPort Serial Hub Si, and power up the new RocketPort Serial Hub Si.
8. Make sure the serial hub is highlighted and click Properties. The Device Setup window displays: 9. Enter the network (MAC or IP) address of the replacement RocketPort Serial Hub Si. Note: Leave all other settings the same. The unit being swapped in must have the same number of ports and the same COM number configuration as the unit being taken out of service. If you use IP addressing, the new unit may be configured to use the same IP address as the old one. 10. Click OK to exit to the Main Setup window.
Configuring Modems After installing the hardware and driver for Windows 95/98, use this discussion to configure modem COM ports. The RocketPort Serial Hub Si can support any asynchronous serial modem for use by any application that uses TAPI. For information regarding port pinouts and signals, see the Hardware Installation Card. Installing Modems The following instructions were developed using Comtrol modem products.
5. Check the “Don’t detect my modem...” box and click Next. Note: Do not use the auto-detect feature. The Windows modem auto-detect function does not recognize ports above COM10, and it scans down, beginning with the highest detected COM port. This can produce extremely confusing modem-to-port numbering and naming sequences. 6. Select the appropriate manufacturer and model and click Next.
7. Select the port to which the modem is attached and click Next. The system installs the modem software. 8. Select Finish.
9. The Modems Properties window displays again. Depending on prior configuration, you may be asked to enter your country of use, area code, number dialed to get an outside line, and whether you have tone or pulse dialing. 10. If you need to configure modem properties (maximum baud rate, data bits, parity, and so on), click the Properties button, make the needed changes, then click OK to return to this window. Note: For help configuring modem properties, see the Windows Help System. 11.
Configuring Printers Use this subsection to configure printers for the RocketPort Serial Hub Si after installing the RocketPort Serial Hub Si hardware and driver. Adding Serial Printers Follow these steps to configure a serial printer. Note: You may need the Windows 95/98 CD-ROM in order to load drivers and complete printer installation. Make sure you have this CD on-hand before beginning the process. 1. Connect the printer to the desired port.
5. Select Local printer, then click Next. Note: While the RocketPort Serial Hub Si is a network device, the COM ports appear to be local ports to your computer. 6. Select your printer make and model and click Next, or use the Have Disk option to load a printer driver from CD or diskette.
7. Select the COM port to which the printer is connected and click Configure Port. 8. Enter the baud rate, flow control, and other information as specified by the printer manufacturer, and click OK.
9. The port selection page displays again. Click Next. 10. Optionally, enter a custom name for this printer, and select whether this printer is the Windows default printer. Click Next. 11. Select whether to print a test page and click Finish. Note: You may be prompted to insert the Windows 95/98 CD-ROM in order to load drivers. Do so and follow the on-screen instructions. 12. If the test page prints successfully, you are now ready to begin using the printer. No reboot is needed.
Changing Printer Port Assignment To change the port assigned to a printer, follow these steps: 1. Open the Printers control panel. 2. Right-click on the icon for the printer you want to change. 3. Select the Properties option from the menu. The Properties window is displayed. 4. Click the Details tab. Note: The Properties window also gives you access to printer test and setup options that can be very helpful when debugging a serial printer installation. 5.
Troubleshooting and Using Comtrol Tools The first subsection discusses troubleshooting. The following subsections discuss the following utilities that are shipped with Comtrol drivers for Microsoft operating systems: • Test Terminal (WCOM32.EXE) • Port Monitor (PORTMON.EXE) • Device Advisor Troubleshooting If you are having trouble with a RocketPort Serial Hub Si, try the following. Note: Most customer problems reported to Comtrol Technical Support are eventually traced to cabling or network problems.
Using Test Terminal WCOM32 is a terminal program that enables you to open a port, send characters and commands to the port, and toggle the control signals. Note: WCOM32 will not work if any other application is using the port. Follow these steps: 1. To start WCOM32, select Test Terminal from the Comtrol program group. The program window displays: 2. Select Open Port from the Port menu. A list of possible COM port numbers displays. 3. Select the COM port you want to test.
Testing a RocketPort Serial Hub Si 1. Place a loopback plug on the COM port you are testing. Make sure all connectors are seated firmly and that the loop button is off. Note: This works only for RS-232 and RS-422 mode. Use the diagnostics for RS-485 mode. To build loopback plugs, see the Hardware Installation documentation. 2. From the Port menu, select Send Test Data. The program sends out a repeating data stream. Note: To stop the data stream, select Send Test Data again.
Some immediate feedback includes: • The state of the modem control and status signals • Open ports • Raw byte input and output counts obtained from the driver • Port errors The available statistics include: • Instantaneous characters per second (CPS) calculations • Minute, hour, and day CPS averages and peaks • Carrier detect (CD) signal runtime and transition count Reports can be automatically generated on an hourly and/or daily basis, and can cover all ports collectively or a separate report
Port Monitor Screen Commands (Continued) Desired Change Procedure Clear any single field except the upper Right-click on the field to be cleared and select Reset from the popleft cell. up menu.* Add a column. Right-click on the column now occupying the desired location and select Add from the pop-up menu. You are prompted to name the variable you want to display, as well as other information. (See Column Setup, below.
Report Configuration To configure reports, select Config from the Edit menu. The Single report options cover all ports and are overwritten each time the reports are generated. The Multiple report options generate a separate report for each port, and each report file is appended each time the report is generated. For Hour reports, use the Single and Multiple droplists to select whether you are generating single or multiple reports, or both.
Port Monitor Files Port Monitor creates and uses the following files: • portmon.vew • calcs.dat The default column layout is saved in portmon.vew. If you have been experimenting with the appearance of the monitor screen, you can use the File menu Save option to save your customized layout in another.vew file. You can retrieve this file later by using the File menu Open option, or you can use the Edit menu View Default option to retrieve portmon.vew and restore the default view.
Port Monitor Variable List (Continued) Variable Description RxCPSHourAvMax Peak RxMinCPS for the last hour. TxCPSDayAvMax Peak TxMinCPS for the last day. RxCPSDayAvMax Peak RxMinCPS for the last day. TxTotalRaw Total number of transmit bytes raw data from the driver. RxTotalRaw Total number of receive bytes raw data from the driver. TxMinCnt Count of transmit bytes sent in last minute. TxHourCnt Transmit bytes count sent in the last hour. TxDayCnt Transmit bytes count sent in the last day.
Port Monitor Variable List (Continued) Variable Description FramingErrorsRaw Total count of receive framing errors, from the driver. ParityErrorsRaw Total count of receive parity errors, from the driver.
Using the Device Advisor You can use the Device Advisor to determine the following information: • Summary of the device status • The MAC address of the network interface card (NIC) • The Adapter ID string • The RocketPort Serial Hub Si MAC address • Detailed state of the RocketPort Serial Hub Si • Total number of successful load attempts • Total number of devices on the network • Transmit statistics, such as the number of: • - Frames out - Packets to device - Retransmitted frames Rece
8. Click on the Device Advisor tab. The Device Advisor screen appears and provides you with information that you may find useful. For more information about the fields on the Device Advisor screen, use the on-line help in the application.
Device Advisor Driver Messages The following tables provide information about device driver summary messages and reported state messages. Driver Summary Messages Message Description Unintialized RocketPort Serial Hub Si has not been installed correctly. Unable to contact the RPSH-Si driver The RocketPort Serial Hub Si driver is not installed or is not responding to Device Advisor requests.
Driver Reported State Messages Message Description Invalid An illegal RocketPort Serial Hub Si state has been detected. Reset the RocketPort Serial Hub Si device. Init This is the normal state for undetected and inactive RocketPort Serial Hub Si devices. InitOwn The server has acquired the RocketPort Serial Hub Si device but has not downloaded the control software. SendCode The server has acquired the RocketPort Serial Hub Si device and is in the process of downloading the control software.
Technical Support Comtrol has a staff of support technicians available to help you. You should review Troubleshooting and Using Comtrol Tools and run through the diagnostics before calling Technical Support. Note: The web site has On-Line Technical Support available. In addition, please have the following information available.
Disclaimer and Copyrights Copyright © 2000. Comtrol Corporation. All Rights Reserved. First Edition, March 21, 2000 Comtrol Corporation makes no representations or warranties with regard to the contents of this guide or to the suitability of the Comtrol products for any particular purpose. Specifications subject to change without notice. Some software or features may not be available at the time of publication. Contact your reseller for current product information.