COLOR MONITOR Model No : CTL 5xn USER 'SMANUAL
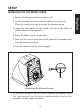
IMPORTANT SAFEGUARDS 1. Read all of these instructions. 2. Save these instructions for later use. 3. Unplug this monitor from the wall outlet before cleaning. Do not use liquid cleaners or aerosol cleaners. Use a damp cloth for cleaning. 4. Do not use attachments not recommended by the monitor manufacturer as they may cause hazards. 12. For added protection for this monitor during a lightning storm, or when it is left unattended and unused for long periods of time, unplug it from the wall outlet.
FEDERAL COMMUNICATIONS COMMISSION RADIO FREQUENCY INTERFERENCE STATEMENT NOTE: This equipment has been tested and found to comply with the limits for a Class B digital device, pursuant to Part 15 of the FCC Rules. These limits in a residential installation. This equipment generates, uses and can radiate radio frequency energy and, if not installed and used in accordance with the instructions, may cause harmful interference to radio communications.
The power cord is used as a main disconnect device. Disconnect the power cord before servicing. The outlet must be installed near the monitor and must be easily accessible. As an ENERGY STAR Partner, Daewoo Electronics Co., Ltd. has determined that this product meets the Energy Star guidelines for energy efficiency.
CONTENTS Introduction Product Features Setup 1 2 3 Installing the Tilt/Swivel Stand 3 Connecting the D-Sub Signal Cable 4 Connecting to Your Macintosh Computer 4 Connecting the Power Cord 4 Power Management System 5 DDC for Plug & Play 5 Operation & Adjustment 6 Specifications 9 Factory Preset Timings 10 Troubleshooting 11 Appendix Description for D-sub Connector
INTRODUCTION First, please check that the contents of the carton box corresponds with the following checklist : ¡ ¡ ¡ ¡ ¡ ¡ Color monitor Power cord Tilt/swivel stand User's manual Warranty Handbook Warranty Registration Card If there is any item missing or damaged, please contact your dealer. Please keep the carton box and packing materials so that you may properly store or transport your monitor.
PRODUCT FEATURES ¡ The convenient and user-friendlly on-screen display allows for easy and accurate adjustments of horizontal and vertical screen size and position, geometry and screen color. ¡ The monitor supports a safe working environment in strict compliance with the MPR¥–standard for low emissions. ¡ The monitor complies with the VESA Display Data Channel (DDC) specification for “Plug & Play” compatibility. Advanced microcircuitry makes set-up and configuration fast and effortless.
SETUP INSTALLING THE TILT/SWIVEL STAND 2. Set the monitor face down with the underside facing you. Please be careful so as not to scratch the monitor screen. 3. Align the four hooks on the stand with the guide holes of bottom chassis of the monitor. 4. Insert the hooks into the guide holes. 5. Slide the tilt/swivel stand toward the front of the monitor until the latch locks in position. 6. Turn the monitor and the stand upright.
CONNECTING THE D-SUB SIGNAL CABLE 1. Turn off the computer and monitor. 2. Connect the 15 pin D-sub connector to the output port of the video card in your computer. 3. Tighten the screws of connector. CONNECTING TO YOUR MACINTOSH COMPUTER 1. Turn off the computer and monitor. 2. Attach the Macintosh cable adapter to the Macintosh video card. 3. Tighten the screws on the cable adapter. 4. Connect the signal cable provided with your monitor to the other end of the Macintosh cable adapter. 5.
POWER MANAGEMENT SYSTEM DISPLAY DATA CHANNEL (DDC) FOR PLUG & PLAY If you use the monitor with a computer which complies with DDC1/2B of VESA, the Host-Video Card automatically configures itself without your intervention in a way that best fits the attached monitor. The Display Data Channel, DDC, allows the monitor to inform the host system about configuration information for optimum use of the monitor .
OPERATION & ADJUSTMENT – EXIT : : : : : : MENU + – EXIT + ADJUST SELECT MENU Launch OSD(On-Screen Display) Menus Select the next function Select the previous function Increase the value of any selected function Decrease the value of any selected function Exit OSD Menus & Launch OSD Menus, when no OSD Key Process MENU 1024X768 60Hz 1024X768 CONTRAST BRIGHTNESS H.POSITION H.SIZE V.POSITION V.
1. OSD(On-Screen Display) Menu 1 50 Adjust the contrast of image, the difference between light and dark areas on the screen. Adjust the brightness of the entire display. BRIGHTNESS 50 Adjust the position of the display horizontally (left or right). H. POSITION 50 Adjust the display width (horizontal size). H. SIZE 50 Adjust the position of the display vertically (up or down). V. POSITION 50 Adjust the display height (vertical size). V.
2. OSD (On-Screen Display) Menu 2 PINCUSHION 50 TRAPEZOID 50 9300 Adjust the trapezoid of the screen by moving the lines inward or outward. ƒUImage turns to by + . ƒUImage turns to by – . Choose different preset color temperatures or set your own customized color parameters. COLOR TEMP. USER Adjust the left and right margins for more convex or more concave margins. ƒUImage turns to by + . ƒUImage turns to by – . 6550 Adjust the red gain. R. GAIN 50 Adjust the blue gain. B.
SPECIFICATIONS Type :15-inch, Flat Square Tube type (14-inch, viewing area) Dot Pitch : 0.28mm, MPR ¥– Face Treatment: Non-glare/Anti-static Video Input Signal : R.G.B Analog Amp. Bandwidth : 60 MHz Input Sync : TTL, separate negative/positive Scan Frequency Horizontal : 30 - 54 KHz Vertical : 50 - 120 Hz Max. Resolution 1024 dots¡¿768 lines.
Tilt /Swivel Range Tilt : 5¡£forward, 10¡£backward Swivel : ¡ 45¡£leftward, rightward Dimension 368(W)¡¿394(D)¡¿382(H)mm (set with stand) Weight (net/Gross) 27.6/31.4 lbs 12.5/14.2Kg Operating Environment Temperature : 10~4˚C/50~104˚F Relative Humidity : 8~80% Storage Environment Temperature : -20~45˚C/-68~113˚F Relative Humidity : 5~90% FACTORY PRESET TIMINGS Resolution ¡¿lines) (dots¡ H.Freq (KHz) V. Freq (Hz) Remark VGA 720¡¿400 31.5 70 Non-interlaced VGA 640¡¿480 31.
TROUBLESHOOTING Check No picture. Check if POWER SWITCH and COMPUTER POWER SWITCH are in the on position. ‹q Check if the signal cable is correctly connected to the video card. ‹q Check if the pins of D-sub connector are not bent. ‹q Check if the computer is in the power saving mode. POWER LED is not lit. Check if POWER SWITCH is in the on position. ‹q Check if the power cord is correctly connected. Image is unstable. Check if the signal cable is suitable to the video card.
APPENDIX DESCRIPTION FOR D-SUB CONNECTOR Pin Signal 1 2 3 4 5 6 7 8 9 10 11 12 13 14 15 Red Green Blue GND GND (Self -Test) GND - Red GND - Green GND - Blue No Pin GND - H.Sync GND-V.
S/N: 9978623903