
User Manual Part 2
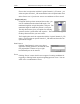


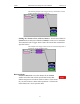
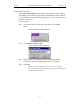
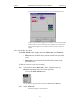
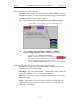
Table Of Contents
- 7. Recording Options
- 8. Display Options
- 9. Reading a CATC Trace
- 10. Decoding Higher Protocols
- 10.1 Introduction
- 10.2 LMP and L2CAP Messages
- 10.3 Decoding and Viewing Higher Protocol Data
- 10.4 Tooltips
- 10.5 Viewing Packets in LMP and L2CAP Messages
- 10.6 Types of LMP and L2CAP Messages
- 10.7 Viewing L2CAP Channel Connections
- 10.8 Viewing Protocol Messages and Transactions
- 10.9 Changing Protocol Assignments
- 11. Other Features
- 12. How to Contact CATC
- 13. Warranty and License

84
Merlin Protocol Analyzer User’s ManualCATC Version 1.6
Blue Dot Menus for the Event Buttons
The Errors button and the first Headers button (marked "Hdr1") have the
same Blue Dot menus. These menus allow Merlin to trigger external output.
To enable or disable external trigger output,
Step 1 Click the Blue Dot on an Event button such as Hdr1 or Errors.
A menu similar to the one below will open. Your menu may say
"Disable" instead of "Enable."
Step 2 Select "Enable External Trigger Output" (or "Disable
External Trigger Output" if that is the choice presented.)
If you have chosen "Enable External Trigger
Output", a small arrow will appear on the right side
of the button. This arrow indicates that a condition
has been set for creating an external output signal.
Choosing "Disable External Trigger" will cause the arrow to disappear.
Enabling High Pulse, Low Pulse or Pulse Toggle Signal Outputs
Once External Trigger Output has been enabled, you can configure the
output signal to one of three formats:
Pulse High - This is the default format. The Pulse High setting causes the
Analyzer to transmit a 5 volt, 16.66 nanosecond signal.
Pulse Low - This format causes the Analyzer to transmit a -5 volt, 16.66
nanosecond signal.
Toggle - This format causes the Analyzer to transmit a signal that will
toggle with each trigger event between a continuous 5 volt signal and a
continuous -5 volt signal.