
User's Manual
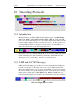
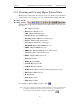
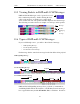
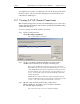
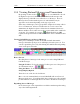
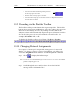
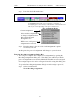
Table Of Contents
- 7. Display Options
- 8. Reading a CATC Trace
- 8.1 Trace View Features
- 8.2 Interpreting the Displayed Information
- 8.3 Tooltips
- 8.4 Set Marker
- 8.5 Edit or Clear Marker
- 8.6 Adding Comments to a Trace File
- 8.7 Expanded and Collapsed Data Formats
- 8.8 Hide Frequency Hops
- 8.9 Hide Nulls and Polls
- 8.10 Menus in Clicked Fields
- 8.11 Hide Unassociated Traffic
- 8.12 Hide Channel
- 8.13 Hide Duplicated Traffic
- 9. Searching Traces
- 10. Decoding Protocols
- 10.1 Introduction
- 10.2 LMP and L2CAP Messages
- 10.3 Decoding and Viewing Higher Protocol Data
- 10.4 Tooltips
- 10.5 Viewing Packets in LMP and L2CAP Messages
- 10.6 Types of LMP and L2CAP Messages
- 10.7 Viewing L2CAP Channel Connections
- 10.8 Viewing Protocol Messages and Transactions
- 10.9 Decoding via the Profiles Toolbar
- 10.10 Changing Protocol Assignments
- 10.11 Encryption
- 10.12 Re-applying Encryption Settings
- 11. Reports & Exporting Data
- Appendix A: Merlin II Clock Calibration
- How to Contact CATC
- Limited Hardware Warranty

131
Merlin II Protocol Analyzer User’s ManualCATC SW Version 2.30
• Left-click the small downward pointing arrow in
the message/protocol header
• Double-click a message/protocol header
• Left-click the message/protocol header and choose "Expand Transaction"
from the short-cut menu
10.9 Decoding via the Profiles Toolbar
The Profiles toolbar presents buttons that represent profiles. The Profiles
buttons do not represent an additional set of decodes; rather, they represent
shortcuts for the existing decodes. By clicking a Profiles button, the
analyzer software will automatically depress the protocol buttons needed to
decode all of the protocols associated with the selected Profile - for
example, RFCOMM, PPP, or IP.
To display the Profiles toolbar, select View > Toolbars > Profiles.
10.10 Changing Protocol Assignments
If a sequence of messages is assigned the wrong protocol, errors will
display. To change or remove a protocol assignment, you will need to
access the Assignment menu and issue an Add Assignment command.
Step 1 Click to display L2CAP messages.
Note You need to view L2CAP Messages in order to have access to the "A" field that
permits reassigning protocols.
Step 2 Scroll through the trace until you have located an L2CAP
message with a field marked "A."