Copyright 2002 Compex Systems Pte Ltd All rights reserved. This document contains information, which is protected by copyright. Reproduction, adaptation or translation without prior permission is prohibited, except as allowed under the copyright laws. Trademark Information Compex, ReadyLINK® and MicroHub® are registered trademarks of Compex, Inc. Microsoft Windows and the Windows logo are the trademarks of Microsoft Corp. NetWare is the registered trademark of Novell Inc.
FCC Notice This device has been tested and found to comply with the limits for a Class B digital device, pursuant to Part 15 of the FCC Rules. These limits are designed to provide reasonable protection against harmful interference in a residential installation. This device generates, uses and can radiate radio frequency energy and, if not installed and used in accordance with the instructions, may cause harmful interference to radio communications.
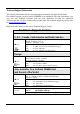
Technical Support Information The warranty information and the registration form are found in the Quick Install Guide. For technical support, you may contact COMPEX or its subsidiaries. For your convenience, you may also seek technical assistance from the local distributor, or from the authorized dealer/reseller that you have purchased this product from. For technical support by email, write to support@compex.com.sg.
About this Document The product described in this document, Compex NetPassage 15B is a licensed product of Compex Systems Pte Ltd. This document contains instructions for installing, configuring and using the NetPassage 15B. It also gives an overview of the key applications and the networking concepts with respect to the product. This documentation is for both Network Administrators and the end user with basic understanding and knowledge in the networking structure and protocols.
Table of Contents Copyright 2002 Compex Systems Pte Ltd Trademark Information Disclaimer Your Feedback FCC Notice Declaration of Conformity Technical Support Information About this Document Conventions Chapter 1 Product Overview 1.1 Introduction 1.2 Key Features 1.3 Package Contents 1.4 Panel Views & Descriptions 1.4.1 1.4.2 1.5 Technical Data 1.5.1 Chapter 2 2.1 3.2 3.3 3.4 3.5 3.6 v Distributing Broadband Internet Access to Fast Ethernet Network TCP/IP Configuration of the Computers 2.2.1 2.2.
Table of Contents 3.7 Load Balancing & Fail-Over Redundancy with Parallel Broadband 3.7.1 3.8 Appendix A Appendix B Appendix C vi Implementing Parallel Broadband 37 38 NetPassage 15B’s System Tools 39 3.8.1 3.8.2 3.8.3 3.8.4 3.8.5 3.8.
Chapter 1 Product Overview Chapter 1 Product Overview 1.1 Introduction Compex NetPassage 15B is a Broadband Internet Gateway supporting external Cable/ADSL modem for broadband Internet sharing. It is integrated with a 4-port 10/100Mbps Fast Ethernet Switch and can seamlessly distribute Internet access to the wired networks.
Chapter 1 Product Overview Integrated 4-port 10/100Mbps Switch Integrated with a 4-port 10/100Mbps Fast Ethernet Switch, Compex NetPassage 15B provides an immediate solution for four users on private LAN switching. With the autocrossover mechanism, Hubs or Switches can be cascaded to NetPassage 15B easily to support more users. Parallel Broadband Parallel Broadband, uniquely found on NetPassage series broadband routers, delivers scalable Internet bandwidth to your office network.
Chapter 1 Product Overview 1.
Chapter 1 Product Overview 1.4 Panel Views & Descriptions 1.4.1 Panel Views R NetPassage 15-B 2 3 Diag Power 100Mb 1 2 3 4 Conn 7 6 Figure 1.4.1-1 Top View WAN 4 8 3 2 9 Figure 1.4.1-2 Side View 5V/3A DC 10 Figure 1.4.
Chapter 1 Product Overview 1.4.2 Panel Description Index Indicator Description 1 Power LED (Green) § 2 LAN 100Mb LED (Green) § § 3 WAN Activity LED (Green) § 4 5 Diag LED (Green) Conn LED (Green) § § 6 WAN Link LED (Green) § 7 LAN Link/Act LED (Green) § § 5 8 WAN Port § 9 Local LAN ports § 10 5 V/3A Power Connector § LED lights up steadily indicate that the power is applied to the router. LED lights up steadily indicate that the respective LAN connection is at 100Mbps.
Chapter 1 Product Overview 1.5 Technical Data 1.5.
Chapter 2 Getting Started Chapter 2 Getting Started Compex NetPassage 15B may be used in different application. It is integrated with an embedded HTTP server providing a user-friendly web-based configuration interface to ensure fast and easy configuration process for these applications. This chapter provides the information on how to connect to the configuration interface, how to setup the hardware for configuration and operation. 2.
Chapter 2 Getting Started 2.2 TCP/IP Configuration of the Computers Compex NetPassage 15B is designed with a built-in DHCP server. You may manually configure the TCP/IP settings of your computers, or simply configure them to dynamically obtain IP address from the DHCP server. If you are not an expert user, you are advised to configure your computers to dynamically obtain IP addresses from the built-in DHCP server of NetPassage 15B.
Chapter 2 Getting Started Press on the Obtain an IP address automatically radio button and press the OK button. Figure 2.2.1-2 Network Configuration Window 4. Press the OK button again to close the network configuration window. The Microsoft Windows will then prompt you to restart the computer. Press the OK button to reboot. When the Microsoft Windows restarts, NetPassage 15B will assign an IP address, Subnet Mask and Gateway information to the computer. For Microsoft Windows 2000/XP 1. 2. 3.
Chapter 2 Getting Started Press on the Obtain an IP address automatically radio button and press the OK button. Figure 2.2.1-4 Network Configuration Window 5. Press the OK button again to close the network configuration window. The new network configuration will be registered on your network card. 2.2.2 Configuring your Computer with Static IP Address If you have chosen to configure your computer with Static IP address, please take note of the following default settings on NetPassage 15B.
Chapter 2 Getting Started 2. 3. Double-click on the Network icon, the network configuration window shall be displayed, as shown in Figure 2.2.1-1. Double-click on the TCP/IP that is bound to your network adapter, the TCP/IP configuration window shall be displayed, as shown in Figure 2.2.2-1. Type in the IP Address and Subnet Mask of 192.168.168.X and 255.255.255.0 respectively. Figure 2.2.2-1 Network Configuration Window 4.
Chapter 2 Getting Started Select the Enable DNS button. Type in a preferred name as the Host. Type in the IP address of your DNS server in the DNS Server Search Order field and press the Add button. Press the OK button to close this window. Figure 2.2.2-3 DNS Configuration Window NOTE You must not configure more than one computer with the same host name. This creates conflict in the network. NOTE The IP address of your DNS Server should be provided by your ISP.
Chapter 2 Getting Started 4. Double-click on the TCP/IP connection, the TCP/IP configuration window shall be displayed, as shown in Figure 2.2.2-5. Type in the IP Address and Subnet Mask of 192.168.168.X and 255.255.255.0 espectively. Type in the Default gateway as 192.168.168.1. Type in the IP address of your DNS server in the Preferred DNS Server field. Figure 2.2.2-5 Network Configuration Window 5. 2.3 Press the OK button again to close the network configuration window.
Chapter 2 Getting Started 2.3.1 Web-based Configuration Interface To connect to the Web-based Configuration Interface of NetPassage 15B, all you need is a web browser. The requirement of the web browser is stated below: Web Browser: JAVA: Proxy Settings: Proxy Auto Discovery: Netscape Navigator 4.0 & above or Internet Explorer 4.0 & above Enabled Cleared Disabled Connecting to Web-based Configuration Interface 1. 2. 3.
Chapter 2 Getting Started Command menu Consists of 3 main menus. • Configuration • System Tools • Help Configuration window Edit various attributes of the menu here. Configuration menu Let’s you set up your NetPassage 15B to connect to your network easily. Hyperlinks connect you to various menus. Help menu Get advice from our friendly technical support engineer. Figure 2.3.1-2 NetPassage 15B Configuration Interface System Tools Edit various internal settings of NetPassage 15B.
Chapter 2 Getting Started Figure 2.3.2-1 Command Console Login NOTE Please refer to Appendix A for the list of commands available at the console.
Chapter 3 Configuring NetPassage 15B Chapter 3 Configuring NetPassage 15B This chapter explains the features of NetPassage 15B in sections and how to implement them. 3.1 Setting up your LAN Compex NetPassage 15B is pre-configured with a default IP address 192.168.168.1 with a network mask of 255.255.255.0. By default, the DHCP Server has also been preconfigured to assign IP addresses starting from 192.168.168.100 to 192.168.168.254.
Chapter 3 Configuring NetPassage 15B 4. DHCP Start IP Address This is the first IP address where the built-in DHCP server of NetPassage 15B assigns. It should be in the same subnet as your NetPassage 15B. For example, if the IP address and network mask of your NetPassage 15B is 192.168.168.1 and 255.255.255.0 respectively, the DHCP Start IP Address should be 192.168.168.X DHCP End IP Address This is the last IP address where the built-in DHCP server of NetPassage 15B assigns.
Chapter 3 Configuring NetPassage 15B Figure 3.1.2-1 DHCP Server Reservations 2. Specify the reserved IP Address, the Host Name or the Hardware Address in the respective text boxes: IP Address This is the reserved IP address for a specific computer Host Name This is the host name of the computer Hardware Address This is the hardware MAC address of the Ethernet interface of the computer NOTE The reserved IP address must not be within the range of DHCP start and end IP addresses. 3.
Chapter 3 Configuring NetPassage 15B 3.2 Configuring NetPassage 15B with your Broadband Internet Account Compex NetPassage 15B shares a single Cable or ADSL Internet account with multiple computers in the network. It supports these broadband Internet connections with different types of WAN protocol. This includes Dynamic IP, Static IP and PPP over Ethernet (PPPoE). NetPassage 15B has also been customized to support Big Pond Cable Internet in Australia and Singtel Magix SuperSurf in Singapore.
Chapter 3 Configuring NetPassage 15B Router Identity as the DHCP Client ID to request for IP release. Refer to Section 3.8.1 titled Setting Router Identity. If your NetPassage 15B has previously been configured with other WAN type, you may re-configure it to support Cable Internet with Dynamic IP Assignment. 1. Click on the WAN Setup URL from the Command Menu and the WAN configuration page will be displayed, as shown in Figure 3.2.1-1. Figure 3.2.1-1 Changing WAN Type NOTE Figure 3.2.
Chapter 3 Configuring NetPassage 15B Figure 3.2.1-3 Cloning MAC Address 2. Press the Clone Mac button to clone the MAC address of your managing computer to NetPassage 15B. The configuration interface will then prompt you to reboot the router. Press the Reboot button to restart your NetPassage 15B. 3.2.2 Cable Internet with Static IP Assignment Certain ISPs lease a static IP for their Internet subscriptions.
Chapter 3 Configuring NetPassage 15B Figure 3.2.2-1 Changing WAN Type 4. 5. Press the Change button and the list of supported WAN type will be displayed, as shown in Figure 3.2.1-2. Check the Static IP Address radio button and press the Save button. The Static IP Configuration page will then be displayed, as shown in Figure 3.2.2-2. Figure 3.2.2-2 Static IP Configuration Page 6. Enter the IP Address, the Network Mask and the ISP’s Gateway IP Address into the fields.
Chapter 3 Configuring NetPassage 15B 2. 3. Press the Change button and the list of supported WAN type will be displayed, as shown in Figure 3.2.1-2. Check the PPP over Ethernet radio button and press the Save button. The PPPoE Configuration page will then be displayed, as shown in Figure 3.2.3-1. Figure 3.2.3-1 PPPoE Configuration Page 4.
Chapter 3 Configuring NetPassage 15B 5. Reconnect Time Factor This field is associated with Always-On option. This field allows you to specify a Reconnect Time Factor (RTF). The default value is 30 seconds. If Always-On option is selected with an RTF of 30 seconds, your NetPassage 15B will stay connected to the ISP even when there is no Internet traffic present.
Chapter 3 Configuring NetPassage 15B 4. 5. Enter the Username, Password and Idling Timeout value to the fields and press the Save button. Press the Reboot button to complete the configuration process. 3.2.5 Australia Big Pond Cable Internet You should select this WAN type only if you are a subscriber of Big Pond Cable Internet in Australia. If you have subscribed to OPTUS in Australia, please go to Section 3.2.1 titled Cable Internet with Dynamic IP Assignment.
Chapter 3 Configuring NetPassage 15B CAUTION Disabling the NAT will cause your computers not being able to share the broadband Internet service. DO NOT disable the NAT unless you are certain on what you are doing. Due to the translation, the computers behind the NAT are not reachable from the Internet. However, with the support of Virtual Server, you may host the Internet servers behind the NAT based on Port Forwarding or IP Forwarding. 3.3.
Chapter 3 Configuring NetPassage 15B Virtual Server based on IP Forwarding If you have subscribed to a range of IP addresses from your ISP, you may also define Virtual Servers based on IP Forwarding. This type of Virtual Server forwards all Internet requests, regardless of the TCP port of the application, to a computer in the private network. Refer to Figure 3.3.1-2. Figure 3.3.1-2 Virtual Server based on IP Forwarding Figure 3.3.1-2 shows two Virtual Servers based on IP Forwarding.
Chapter 3 Configuring NetPassage 15B 3.3.2 Defining Virtual Server based on Port Forwarding To define Virtual Server based on Port Forwarding: 1. Click on the NAT URL from the Command Menu and the NAT configuration page will be displayed, as shown in Figure 3.3.2-1. Figure 3.3.2-1 NAT Configuration Page 2. Press the Port Forwarding button and the list of defined Virtual Server will be displayed, as shown in Figure 3.3.2-2. Figure 3.3.2-2 Table Showing Defined Virtual Server based on Port Forwarding 3.
Chapter 3 Configuring NetPassage 15B 4. 5. 6. For Known Server, select the Server Type from the drop down menu and specify the private IP address of your Virtual Server. For Custom Server, specify the IP address of the Virtual Server, select the Protocol used by this application from the drop down menu, specify the TCP/UDP port used by this application, and enter your preferred reference name in the Server Type field. Press the Add button to add this new Virtual Server into the list.
Chapter 3 Configuring NetPassage 15B Figure 3.3.3-3 Defining New Virtual Server based on IP Forwarding 4. 5. 6. Enter the Public IP Address and the Private IP Address which it maps to. Please ensure that you have subscribed to this Public IP Address. Press the Add button to add this new Virtual Server into the list. Click on the Save or Reset Settings URL from the Command Menu and press the Save button. 3.3.4 Defining De- Militarized Zone To define a DMZ host: 7.
Chapter 3 Configuring NetPassage 15B 3.4 Configuring Routing Protocol Compex NetPassage 15B allows the network administrator to add a static routing entry into the routing table. Other than the default gateway to the Internet, NetPassage 15B may reroute the IP packets to another network. This is very useful for a network with more than one router. CAUTION If you are configuring NetPassage 15B for broadband Internet sharing, you DO NOT need to configure any routing information.
Chapter 3 Configuring NetPassage 15B Alternatively, you may also activate dynamic routing protocol on NetPassage 15B. Compex NetPassage 15B supports two types of routing protocol, RIP1 and RIP2. 3.4.1 Static Routing To add a static routing entry into NetPassage 15B’s routing table: 1. Click on the Routing URL from the Command Menu, and the routing configuration page will be displayed, as shown in Figure 3.4.1-1. Figure 3.4.1-1 Routing Configuration Page 2.
Chapter 3 Configuring NetPassage 15B 1. 2. 3.5 Click to expand the Dynamic Routing drop down menu and select the preferred dynamic routing protocol, RIP1 or RIP2. (Figure 3.4.1-1) Press the Apply button for the changes to be effective. IP Packet Filtering Compex NetPassage 15B enables the users to define administrative functions based on packet filtering rule. With IP packet filtering, you may perform Time-based Access Management and Internet Application Filtering.
Chapter 3 Configuring NetPassage 15B Figure 3.5.1-2 Defining Filtering Function 4. To define a rule for Time-based Access Control, you need to know the IP address of the computers where this rule applies. For example, if you wish to disallow two computers (IP address of 192.168.168.10 and 192.168.168.
Chapter 3 Configuring NetPassage 15B stop the computers from connecting to the Internet via a TELNET (uses TCP Port 23) session, you may define a rule with the following parameters: Rule Name IP Address (From) (To) Destination Port (From) (To) Day of the Week (From) (To) Time of the day (From) (To) 3. 4. 5. 3.
Chapter 3 Configuring NetPassage 15B 2. Enter the desired TCP port that you wish to use for Remote Router Management. Default value of “0” disables this feature. HTTP Port Specify the desired port for remote router management via a web browser. If you have specified a non-standard TCP port for this field, you need to specify the port number when you connect to the management interface from the Internet. For example, if your ISP has assigned 203.120.12.
Chapter 3 Configuring NetPassage 15B 3.7.1 Implementing Parallel Broadband To implement Parallel Broadband, you need to install two or more units of NetPassage 15B in the network, each connected to its broadband Internet service account. There is no restriction on the type of broadband Internet accounts that they are connected to. For example, if you have two NetPassage 15Bs in the network, you may have one connected to Cable Internet whereas the other connected to ADSL line.
Chapter 3 Configuring NetPassage 15B 3.8 NetPassage 15B’s System Tools The web-based configuration interface of NetPassage 15B comes with a set of system tools for you to define name for your NetPassage 15B, setting the router’s clock, upgrading the firmware, saving & restore router’s profile and changing the administrative password. 3.8.1 Setting Router Identity You may define a name for your NetPassage 15B.
Chapter 3 Configuring NetPassage 15B Figure 3.8.2-1 Synchronizing Router’s Clock 2. 3. 4. 5. The Proposed Router Time will display the system time of your managing computer. Select the Enable radio button at Auto Time Setting and enter your preferred time server in the text box. (please refer to Figure 3.8.2-1) Press the Apply button for the changes to be effective. Save the configuration profile. 3.8.3 Upgrading Router’s Firmware Compex NetPassage 15B comes with the firmware upgrade capability.
Chapter 3 Configuring NetPassage 15B CAUTION Make sure that the power supply is not cut off during the firmware upgrade process. If the NetPassage 15B looses power supply during firmware upgrade process, the firmware will be corrupted and the NetPassage 15B will no longer be functional. 3.8.4 Profile Saving, Restore & Reset to Defaults You may save the configuration profile of your NetPassage 15B onto the hard disk of your managing computer and restore this profile in a later time.
Chapter 3 Configuring NetPassage 15B CAUTION If you reboot the NetPassage 15B without saving the configuration, all the unsaved configuration will be lost after reboot. 1. 2. Click on the Reboot Router URL from the Command Menu. Press the Yes button to reboot the router. 3.8.6 Changing Administrative Password By default, the administrative password is “password”. You may change the password to your preferred string. 1. 2. 42 Click on the Change Password URL from the Command Menu.
Appendix A Console Commands Appendix A Console Commands SHOW Command SYNTAX SHOW IP SHOW IP STAT SHOW ICMP STAT SHOW UDP STAT SHOW TCP STAT SHOW IP ROUTE TABLE SHOW IP STATIC NAT TABLE SHOW PORT STATIC NAT TABLE SHOW SYSTEM SHOW RIP SHOW GATEWAY SHOW DHCP SHOW DHCP RESERVE SHOW DHCP LEASE SHOW ETHERNET ADDRESS SHOW TELNET SESSION SHOW TIME SHOW NAT STAT SHOW ARP TABLE SHOW FILTER DESCRIPTION Display the IP information of the LAN and WAN interface Display the statistics of the IP packets Display the stat
Appendix A Console Commands DELETE PORT STATIC NAT DELETE DHCP RESERVE DELETE FILTER forwarding. You may obtain the by listing the defined IP forwarding table with the command “SHOW IP STATIC NAT TABLE” Delete an entry from the list of defined virtual server based on port forwarding. You may obtain the by listing the defined port forwarding table with the command “SHOW PORT STATIC NAT TABLE” Delete a DHCP reservation from the list.
Appendix B ISP-Specific Notes Appendix B B.1 ISP-Specific Notes Singapore SingNet Broadband WAN Type: Username Format: B.2 Singapore Pacific Internet Broadband WAN Type: Username Format: B.3 PPP over Ethernet (PPPoE) @singnet.com PPP over Ethernet (PPPoE) @pacific.net.sg Germany T-DSL & T-Online WAN Type: Username Format: PPP over Ethernet (PPPoE) #0001@t-online.de NOTE The and are provided by German Telecom.
Appendix C Troubleshooting Appendix C Frequently Asked Questions C.1 Based on which firmware release is this User’s Manual written? This User’s Manual is written based on NetPassage 15B firmware release 2.74 build 1000. C.2 I have forgotten the IP address that I have set on my NetPassage 15B, what should I do? You may run the utility NPFIND.EXE located in the Product CD, it will report the IP address of the NetPassage 15B found in the network. C.
Appendix C Troubleshooting JP6 JP5 JP4 Procedure for resetting password to default: 1. Switch OFF NetPassage 15B. 2. Remove jumper JP5. 3. Switch ON the router. The DIAG led will light up for a few seconds and off. 4. Switch OFF the router again and put back the jumper. 5. The password for the router will then be reset. To confirm this has been done, switch ON the router and log on to the Remote Access Router Manager again. (Refer to Section 2.