User’s Guide Compaq TFT8030 Flat Panel Monitor Part Number: 237159-001 July 2001 Enhanced for accessibility
© 2001 Compaq Computer Corporation. Compaq, the Compaq logo, Armada, Deskpro Registered in U. S. Patent and Trademark Office. Microsoft, MS-DOS, Windows, Windows NT are trademarks of Microsoft Corporation in the United States and other countries. All other product names mentioned herein may be trademarks of their respective companies. Compaq shall not be liable for technical or editorial errors or omissions contained herein.
Product Features The Compaq TFT8030 Flat Panel Display has an active matrix, thin-film transistor (TFT), liquid crystal display (LCD). The monitor features include the following: ■ Large 18.1-inch (45.9 cm) viewable area display. ■ 1280 × 1024 resolution, plus full-screen support for lower resolutions. ■ Wide viewing angle to allow viewing from a sitting or standing position, or moving side-to-side. ■ Tilt and swivel adjustment capabilities. ■ Removable base for flexible mounting solutions.
■ Energy Saver feature for Energy Star compliance. ■ Security lock slot ■ AssetControl ■ Compliant with the following regulated specifications: ❏ EPA ENERGY STAR ❏ European Union CE Directives ❏ Swedish MPR II 1990 ❏ Swedish TCO '99 Information Files The CD-ROM included with this monitor contains two information files to be installed onto your computer; an .INF file and an .ICM file. ■ The .
Setting Up the Monitor To set up the monitor, ensure that the power is turned off to the monitor, computer system, and other attached devices, then follow these steps: This monitor has multiple connectors on the back panel that can be used to connect two computers simultaneously to the monitor. Be sure the Video Channel Select button on the front of the monitor is set to the correct position to receive signals from the connected computer. See the Front Panel Controls table for more information. 1.
WARNING: To reduce the risk of electric shock or damage to your equipment: ■ Do not disable the power cord grounding plug. The grounding plug is an important safety feature. ■ Plug the power cord into a grounded (earthed) electrical outlet that is easily accessible at all times. ■ Disconnect power from the monitor by unplugging the power cord from the electrical outlet. ■ Do not place anything on power cords or cables. Arrange them so that no one may accidentally step on or trip over them.
After you turn on the monitor, install the Compaq LCD Display Assistant utility included on the CD-ROM. Use the on-screen instructions to adjust the picture quality of your monitor. To install this utility, follow the instructions on the “Configuring Your Compaq LCD Monitor” card located in the Program License Agreement packet.
1. Lay the front bezel down on a soft area to prevent it from getting scratched, defaced, or broken. 2. Remove the cover plate from the monitor base by placing your fingers in the opening on the bottom of the base and pulling upward, then pulling out to remove the cover. 3. Remove the back panel from the monitor by pushing the bottom tabs upward and pulling out to remove the panel. 4.
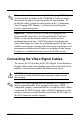
The DVI-D connector on this monitor uses digital video information to provide higher speed for higher display resolution. The results are more precise video displays without manually adjusting screen display quality.
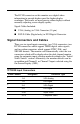
Input Select Switch The Video Channel Select control is located at the left-hand side of the lower front bezel. To the left and right of the Select control are two indicators that display the video channel that is selected. The left indicator is for Channel 1 and the right indicator is for Channel 2.
Upon initial power-up, if the monitor determines that Channel 1 is connected, but the host PC is OFF or sending sleep commands, or Channel 1 does not have a video cable attached, the monitor displays Channel 2 video, if valid. If all video inputs are connected to video sources that are not active (i.e., the host CPU is OFF or is sending energy saving commands to the monitor), the monitor enters sleep mode.
If only one of the user input channels has valid video connected, that input channel is the default at power-up. If the user input video is in sleep mode, the monitor displays the “Going to Sleep” OSD message and enters sleep mode. Input channels that do not have a user-selected input follow the input recall detection scheme described in the previous section and are available for display by selecting the Input Channel button.
Removing the Monitor Base Before you can mount the monitor onto a swing arm or other mounting fixture, you must remove the monitor from the base. CAUTION: Before beginning to disassemble the monitor, be sure the monitor is turned off and the power and signal cables are both disconnected. To remove the monitor from the base, complete the following steps: 1. Lay the front bezel down on a soft area to prevent it from getting scratched, defaced, or broken. 2.
CAUTION: Ensure that the bottom of the monitor base is positioned over a table or desktop before removing the base from the monitor. 6. Remove the monitor base 3 from the monitor. When the base is removed, four threaded mounting holes are exposed on the monitor panel to be used for mounting purposes. These mounting holes are spaced 100 mm apart and are compliant with the Video Electronics Standards Association (VESA) standard for mounting flat panel displays.
Operating the Monitor TFT8030 User’s Guide 13
Front Panel Controls No. 1 Icon 1-2 Control Video Channel Select Button Menu button 2 Function Selects the video signal for input to the monito when two computers are connected to the monitor at the same time 1. Launches 1st and 2nd-level on-screen menus. 2. Activates Auto Adjust when the OSD menu is inactive. 3 - Minus button 4 + Plus button Selects and adjusts the functions. 2. Activates Auto Adjust when the OSD menu is inactive. Selects and adjusts the functions.
On-Screen Display Settings The adjustments for screen settings are located in the On-Screen Display (OSD) and can be viewed in one of six available languages.
Advanced OSD Menu Levels Menu Level 1 Menu Level 2 Menu Level 3 Menu Level 4 6500 K Custom Color RGB Color ADJ Video Color Hue & Saturation ADJ Cancel Save and Return Language Deutsche English Espanol Francais Italiano Nederlands Cancel Save and Return Management Power Saver On/Off Selection Power On On/Off Recall Selection Mode Display On/Off Serial Number (display serial number) Sleep Timer Set Current Selection Time 16 TFT8030 User’s Guide
Advanced OSD Menu Levels Menu Level 1 Menu Level 2 Menu Level 3 Menu Level 4 Set Sleep Time Set On Time Timer SLEEP NOW Cancel Save and Return Basic Menu Cancel Save and Return OSD Control Horizontal Position ADJ Scale Vertical Position ADJ Scale OSD Timeout ADJ Scale OSD Transparency ADJ Scale Cancel Save and Return Video Input Select Priority Channel Select Input Channel 1 Input Channel 2 TFT8030 User’s Guide 17
Advanced OSD Menu Levels Menu Level 1 Menu Level 2 Menu Level 3 Input Channel 1 Analog 1 Menu Level 4 Digital 1 Auto Detect Input Channel 2 Analog 2 Digital 2 Super Video Composite Video Auto Detect PiP Control PiP Source Super Video Composite Video PiP Size PiP Off Small Medium Large Horizontal Position ADJ Scale Vertical Position ADJ Scale Cancel Save and Return Cancel 18 TFT8030 User’s Guide
Advanced OSD Menu Levels Menu Level 1 Menu Level 2 Menu Level 3 Menu Level 4 Save and Return Factory Reset Yes No Exit TFT8030 User’s Guide 19
How to Adjust Settings 1. To launch the on-screen display menus: ❏ Display the Basic Menu on the monitor screen by selecting the Menu button on the monitor front panel. ❏ Display the Advanced Menu by selecting the Menu button on the monitor front panel to display the Basic Menu, use the Minus or Plus buttons to scroll to and highlight the Advance Menu selection, then press the Menu button again.
2. Select an item from the Main Menu by scrolling down and highlighting it using the Minus (-) button 2 located on the monitor front panel. To reverse or back up, press the Plus (+) button 3. 3. Highlight your choice and press the Menu button 1 again. 4. Adjust the second-level menu displays using the same procedures as the first level. The second-level menus for Brightness and Contrast displays an adjustment screen.
Video Select Button This monitor has multiple signal input connectors (VGA, DVIDigital, Super Video, and Composite Video) on the back panel for connecting two computers or one computer/one video source to the monitor.
To set the timer: 1. Press the Menu button on the monitor front panel to display the Advanced Menu. 2. Scroll down and highlight Management. 3. Press the Menu button to select Management. 4. Scroll down and highlight and select Sleep Timer > Set Current Time. You must set the current local time before you reset the time for Sleep Time or On Time. 5. Press the Menu button once to enter the adjustment mode for hours. 6. Press the Minus or Plus buttons to adjust the hour. 7.
The fifth selection, Sleep Now, turns the monitor backlights off immediately and stays in sleep mode until the next On Time activates or a monitor button is pressed. Adjusting Screen Quality Allow the monitor to warm up for 20 minutes before performing the following procedures. The Auto Adjustment feature in the OSD automatically finetunes the image quality each time a new video mode is utilized. If additional improvement is desired, select "Auto Adjust" in the Basic Menu.
When adjusting the Clock and Clock Phase values, if the monitor images become distorted, continue adjusting the values until the distortion disappears. To restore the factory settings, select Yes from the Factory Reset menu in the on-screen display. Display Resolutions The display resolutions listed below are the most commonly used modes and are set as factory defaults. This monitor automatically recognizes these preset modes and they will appear properly sized and centered on the screen.
Factory Preset Display Modes Pre- Pixel Horz Horz Vert Vert Pixel set Format Freq Polarity Frep Polarity Clk (kHz) (Hz) Source (MHz) 14 1152 x 900 61.80 +/- 65.96 +/- 92.978 SUN 15 1280 x 1024 63.98 + 60.02 + 108.00 VESA 16 1280 x 1024 79.98 + 75.02 + 135.00 VESA 17 1280 x 1024 91.15 + 85.02 + 157.50 0 VESA User Modes The video controller signal may occasionally call for a mode that is not preset if: ■ You are not using a Compaq standard graphics adapter.
Energy Saver Feature When the monitor is in its normal operating mode, the monitor utilizes less than 60 watts of power and the Power LED is green. The monitor also supports a reduced power state. The reduced power state will be entered into if the monitor detects the absence of either the horizontal sync signal and/or the vertical sync signal. Upon detecting the absence of these signals, the monitor screen is blanked, the backlight is turned off, and the Power LED is turned amber.
■ Use only a power source and connection appropriate for this monitor, as indicated on the marking label/back plate and the AC adapter. ■ If an extension cord or power strip is used, make sure that the cord or strip is rated for the product and that the total ampere ratings of all products plugged into the extension cord or power strip do not exceed 80% of the extension cord or strip ampere ratings limit. ■ Do not overload an electrical outlet, power strip, or convenience receptacle.
Cleaning the Monitor To clean the monitor, follow these steps: 1. Turn off the monitor and the computer. 2. Dust the monitor by wiping the screen and the cabinet with a soft, clean cloth. If the screen requires additional cleaning, use a clean cloth dampened with isopropyl alcohol. CAUTION: Do not use benzene, thinner, ammonia, or any volatile substance to clean the monitor screen or cabinet. These chemicals may damage the monitor. Never use water to clean an LCD screen.
Specifications Compaq TFT8030 Flat Panel Monitor Display Type Viewable Image Size Face Treatment Maximum Weight (Unpacked) Dimensions Height Depth Width Maximum Graphics Resolution Text Mode Dot Pitch Horizontal Frequency Vertical Frequency Environmental Requirements Temperature (Independent of Altitude) Operating Temperature Storage Temperature Humidity (Noncondensing) Operating Nonoperating 30 18 inches Flat panel, Active matrix-TFT LCD 18 inch diagonal 3H hardness coating with antiglare treatment 17.
Compaq TFT8030 Flat Panel Monitor Power Source Power Consumption Input Terminals 90 - 264 VAC, 50-60 Hz < 60 watts 15-pin D-type connector with cable included. DVI-D connector with cable included. Color Display Values CIE* Chromaticity Coordinates x (+/- 0.030) Red Blue Green White Point (6500 K) Gamma: 2.2 0.63 0.14 0.30 0.31 y (+/- 0.030) 0.34 0.096 0.59 0.33 * Commission International d’Eclairage, 1931 Standard.
Agency Regulatory Notices Federal Communications Commission Notice This equipment has been tested and found to comply with the limits for a Class B digital device, pursuant to Part 15 of the FCC Rules. These limits are designed to provide reasonable protection against harmful interference in a residential installation.
Cables Connections to this device must be made with shielded cables with metallic RFI/EMI connector hoods to maintain compliance with FCC Rules and Regulations. Declaration of Conformity for Products Marked with FCC Logo, United States Only This device complies with Part 15 of the FCC Rules.
Avis Canadien Cet appareil numérique de la classe B respecte toutes les exigences du Règlement sur le matériel brouilleur du Canada. European Notice Products with the CE Marking comply with both the EMC Directive (89/336/EEC) and the Low Voltage Directive (73/23/EEC) issued by the Commission of the European Community.
EPA Energy Star Compliance Monitors that are marked with the Energy Star Logo meet the requirements of the EPA Energy Star program. As an Energy Star Partner, Compaq Computer Corporation has determined that this product meets the Energy Star guidelines for energy efficiency. Specific details on using the Energy Saving features can be found in the energy saver or power management section of the computer manual.
environmentally harmful substances are used both in the products and during their manufacture. Since it is not so far possible to satisfactorily recycle the majority of electronics equipment, most of these potentially damaging substances sooner or later enter nature. There are also other characteristics of a computer, such as energy consumption levels, that are important from the viewpoints of both the work (internal) and natural (external) environments.
The energy requirements include a demand that the computer and/or display, after a certain period of inactivity, shall reduce its power consumption to a lower level in one or more stages. The length of time to reactivate the computer shall be reasonable for the user. Labelled products must meet strict environmental demands, for example, in respect of the reduction of electric and magnetic fields, physical and visual ergonomics and good usability.
The relevant TCO'99 demand requires that plastic components weighing more than 25 grams must not contain flame retardants with organically bound bromine or chlorine. Flame retardants are allowed in the printed circuit boards since no substitutes are available. Cadmium** Cadmium is present in rechargeable batteries and in the colourgenerating layers of certain computer displays. Cadmium damages the nervous system and is toxic in high doses.
Lead** Lead can be found in picture tubes, display screens, solders and capacitors. Lead damages the nervous system and in higher doses, causes lead poisoning. The relevant TCO´99 requirement permits the inclusion of lead since no replacement has yet been developed. *Bioaccumulative is defined as substances which accumulate within living organisms. **Lead, Cadmium and Mercury are heavy metals that are Bioaccumulative.
Compaq TFT8030 Flat Panel Monitor User’s Guide 41