
Specifications


Operation and Management
59MSA1000 Reference Guide
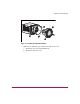
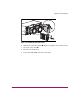
6. Insert the new drive into the same bay as the drive just removed, sliding it in
as far as it will go 1.
Make sure the ejector lever 2 is in the full open position to ensure a correct
latch.
Figure 23: Inserting the new drive
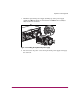
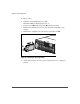
7. Close the ejector lever against the front of the drive. The locking hinge must
be engaged behind the front panel of the unit.
8. Insert the drive completely to ensure that the drive is firmly engaged and that
the ejector lever is latched.
Caution: Data can be lost if the drive is not firmly seated.
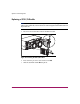
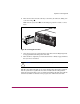
The drive tray indicators light one at a time and then turn off together to indicate
that the system has recognized the new drive. In fault-tolerant configurations,
allow the replacement drive to be reconstructed automatically with data from the
other drives. While reconstruction is in progress, the online indicators flash.
2
1