TruCluster Software Products Hardware Configuration Technical Update for StorageWorks RAID Array 3000 January 1999 Product Version: TruCluster Production Server Software Version 1.5 and TruCluster Available Server Software Version 1.5 Operating System and Version: Compaq’s DIGITAL UNIX Version 4.0D This technical update describes how to configure the hardware for the TruCluster Production Server Software Version 1.5 and TruCluster Available Server Software Version 1.
© Compaq Computer Corporation 1999 All rights reserved.
Contents About This Technical Update 1 Introducing the StorageWorks RAID Array 3000 Storage Subsystem 1.1 1.2 StorageWorks RAID Array 3000 General Overview .. . .. . .. . .. . RAID Array 3000 Restrictions .. . .. . .. . .. . . .. . .. . .. . .. . . .. . .. . .. . .. . 1–1 1–2 2 Using the StorageWorks RAID Array 3000 in a TruCluster Configuration 2.1 2.2 RA3000 Installation Overview . . .. . .. . .. . . .. . .. . .. . .. . . .. . .. . .. . .. .
2–5 2–6 2–7 Displaying the pk* Console Environment Variables on an AlphaServer 4100 System . . .. . .. . .. . .. . .. . . .. . .. . .. . .. . . .. . .. . .. . .. . Displaying Console Variables for a KZPBA-CB on an AlphaServer 8x00 System . . .. . .. . .. . .. . .. . . .. . .. . .. . .. . . .. . .. . .. . .. . Setting the SCSI Bus ID . . . .. . .. . .. . .. . .. . . .. . .. . .. . .. . . .. . .. . .. . .. .
2–3 Installing Cables for RA3000 Configuration Using External Termination and Y Cables . .. . .. . .. . .. . .. . . .. . .. . .. . .. . . .. . .. . .. . .. . 2–7 2–4 Hardware Components Used in the Configurations Shown in Figure 2–4, Figure 2–5, and Figure 2–6 . .. . .. . .. . .. . . .. . .. . .. . .. . 2–22 2–5 Hardware Components Used in the Configuration Shown in Figure 2–7 .. . .. . . .. . .. . .. . .. . . .. . .. . .. . .. . .. . . .. . .. . .. . .. . . .. . .. . .. . .. .
About This Technical Update This technical update provides important information about using the StorageWorks RAID Array 3000 (RA3000) with the TruCluster Production Server Software Version 1.5 and TruCluster Available Server Software Version 1.5 products. Audience If your plans to configure the hardware for TruCluster Production Server Software Version 1.5 or TruCluster Available Server Software Version 1.
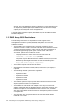
1 Introducing the StorageWorks RAID Array 3000 Storage Subsystem This technical update to the TruCluster Software Products Hardware Configuration manual provides important information about support for the StorageWorks RAID Array 3000 (RA3000) with the TruCluster Production Server Software and TruCluster Available Server Software Version 1.5 products. 1.
devices. The included battery backup subsystem is a free-standing UPS. An expansion pedestal option (DS-SWXRA-GD) increases the storage capacity of the subsystem to 14 storage devices. A second HSZ22 controller option (DS-HSZ22-AA) can be added to either RA3000 subsystem. 1.
• The device expansion shelf (DS-SWXRA-GN) for the rackmount version must be at revision level B01 or higher. • The DS-BA35X-FA single-ended personality module used in the DS-SWXRA-GN UltraSCSI storage expansion shelves must be at revision H01 or higher.
2 Using the StorageWorks RAID Array 3000 in a TruCluster Configuration This chapter describes how to install the hardware for a TruCluster Production Server Software or TruCluster Available Server Software configuration which includes the StorageWorks RAID Array 3000 (RA3000) storage subsystem. 2.1 RA3000 Installation Overview Review the restrictions in Section 1.2 before installing any TruCluster Production Server Software or TruCluster Available Server Software hardware.
• Command Console V2.0 for RAID Array 3000 User’s Guide (AA-RBF2A-TE)—A graphical user interface (GUI) for managing StorageWorks RAID products from a console running on a Windows 95 or Windows NT PC. • Getting Started RAID Array 3000 for Digital UNIX Installation Guide Describes how to unpack and set up your RA3000 subsystem components, how to prepare your host system for use with the RA3000, how to install the SWCC and create your first virtual disk, and how to communicate over a TCP/IP connection.
The following sections describe how to install and configure the hardware for a TruCluster Production Server Software or TruCluster Available Server Software configuration that includes the StorageWorks RAID Array 3000 subsystem. 2.2 Installing and Configuring a TruCluster Configuration with a StorageWorks RAID Array 3000 This section provides details on how to install and configure the hardware to support the StorageWorks RAID Array 3000 (RA3000) in a TruCluster configuration.
Server configuration using an RA3000 storage subsystem. For TruCluster Available Server Software, skip the first step as you do not use Memory Channel. Also, you may save time by installing the Memory Channel adapters, redundant network adapters (if applicable), as well as the KZPBA-CB UltraSCSI host adapters all at the same time.
Table 2–1: Configuring TruCluster Hardware for Use with the RA3000 (cont.) Step Action Refer to: 5 Power up the system and use the show Section 2.2.3 and config and show device console commands Example 2–1 through to display the installed devices and Example 2–4 information about the KZPBA-CBs on the AlphaServer systems. Look for QLogic ISP1020 in the show config display and isp in the show device display to determine which devices are KZPBA-CBs. 6 If necessary, update the SRM firmware.
Table 2–1: Configuring TruCluster Hardware for Use with the RA3000 (cont.) Step Action Refer to: The preferred method of radial connection to a DWZZH UltraSCSI hub Table 2–2 Using external termination and Y cables Table 2–3 aSkip this step for the TruCluster Available Server Software product. bIf you install additional PCI adapters or an extra network adapter at this time, delay testing the Memory Channel adapter(s) until you have installed all hardware.
Table 2–2: Installing Cables for RA3000 Radial Configuration with a DWZZH UltraSCSI Hub (cont.) Step Action Refer to: Figure 2–2 and RA3000 controller shelf with active/active or active/passive failover: Install a BN37A cable Figure 2–7 between any DWZZH-03 port or the DWZZH-05 controller port and the RA3000 controller shelf Host 0 I/O module Host In port. Install a BN37A-0E 0.5 meter cable between the Host 0 I/O module Host Out port and the Host 1 I/O module Host In port.
Table 2–3: Installing Cables for RA3000 Configuration Using External Termination and Y Cables (cont.) Step Action Refer to: RA3000 pedestal with active/passive failover: Install a BN38C HD68 to VHDCI cable between the BN21W-0B Y cable of one member system and the RA3000 Host 0 port. Install a BN21K, BN21L, or BN31G cable between the BN21W-0B Y cables of all other member systems.
Table 2–3: Installing Cables for RA3000 Configuration Using External Termination and Y Cables (cont.) cThe maximum length of the SCSI bus segment, including the combined length of the BN38C, BN37A-0E, and BN21K (or BN21L or BN31G) cables and internal device length, must not exceed 25 meters. The following sections describe how to install a KZPBA-CB UltraSCSI PCI adapter in more detail. Section 2.2.5 provides illustrations of cluster configurations. 2.2.
8. Print the release notes. 2.2.2 KZPBA-CB Termination Resistors The KZPBA-CB internal termination is disabled by removing the termination resistors RM1 through RM8, as shown in Figure 2–1. Figure 2–1: KZPBA-CB Termination Resistors Internal Narrow Device Connector P2 Internal Wide Device Connector J2 JA1 SCSI Bus Termination Resistors RM1-RM8 ZK-1451U-AI 2.2.
Example 2–1: Displaying Configuration on an AlphaServer 4100 P00>>> show config Digital Equipment Corporation AlphaServer 4x00 Console V5.1-3 OpenVMS PALcode V1.1914, Digital UNIX PALcode V1.
Example 2–2: Displaying Configuration on an AlphaServer 8200 (cont.
Example 2–3: Displaying Devices on an AlphaServer 4100 (cont.) dke200.2.0.5.1 DKe200 RZ26 392A dke300.3.0.5.1 DKe300 RZ26L 442D polling floppy0 (FLOPPY) pceb IBUS hose 0 dva0.0.0.1000.0 DVA0 RX23 polling kzpsa1 (DEC KZPSA) slot 4, bus 0 PCI, hose 0 TPwr 1 Fast 1 Bus ID 7 kzpsa1.7.0.4.1 dkf TPwr 1 Fast 1 Bus ID 7 E01 A11 dkf100.1.0.5.1 DKf100 RZ26 392A dkf200.2.0.5.1 DKf200 RZ28 442D dkf300.3.0.5.1 DKf300 RZ26 392A polling tulip0 (DECchip 21040-AA) slot 3, bus 0 PCI, hose 0 ewa0.0.0.3.
Example 2–4: Displaying Devices on an AlphaServer 8200 (cont.) dkg300.3.0.2.1 DKG300 RZ26N 0568 polling for units kzpsa1.4.0.3.1 dkh100.1.0.3.1 dkh200.2.0.3.1 dkh300.3.0.3.1 on kzpsa1, slot 3, bus 0, hose1... dkh TPwr 1 Fast 1 Bus ID 7 L01 A11 DKH100 RZ28 442D DKH200 RZ26 392A DKH300 RZ26L 442D polling for units kzpsa2.4.0.4.1 dki100.1.0.3.1 dki200.2.0.3.1 dki300.3.0.3.1 on kzpsa2, slot 4, bus 0, hose1... dki TPwr 1 Fast 1 Bus ID 7 L01 A10 DKI100 RZ26 392A DKI200 RZ28 442C DKI300 RZ26 392A 2.2.
Example 2–5: Displaying the pk* Console Environment Variables on an AlphaServer 4100 System P00>>>show pk* pka0_disconnect pka0_fast pka0_host_id 1 1 7 pkb0_disconnect pkb0_fast pkb0_host_id 1 1 7 pkc0_host_id pkc0_soft_term 7 diff pkd0_host_id pkd0_soft_term 7 on pke0_fast pke0_host_id pke0_termpwr 1 7 1 pkf0_fast pkf0_host_id pkf0_termpwr 1 7 1 Comparing the show pk* command display in Example 2–5 with the show config command in Example 2–1, you determine that the first two devices are for ncr
• diff—Places the bus in differential mode As the KZPBA-CB (ISP1040) termination is determined by the presence or absence of internal temination resistor SIPS RM1 through RM8, the pkb0_soft_term environment variable has no meaning; therefore, it may be ignored. Example 2–6 shows the use of the show isp* console command to display the console environment variables for KZPBA-CBs on an AlphaServer 8x00.
2.2.4.2 Setting the KZPBA-CB SCSI ID After you determine the console environment variables for the KZPBA-CBs on the shared SCSI bus, use the set console command to set the SCSI ID. For a TruCluster configuration, you will most likely have to set the SCSI ID for all KZPBA-CB UltraSCSI adapters except one. And, if you are using a DS-DWZZH-05, you will have to set the SCSI IDs for all KZPBA-CB UltraSCSI adapters.
Figure 2–2: StorageWorks RAID Array 3000 Controller Shelf Front View Blowers DC Power Supplies HSZ22 RAID Controller Blank Panel Host 1 I/O Module Host 0 I/O Module Device I/O Module ZK-1463U-AI Figure 2–3 shows the rear view of the StorageWorks RAID Array 3000 pedestal.
Figure 2–3: RAID Array 3000 Pedestal Rear View Host 0 UPS External Fault H0 IN UPS Host 1 Controller 2 (top) H1 IN Ext. CTR 2 Controller 1 (bottom) D1 OUT knock-out plate ZK-1464U-AI In the configurations shown in Figure 2–4 through Figure 2–12, it is assumed that the RA3000 contains two HSZ22 controllers. Figure 2–4 shows a four-member TruCluster configuration and an RA3000 controller shelf with active/passive failover radially connected to a DS-DWZZH-05 UltraSCSI hub.
Figure 2–4: TruCluster Configuration with an RA3000 Controller Shelf with Active/Passive Failover and a DWZZH-05 UltraSCSI Hub AlphaServer Member System 1 T KZPBA-CB 1 1 KZPBA-CB DS-DWZZH-05 T T T AlphaServer Member System 2 1 T T T KZPBA-CB T 1 2 KZPBA-CB T AlphaServer Member System 3 RAID Array 3000 Controller Shelf AlphaServer Member System 4 T Host Host In Out Host 0 I/O Module Host Host In Out Host 1 I/O Module ZK-1477U-AI Figure 2–5 shows a four-member TruCluster configuration and an RA
Figure 2–5: TruCluster Configuration with an RA3000 Pedestal with Active/Passive Failover and a DWZZH-05 UltraSCSI Hub AlphaServer Member System 1 T KZPBA-CB 1 1 KZPBA-CB DS-DWZZH-05 T T AlphaServer Member System 2 T T T KZPBA-CB T 1 KZPBA-CB T AlphaServer Member System 3 1 T 2 RAID Array 3000 Pedestal AlphaServer Member System 4 T Host 0 Host 1 ZK-1478U-AI Figure 2–6 shows a two-member TruCluster configuration and an RA3000 pedestal with active/passive failover radially connected to a DS-D
Figure 2–6: TruCluster Configuration with an RA3000 Pedestal with Active/Passive Failover and a DWZZH-03 UltraSCSI Hub 1 KZPBA-CB DS-DWZZH-03 T T AlphaServer Member System 1 T T 2 1 KZPBA-CB T T Host 0 AlphaServer Member System 2 Host 1 RAID Array 3000 Pedestal ZK-1485U-AI Table 2–4 shows the components used to create the clusters shown in Figure 2–4, Figure 2–5, and Figure 2–6.
Figure 2–7: TruCluster Configuration with an RA3000 Controller Shelf with Active/Active or Active/Passive Failover and a DWZZH-05 UltraSCSI Hub AlphaServer Member System 1 T KZPBA-CB 1 1 KZPBA-CB DS-DWZZH-05 T T 1 T AlphaServer Member System 2 T T T KZPBA-CB 2 1 KZPBA-CB T AlphaServer Member System 4 RAID Array 3000 Controller Shelf T 3 AlphaServer Member System 3 T Host In Host Out Host 0 I/O Module Host In Host Out Host 1 I/O Module ZK-1479U-AI Table 2–5 shows the components used to c
Table 2–5: Hardware Components Used in the Configuration Shown in Figure 2–7 Callout Number Description 1 BN38C HD68 to VHDCI cablea 2 BN37A VHDCI cableb 3 BN37A-0E 0.5-meter VHDCI cable aThe maximum length of the SCSI bus segment, including the combined length of BN38C cables and internal device length, must not exceed 25 meters. bThe maximum length of the SCSI bus segment, including the BN37A cables and internal device length, must not exceed 25 meters.
Figure 2–8: TruCluster Configuration with an RA3000 Pedestal with Active/Active or Active/Passive Failover and a DWZZH-05 UltraSCSI Hub 1 KZPBA-CB DS-DWZZH-05 T T T AlphaServer Member System 1 1 T T T 1 2 2 KZPBA-CB KZPBA-CB T T Host 0 AlphaServer Member System 2 T T Host 1 RAID Array 3000 Pedestal AlphaServer Member System 3 ZK-1480U-AI Table 2–6 shows the components used to create the cluster shown in Figure 2–8.
Figure 2–9: Externally Terminated TruCluster Configuration with an RA3000 Pedestal with Active/Passive Failover 1 2 3 2 4 RAID Array 3000 Pedestal T KZPBA-CB KZPBA-CB T Host 0 AlphaServer Member System 1 Host 1 AlphaServer Member System 2 ZK-1483U-AI Figure 2–10: Externally Terminated TruCluster Configuration with an RA3000 Controller Shelf with Active/Passive Failover 1 2 3 2 4 RAID Array 3000 Controller Shelf T KZPBA-CB AlphaServer Member System 1 KZPBA-CB AlphaServer Member System 2
Figure 2–11 shows an externally terminated TruCluster configuration using an RA3000. In this configuration, because the Host 0 I/O module is daisy-chained to Host 1 I/O module, dual HSZ22 controllers could use active/active or active/passive failover.
Figure 2–12: Externally Terminated TruCluster Configuration with a Mid-bus RA3000 Controller Shelf with Active/Active or Active/Passive Failover 1 2 3 3 1 2 T T 4 KZPBA-CB AlphaServer Member System 1 KZPBA-CB Host Host In Out Host 0 I/O Module Host Host In Out Host 1 I/O Module RAID Array 3000 Controller Shelf AlphaServer Member System 2 ZK-1484U-AI Table 2–9 shows the components used to create the cluster shown in Figure 2–12.
3 Reconfiguring the RA3000 Pedestal for the Expansion Pedestal Option The following documentation covers installing the StorageWorks RAID Array 3000 expansion pedestal option: • RAID Array 3000 Storage Subsystem Expansion Pedestal Option Installation Guide (EK-SM3KA-IG) • RAID Array 3000 Storage Subsystem Hardware User’s Guide Chapter 4 (EK-SMCPO-UG), which is basically a copy of EK-SM3KA-IG Although most of the descriptive information in the Revision A01 version is correct, many of the illustrations ac
3.2 Reconfiguring the RA3000 Base Pedestal UltraSCSI Bus See the RAID Array 3000 Storage Subsystem Expansion Pedestal Option Installation Guide for more information about reconfiguring the StorageWorks RAID Array 3000 (RA3000) base pedestal UltraSCSI bus. Use the following procedure and the accompanying illustrations, in conjunction with the description in the manual to reconfigure the RA3000 base pedestal for use with an expansion pedestal option: 1.
Figure 3–1: RA3000 Pedestal Cabled for Split-Bus Configuration J11 J16 ZK-1467U-AI 6. Remove the SCSI bus cable from the J16 backplane connector and the device #1 backplane connector. 7. Connect SCSI bus jumper cable 17-04166-03 between backplane connectors J11 and J16 (see Figure 3–2). This forms a single SCSI bus within the base pedestal.
Figure 3–2: RA3000 Pedestal Cabled for Single-Bus Configuration J11 J16 ZK-1465U-AI 8. Remove the knockout plate above the D1 OUT label on the rear panel of the base pedestal (see Figure 2–3). 9. Attach one end of cable assembly 17-04454-01 to the D1 OUT bulkhead opening. Connect the other end of the cable to the device #1 backplane connector (see Figure 3–2). This is the second SCSI bus, and it will be connected to the expansion pedestal option. 10.
Figure 3–3: RA3000 Pedestal SCSI ID Renumbering J11 J16 7 ZK-1466U-AI 11. Connect a BN21K (BN21L or BN31G) HD68 cable between the base pedestal D1 OUT connector and the expansion pedestal option D1 IN connector. 12. Transfer the disks from slots 4, 5, and 6 of the base pedestal to slots 0, 1, and 2 of the expansion pedestal option if you want those disks to retain SCSI IDs 8, 9, and 10. 13. Reinstall the RA3000 base pedestal side cover and plug the power cord in to the power outlet.